

Introduction to the gfx-rs rendering API
source link: https://gfx-rs.github.io/2014/07/25/intro.html
Go to the source link to view the article. You can view the picture content, updated content and better typesetting reading experience. If the link is broken, please click the button below to view the snapshot at that time.
Gfx-rs nuts and bolts
Gfx-rs is a low-level graphics abstraction layer in Rust. This blog supposedly hosts the major milestones, concepts, and recaps of the project.
Introduction to the gfx-rs rendering API
25 Jul 2014
The goal of the gfx-rs project is to make a high-performance, easy to use,
robust graphics API for the Rust programming language. Later posts will detail
show how we achieve that, but this one serves as a high-level introduction and
tutorial to gfx-rs. A basic familiarity with 3D graphics in general is
assumed (know what a vertex is). We’ll walk through the triangle
example.
Basic Setup
First we need some boilerplate to link to the libraries we need.
#![feature(phase)]

#[phase(plugin)]
extern crate gfx_macros;
extern crate gfx;
extern crate glfw;
Next, we define our vertex format. For this simple example, a 2D colored
triangle, we only need 2D coordinates and the color. The #[vertex_format]
attribute makes gfx-rs generate all of the glue code necessary for using our
custom type with the underlying graphics API:
#[vertex_format]
struct Vertex {
    pos: [f32, ..2],
    color: [f32, ..3]
}
Creating a renderer
The first thing any gfx-rs program needs to do is get a window to render to.
Right now, only the glfw library is supported. We create an 800x600 window
using the lastest OpenGL version the graphics driver supports:
let glfw = glfw::init(glfw::FAIL_ON_ERRORS).unwrap();

let (mut window, events) = gfx::glfw::WindowBuilder::new(&glfw)
    .title("Welcome to gfx-rs!")
    .try_modern_context_hints()
    .create()
    .expect("Could not make window :(");
The next thing we need to do is create a renderer and a device:
let (renderer, mut device) = {
    let (context, provider) = gfx::glfw::Platform::new(window.render_context(), &glfw);
    gfx::start(context, provider, 1).unwrap()
};
The context provides buffer swapping, and the provider exposes GL extension
querying and function loading. The magic 1 is how many frames the renderer
will send before it blocks on the device. When renderer.end_frame() is
called, it will wait for a corresponding device.update() to finish
processing the frame.
The device abstracts over a specific graphics API and isn’t that
interesting, but the renderer provides a high-level, easy to use interface.
Let’s create a thread that will drive the renderer. This will allow the
device to still make progress on the sent draw calls while the renderer is
preparing more to send:
spawn(proc() {
    let mut renderer = renderer;
In order to begin drawing we’ll need to prepare:
- A
Frameto render into. - A
DrawState. We don’t customize it here, but this tracks things like vertex winding order and how to do depth testing. - A mesh to draw.
- A shader program to draw with.
- The description of how we want to clear the
Framebefore we draw into it.
let frame = gfx::Frame::new();
let state = gfx::DrawState::new();
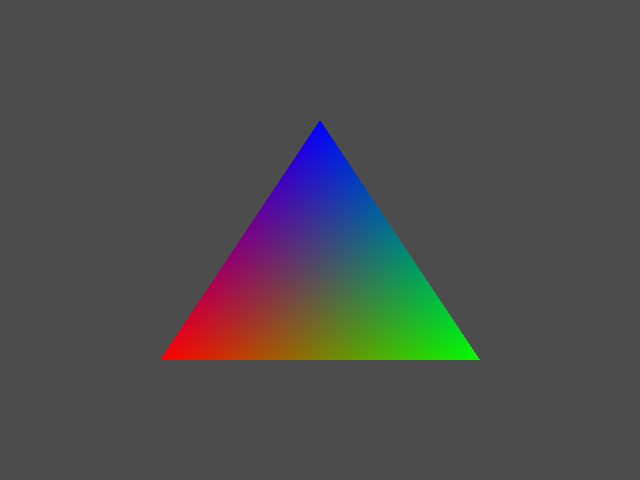
let vertex_data = vec![
Vertex { pos: [ -0.5, -0.5 ], color: [1.0, 0.0, 0.0] },
Vertex { pos: [ 0.5, 0.5 ], color: [0.0, 1.0, 0.0] },
Vertex { pos: [ 0.0, 0.5 ], color: [0.0, 0.0, 1.0] }
];
let mesh = renderer.create_mesh(vertex_data);
let program = renderer.create_program(...);
let bundle = renderer.bundle_program(program, ()).unwrap();
let clear = gfx::ClearData {
color: Some(gfx::Color([0.3, 0.3, 0.3, 1.0])),
depth: None,
stencil: None
};
The details of creating a shader program are skipped here, to be shown in a later post.
We are now ready to write the renderer loop. This is a simple demo, so there won’t be much here. We’ll clear the frame, draw the mesh, and then tell the device that we have finished:
    while !renderer.should_finish() {
        renderer.clear(clear, frame);
        renderer.draw(&mesh, gfx::mesh::VertexSlice(0, 3), frame, &bundle, state)
                .unwrap();
        renderer.end_frame();
        for err in renderer.errors() {
            println!("Render error: {}", err);
        }
    }
})
Back in the main thread, we need to process the commands that the renderer
is sending:
while !window.should_close() {
    glfw.poll_events();
    // any event handling
    device.update();
}
device.close();
The update method will process any commands it has received from the
renderer. Compile and run, and you get:
Recommend
About Joyk
Aggregate valuable and interesting links.
Joyk means Joy of geeK