

Extract Data From Maps QGIS
source link: https://deparkes.co.uk/2022/09/25/extract-data-from-maps-qgis/
Go to the source link to view the article. You can view the picture content, updated content and better typesetting reading experience. If the link is broken, please click the button below to view the snapshot at that time.
Extract Data From Maps QGIS
In this blog post I’ll show you how to extract data from maps using QGIS to georeference a map image and identify data points.
The steps are:
- Start with a map image containing data you want to capture, such as marked locations
- Add a base map to QGIS that you will load the map image on to
- Import the map image and ‘georeference’ to get correct alignment
- Create a data layer in QGIS and select data points
- Export data points extracted from the map to a separate file
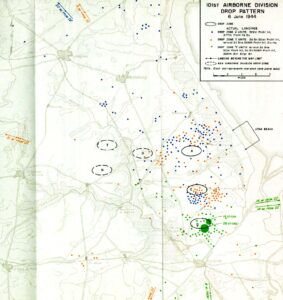
The Starting Map
I’m assuming you have a raster map image that you want to extract location data from. In this example I’ll be using the drop pattern of airborne landings on D-Day.
This map image has an underlying map image with identifyable locations and features. We will use these later to georeference the map image against an underlying base map.
Add Basemap
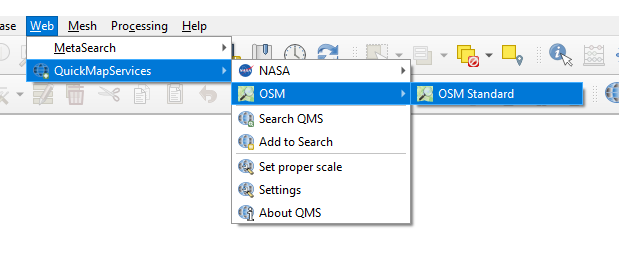
If you don’t have it already you’ll need to install the QuickMapServices plugin.
With that plugin installed you can import the Open Streetmap Standard base map.
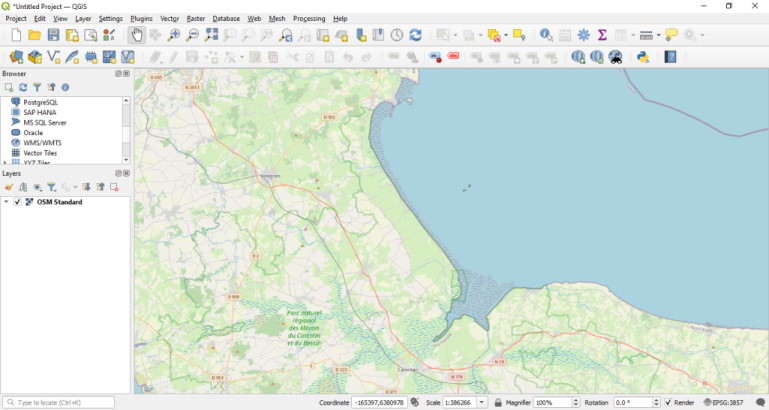
With the base map imported we can navigate to roughly the right location for our map image.
Import Map Image
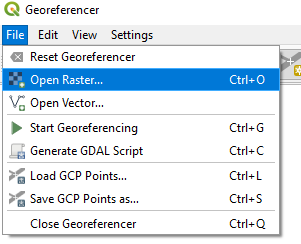
We can now import the map image that we are interested in. To do this we will use the ‘Georeferencer‘.
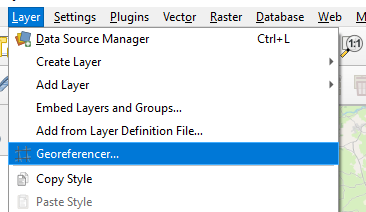
From the Georeferencer we need to Open Raster and select the map image we want to load.
Once we have loaded the map image we can identify and apply the georeferencing points.
Apply Georeferencing Points
The georeferencing process involves selecting features or landmarks on the map image and then finding them in the corresponding location on the base map.
Read more about the basics of georeferencing
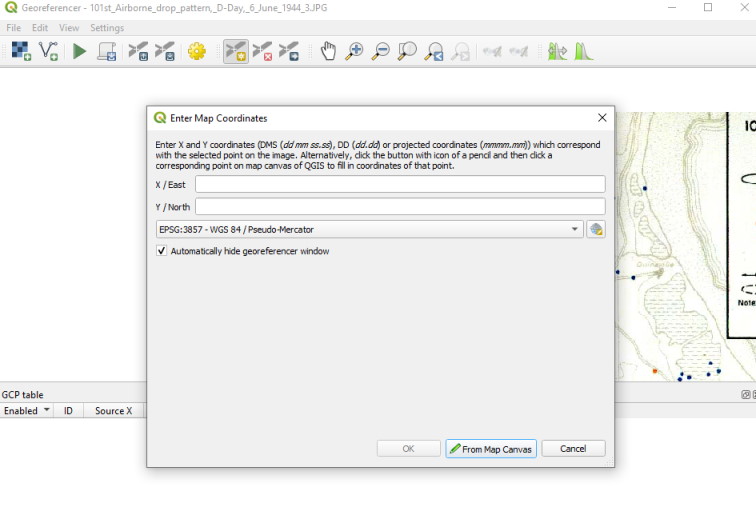
You’ll typically need to add at least four points, but check the Georeferencer documentation for guidelines. More points enable more accurate registration between the map image and the base map.
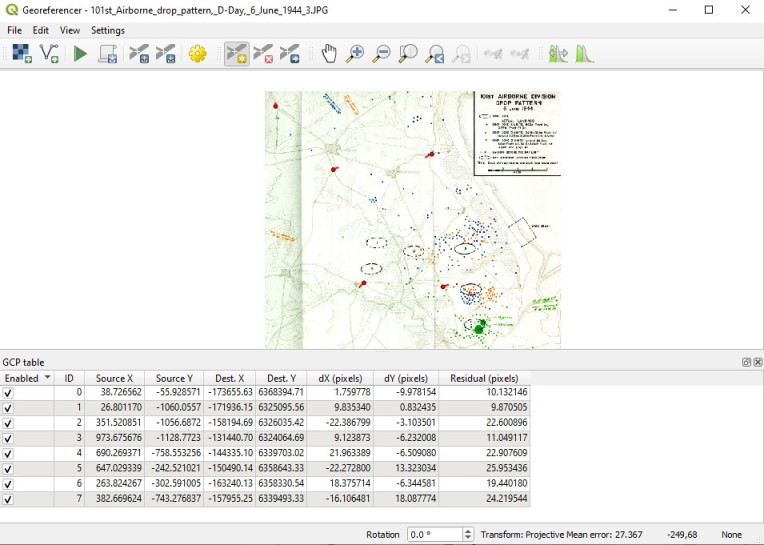
Before running the georeferencer, go to settings -> Transformation Settings and set the transformation type to “Helmert”. This is a good starting point as it won’t warp your image too much but does allow both translation and rotation.
If you are playing around with different georeferencing settings you may find you need to change the output filename each time to stop filename clashes.
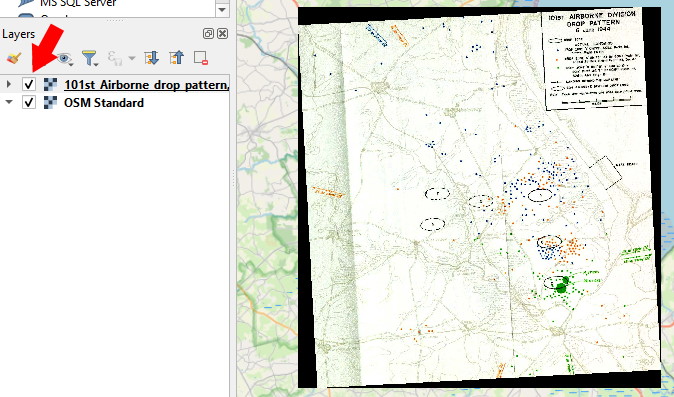
Minimise or close the Georeferencer window to check the result. You can switch the new map layer on and off to check you are happy with the alignment.
Create Data Layer
It’s at this point we can actually start extracting the location data from the map.
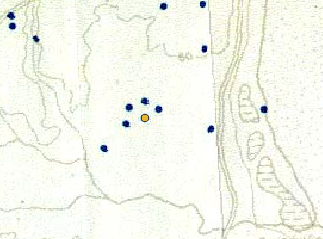
For this example map of Normandy airborne landings I am interested in the individual landing points, so I will create a point layer to store the point location data.
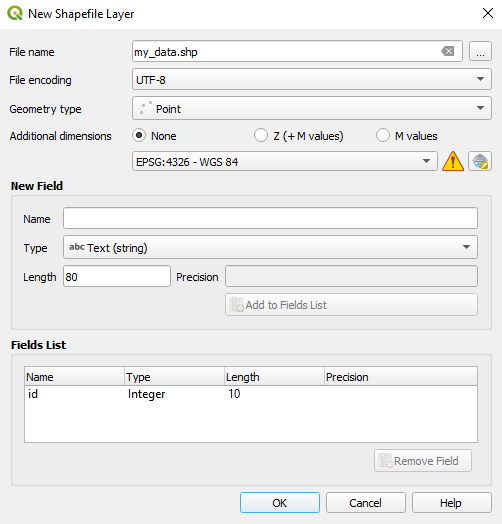
First we create a layer by going to Layer -> Create Layer -> Add Shapefile Layer
In the Layer Settings window we set a filename, and select ‘Point’ as the Geometry type. For now we don’t need to worry about the other settings.
Create Data Points
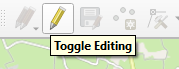
With the layer created we can add points to it.
First we allow editing on the layer by clicking the “Toggle Editing”
Followed by “Add Point Feature”
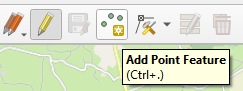
We can simply then click on the locations where we want to record a point data item. When the option to set an ID value comes up we can just hit ok.
When you are finished, hit ‘Toggle Edits’ again and save the changes.
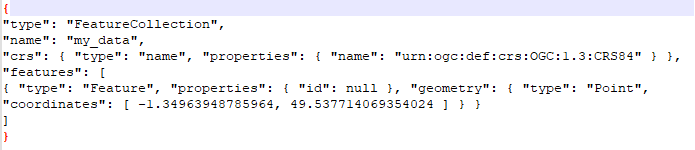
Saving the Data to a File
You can export the data layer by right clicking then going to “Export” and “Save Features As…”. You’ll see there are many different file format options.
For now we’ll export to a geojson file so we can easily inspect it in a text editor:
You can also view the geojson data on geojson.io
Recommend
About Joyk
Aggregate valuable and interesting links.
Joyk means Joy of geeK