

Linux Administration: Ubuntu Linux Tutorial for Beginners
source link: https://www.howtoforge.com/linux-administration-linux-tutorial-for-beginners/
Go to the source link to view the article. You can view the picture content, updated content and better typesetting reading experience. If the link is broken, please click the button below to view the snapshot at that time.
Linux Administration: Ubuntu Linux Tutorial for Beginners.
Linux is a multi-user system that serves as a reliable open-source system for desktops, and servers. Linux is the most widely used open-source Operating System (OS). Ubuntu Linux Operating System comes with two versions.
- Desktop Version
- Server Version
Desktop Version
This version has a Graphical User Interface(GUI) like Windows OS. All the operations that need to be performed can be performed using the UI. This OS can also be managed using the terminal. To use the terminal to perform any operation one must be familiar with the commands OS provides.
Server Version
Server Version can only be managed using commands and there is no UI to perform any kind of operation. The server version is always preferred by Organisations as Desktop version wastes disk space, CPU cycles and RAM required for GUI.
Linux comes with different flavours. Ubuntu, Fedora, Redhat, Centos, Suse and many more.
In this article we will be using Ubuntu Server Version to learn to use Linux using Commands. In this article, we will not see the Installation Process of Linux OS and I will try to keep this article very simple and clean.
Pre-requisites
- Ubuntu Server Version (or Desktop)
What we will do?
- Learn Basic Commands.
- Learn User Administration
- Learn File Permission Commands.
- Learn Networking Commands.
- Learn Devil’s Command.
Learn Basic Commands
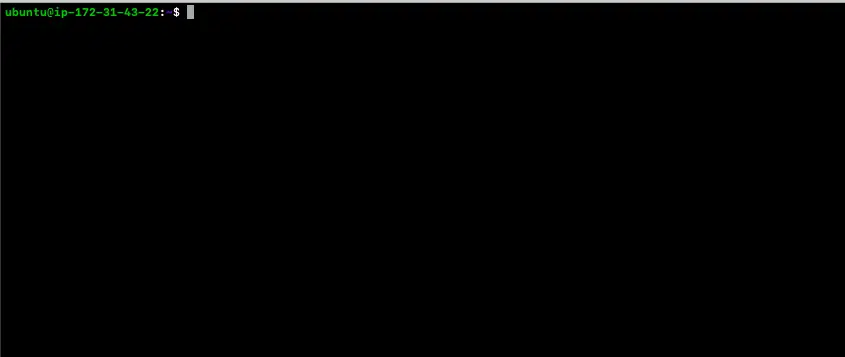
Once you get connected to the server, you will see a screen as follows.
Before proceeding with the commands, let’s understand what is being displayed on the screen.
Here,
ubuntu is a username usich which you have logged-in into the system.
ip-172-31-43-22 is the hostname of the system.
$ shows that you are in the normal prompt (non-root user)
# shows that you are in the root user prompt
In our system we have logged-in using a non-root user that’s why we see $ in our terminal
Now let's see the basic command of linux.
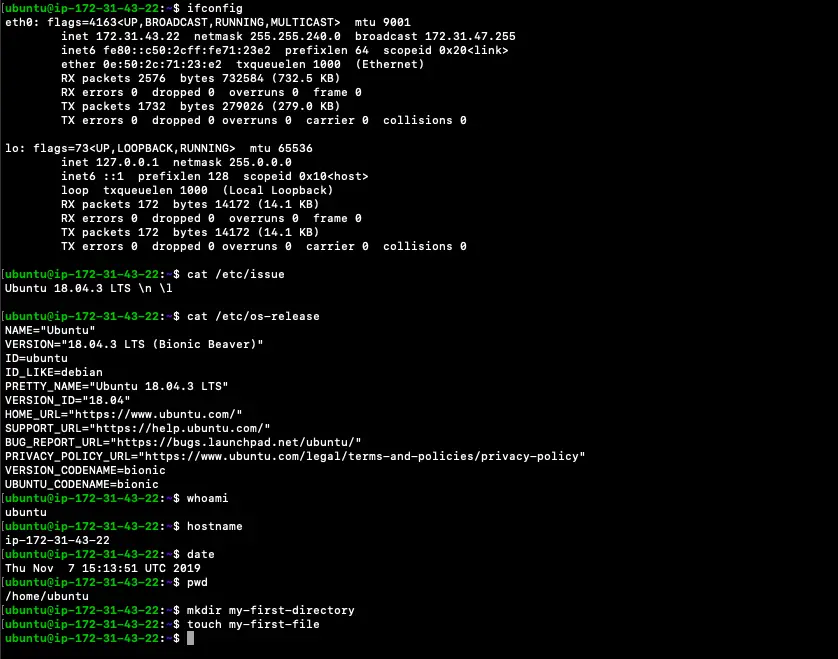
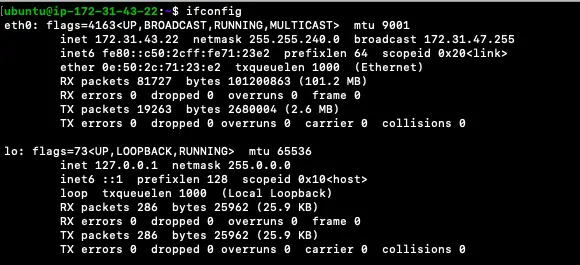
See IP Address of the system along with other system network information.
ifconfig
See Linux Version. This will display the version and the flavour of the linux system. The "cat" command will read the "/etc/issue".
cat /etc/issue
See Linux version/favour along with more details.
cat /etc/os-release
See the username using which we have logged-in into the system. Advertisement
whoami
See the Hostname of the system.
hostname
See System date along with day, time and time zone.
date
See current directory/folder.
pwd
Create a new directory/folder at the current location.
mkdir my-first-directory
Create a new file at the current location.
touch my-first-file
Clear the screen. This will just clear the screen and you can still scroll down to see the previous text.
clear
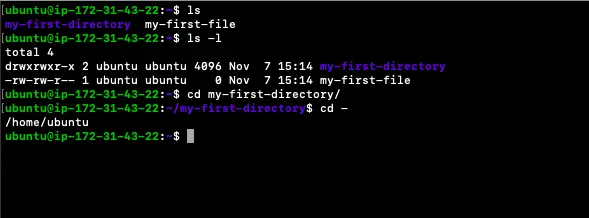
List files and folders in the present directory.
ls
List files and folders in the present directory with more details about them.
ls -l
Change the directory.
cd my-first-directory/
Go back to the previous directory.
cd -
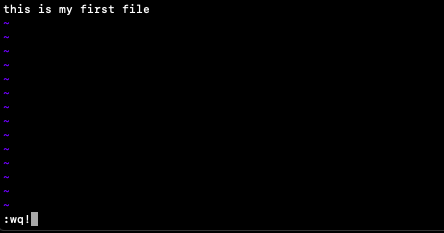
Open file to write in it.
vim my-first-file
Press “i” to go into “write” mode
Then write whatever you want
Now press Esc :wq! to save and exit the file
Read the file without opening it for writing.
cat my-first-file
Exit the file without saving it.
vim my-first-file
Write in it
Now press Esc :q! to exit the file without saving.
Now, read the file using cat command we saw in the above step.
cat my-first-file
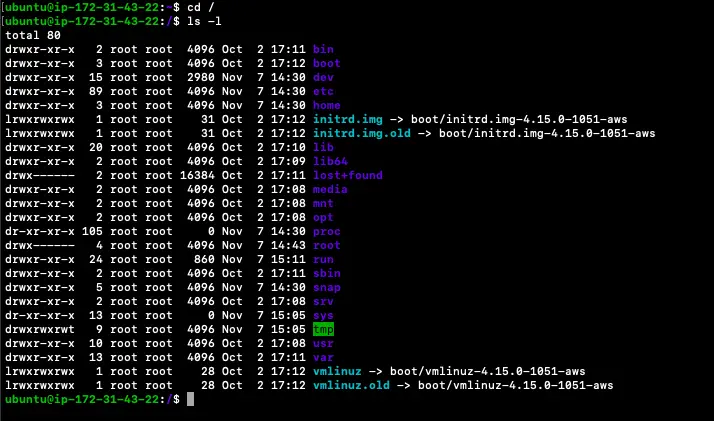
See the directory structure Linux Server has.
Switch the directory to / using cd command and list the files using ls -l command.
cd /
ls -l
These were a few of the basic commands to perform normal operations in the server.
Before proceeding further with little advance commands, let’s understand the “Common Top Level Directories” in short.
|
The directory called “root.” It is the starting point for the file system hierarchy. Note that this is not related to the root, or superuser, account. | |
|
Binaries and other executable programs. | |
|
System configuration files. | |
|
/home |
Home directories. |
|
Optional or third party software. | |
|
Temporary space, typically cleared on reboot. | |
|
User related programs. | |
|
Variable data, most notably log files. |
Learn User Administration Commands
In this section we will see simple commands to create a new user and delete it.
To deal with user administration commands, we need to have 'sudo' permission. 'sudo' needs to be appended before executing any administration command.
Add a new user.
sudo useradd rahul
Delete the user.
sudo userdel rahul
Learn File Permission Commands.
In this section we will see how file/directory permissions/ownership can be changed.
First we will see how to deal with file permission commands.
There is no need to have 'sudo' permission unless the files/directories belong to other user.
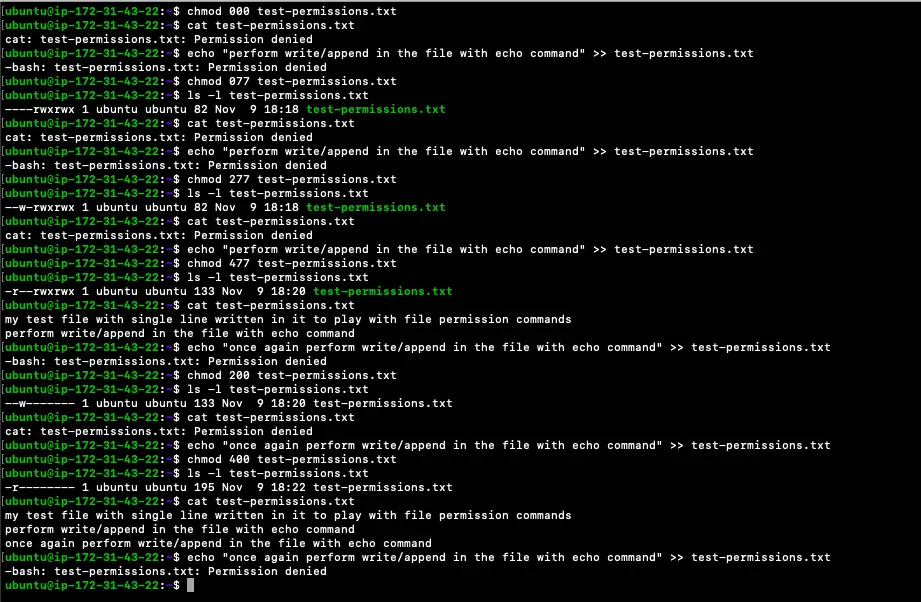
First we will create a file using touch command, then add text in it and then change its permissions. You can try yourself for directory.
Create a file.
touch test-permissions.txt
List the current directory.
ls -lt
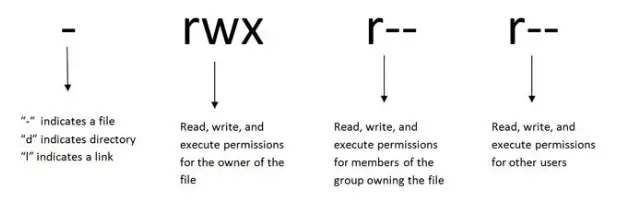
Before playing with file/folder permissions, let's understand it first. When you list the files/directories using 'ls -l', you will see some information as seen in the above screenshot.
- The first character can be either ‘-‘, which means it is a file or ‘d’, which means it is a folder/directory.
- The next nine characters (rw-rw-r--) show the security. Refer the following screenshot to understand the meaning of these(-rw-rw-r--) characters
We will see Numeric Code in Linux to change file permission which is the easiest way.
0 = No Permission
1 = Execute
2 = Write
4 = Read
We need to add the numbers depending on the level of permission we want to give.
Permission numbers are:
0 = ---
1 = --x
2 = -w-
3 = -wx
4 = r-
5 = r-x
6 = rw-
7 = rwx
For example:
- chmod 777 test-permissions.txt will give read, write, and execute permissions to everyone on test-permissions.txt.
- chmod 700 test-permissions.txt will give read, write, and execute permissions to the owner of the file only on test-permissions.txt.
- chmod 327 test-permissions.txt will give write and execute (3) permission to the owner, w (2) for the group, and read, write, and execute to other users.
Now let's change the permission of "test-permissions.txt" to 000, 077,277,477,200 one by one and see what happens. The rest you can try and see.
Learn Networking Commands.
These commands help in network troubleshooting. You may not have "traceroute" command in the system. If this is the case then the following command can be used to install it.
sudo apt install traceroute
To see the system IP.
ifconfig
To see the route packets take to the network host.
traceroute google.com
To see the connection on a particular port.
telnet localhost 22
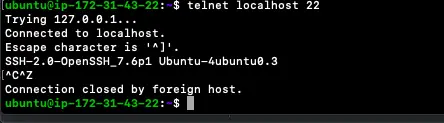
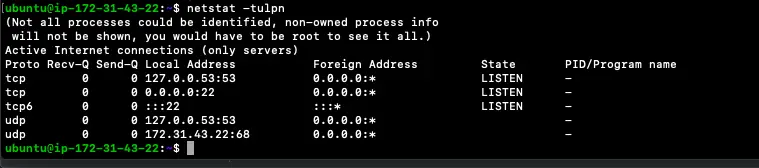
To review each of our network connections and open sockets.
netstat -tulpn
Learn Devil’s Command.
"rm" command is also called as a devil's command in linux. It is a remove command, used to delete files and folders.
Since there is no Trash/Bin in server version, rm needs to be used very carefully. Once deleting the file makes it delete permanently hence rm is known as Devil's command. Now let's see its usage to delete files and folders.
Delete a file.
rm my-first-file
Delete a folder (add -r as an option to the command command).
rm -r my-first-directory/

Notes:
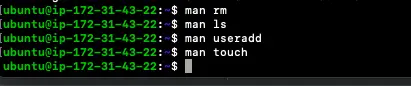
1. Be very careful while using "rm" command.
2. "man" before any command can be used to know more about the command.
man rm
man ls
man useradd
man touch
Conclusion
In this article we saw frequently used and required commands in the Linux system. If you want an advanced version of this article, do let me know.
Recommend
About Joyk
Aggregate valuable and interesting links.
Joyk means Joy of geeK