

How to Setup an Ansible Test Environment
source link: https://mydeveloperplanet.com/2022/05/04/how-to-setup-an-ansible-test-environment/
Go to the source link to view the article. You can view the picture content, updated content and better typesetting reading experience. If the link is broken, please click the button below to view the snapshot at that time.
When you want to experiment with Ansible, you will need to setup a test environment. In this blog, you will create a test environment containing one controller and two target machines. This will give you a good setup for experimenting with Ansible without breaking a real machine.
1. Introduction
With Ansible, you can automate repetitive IT tasks and because it is automated, it will also prevent you from making mistakes. Especially when you have to configure several similar environments. The other main advantage is that the configuration is maintained in files and therefore extremely suitable for adding the configuration to version control (e.g. Git). However, in every learning path you need to be able to experiment in order to make mistakes and to learn. In this blog, you will setup an Ansible controller machine and two target machines running in VirtualBox. The Ansible Controller will be the machine where to run the Ansible playbooks from and the target machines will be where tasks can be executed. The test setup looks as follows.

The sources for this post are available at GitHub.
2. Setup Ansible Controller
The machines will be created as Virtual Machines (VMs) and as virtualization platform you will use VirtualBox. Install VirtualBox on your host machine when it is not yet installed.
You can create a machine from scratch and install an operating system (OS) yourself, but for testing purposes, it is easier to retrieve an already installed image from osboxes.org.
Navigate to VM IMAGES – VirtualBox Images and choose for Ubuntu, the OS you will use for setting up the environment. Download the Ubuntu 20.04.4 Focal Fossa version. After downloading the file, unzip it.
Create in VirtualBox a new machine via Machine – New… Fill in the following and click the Next button:
- Name: Controller
- Type: Linux
- Version: Ubuntu (64-bit)

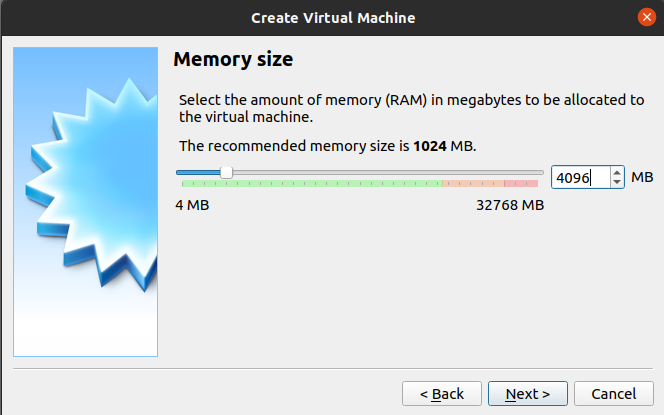
Set the memory size to 4 GB and click the Next button.
Choose for Use an existing virtual hard disk file and select the .vdi file you downloaded and unzipped. Click the Create button.

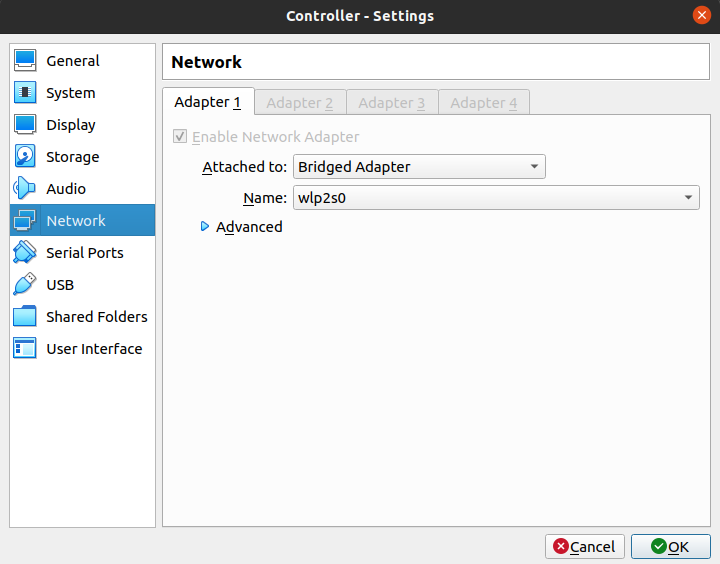
Select the VM in VirtualBox and click the Settings button. Navigate to Network in the left menu and change in the Adapter_1 tab Attached to into Bridged Adapter. Click the OK button.
Start the VM and login with username osboxes and password osboxes.org. After successful login, verify whether you have internet connection (just try to search something in the browser in the VM). Run the software updates in Ubuntu and also update libraries in a terminal window.
$ sudo apt-get upgrade |
Retrieve the IP address of the VM. You can do so by hovering over the network icon at the right bottom of the VM or by executing the following command in a terminal window.
$ ip a |
Install openssh-server in order to be able to connect via SSH from your host to the VM.
$ sudo apt install openssh-server |
As a last step, try to connect from your host to the VM via a terminal window, and replace the IP address with the IP address of your Controller VM.
Shutdown the VM.
3. Create Target Machines
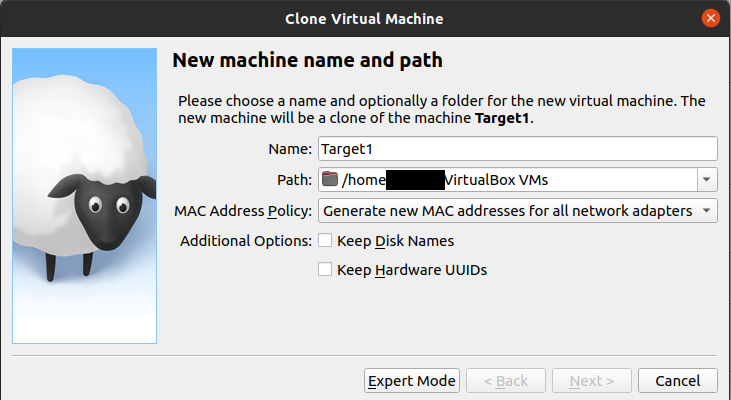
In this section the two target machines will be created. In VirtualBox, right-click the Ansible Controller and choose Clone… Fill in the following and click the Next button:
- Name: Target1
- MAC Address Policy: Generate new MAC addresses for all network adapters
Choose for Linked clone (you can also choose for a full clone, but when it is only for testing purposes, there is no harm for chosing a linked clone). Click the Clone button.

Again, log in to the VM, retrieve the IP address and try to SSH to the VM from your host.
Lastly, create in a similar way a Target2 machine.
4. Install Ansible
The controller needs an Ansible installation in order to be able to run playbooks from the Ansible controller. Several options are available for installing Ansible, these can be found in the documentation. The steps below were successfully executed inside the controller VM. The third command did not really execute successfully or it took too long. Nevertheless, the installation seems to be successful.
$ sudo apt update$ sudo apt install software-properties-common$ sudo add-apt-repository --yes --update ppa:ansible/ansible$ sudo apt install ansible |
Verify whether the Ansible installation was successful.
$ ansible --versionansible [core 2.12.4]config file = /etc/ansible/ansible.cfgconfigured module search path = ['/home/osboxes/.ansible/plugins/modules', '/usr/share/ansible/plugins/modules']ansible python module location = /home/osboxes/.local/lib/python3.8/site-packages/ansibleansible collection location = /home/osboxes/.ansible/collections:/usr/share/ansible/collectionsexecutable location = /usr/bin/ansiblepython version = 3.8.10 (default, Mar 15 2022, 12:22:08) [GCC 9.4.0]jinja version = 3.1.1libyaml = True |
5. IDE Configuration
Although it is perfectly possible to create Ansible files with a text editor, it is easier and better to use an IDE for this. When you are developing with Java, you probably already have IntelliJ installed onto your host machine and with the help of some plugins, creating Ansible scripts will make your life a lot easier. Install via File – Settings… – Plugins the Ansible plugin (for autocompletion during development of Ansible scripts) and the yamllint plugin (for verifying your yaml syntax). In order to be able to use the yamllint plugin, you also need to install yamllint itself. See the yamllint documentation how to do this.
You also need to enable yamllint in IntelliJ. Navigate to File – Settings… and search for yamllint. Enable yamllint and click the OK button.

Create a new empty project MyAnsiblePlanet via File – New – Project… and click the Finish button.

The project files are located on your host machine, you now have to find a way to sync them to the controller. This can be done with the help of the rsync command. In the project directory a file transferdata.sh is available with the rsync command to copy the project files to the controller. Do not forget to change the IP address of the controller when it is different than the one in the script.
rsync -avz . [email protected]:MyAnsiblePlanet |
Execute the script (do not forget to start the controller). Login via SSH to the controller and verify whether the files are correctly synced.
6. Conclusion
In this post, you created an Ansible controller VM and two target VMs. You also setup your IDE and you have a way to sync your local project files to the Ansible controller machine. You are now all setup for experimenting with Ansible.
Recommend
About Joyk
Aggregate valuable and interesting links.
Joyk means Joy of geeK