

Vue 团队公开快如闪电的全新脚手架工具 create-vue,未来将替代 Vue-CLI,才300余行代...
source link: https://segmentfault.com/a/1190000040865299
Go to the source link to view the article. You can view the picture content, updated content and better typesetting reading experience. If the link is broken, please click the button below to view the snapshot at that time.

Vue 团队公开快如闪电的全新脚手架工具 create-vue,未来将替代 Vue-CLI,才300余行代码,学它!
大家好,我是若川。欢迎关注我的公众号若川视野,最近组织了源码共读活动,感兴趣的可以加我微信 ruochuan12 参与,已进行两个多月,大家一起交流学习,共同进步。
想学源码,极力推荐之前我写的《学习源码整体架构系列》 包含jQuery、underscore、lodash、vuex、sentry、axios、redux、koa、vue-devtools、vuex4、koa-compose、vue-next-release、vue-this等十余篇源码文章。
美国时间 2021 年 10 月 7 日早晨,Vue 团队等主要贡献者举办了一个
Vue Contributor Days在线会议,蒋豪群(知乎胖茶,Vue.js 官方团队成员,Vue-CLI 核心开发),在会上公开了create-vue,一个全新的脚手架工具。
create-vue使用npm init vue@next一行命令,就能快如闪电般初始化好基于vite的Vue3项目。
本文就是通过调试和大家一起学习这个300余行的源码。
阅读本文,你将学到:
1. 学会全新的官方脚手架工具 create-vue 的使用和原理
2. 学会使用 VSCode 直接打开 github 项目
3. 学会使用测试用例调试源码
4. 学以致用,为公司初始化项目写脚手架工具。
5. 等等
2. 使用 npm init vue@next 初始化 vue3 项目
create-vue github README上写着,An easy way to start a Vue project。一种简单的初始化vue项目的方式。
npm init vue@next
估计大多数读者,第一反应是这样竟然也可以,这么简单快捷?
忍不住想动手在控制台输出命令,我在终端试过,见下图。

最终cd vue3-project、npm install 、npm run dev打开页面http://localhost:3000。
2.1 npm init && npx
为啥 npm init 也可以直接初始化一个项目,带着疑问,我们翻看 npm 文档。
npm init 用法:
npm init [--force|-f|--yes|-y|--scope]
npm init <@scope> (same as `npx <@scope>/create`)
npm init [<@scope>/]<name> (same as `npx [<@scope>/]create-<name>`)
npm init <initializer> 时转换成npx命令:
- npm init foo -> npx create-foo
- npm init @usr/foo -> npx @usr/create-foo
- npm init @usr -> npx @usr/create
看完文档,我们也就理解了:
# 运行
npm init vue@next
# 相当于
npx create-vue@next
我们可以在这里create-vue,找到一些信息。或者在npm create-vue找到版本等信息。
其中@next是指定版本,通过npm dist-tag ls create-vue命令可以看出,next版本目前对应的是3.0.0-beta.6。
npm dist-tag ls create-vue
- latest: 3.0.0-beta.6
- next: 3.0.0-beta.6
发布时 npm publish --tag next 这种写法指定 tag。默认标签是latest。
可能有读者对 npx 不熟悉,这时找到阮一峰老师博客 npx 介绍、nodejs.cn npx
npx 是一个非常强大的命令,从 npm 的 5.2 版本(发布于 2017 年 7 月)开始可用。
简单说下容易忽略且常用的场景,npx有点类似小程序提出的随用随走。
轻松地运行本地命令
node_modules/.bin/vite -v
# vite/2.6.5 linux-x64 node-v14.16.0

# 等同于
# package.json script: "vite -v"
# npm run vite

npx vite -v
# vite/2.6.5 linux-x64 node-v14.16.0
使用不同的 Node.js 版本运行代码
某些场景下可以临时切换 node 版本,有时比 nvm 包管理方便些。
npx node@14 -v
# v14.18.0

npx -p node@14 node -v
# v14.18.0
无需安装的命令执行
# 启动本地静态服务
npx http-server
# 无需全局安装
npx @vue/cli create vue-project
# @vue/cli 相比 npm init vue@next npx create-vue@next 很慢。

# 全局安装
npm i -g @vue/cli
vue create vue-project

npm init vue@next (npx create-vue@next) 快的原因,主要在于依赖少(能不依赖包就不依赖),源码行数少,目前index.js只有300余行。
3. 配置环境调试源码
3.1 克隆 create-vue 项目
本文仓库地址 create-vue-analysis,求个star~
# 可以直接克隆我的仓库,我的仓库保留的 create-vue 仓库的 git 记录
git clone https://github.com/lxchuan12/create-vue-analysis.git
cd create-vue-analysis/create-vue
npm i
当然不克隆也可以直接用 VSCode 打开我的仓库
顺带说下:我是怎么保留 create-vue 仓库的 git 记录的。
# 在 github 上新建一个仓库 `create-vue-analysis` 克隆下来
git clone https://github.com/lxchuan12/create-vue-analysis.git
cd create-vue-analysis
git subtree add --prefix=create-vue https://github.com/vuejs/create-vue.git main
# 这样就把 create-vue 文件夹克隆到自己的 git 仓库了。且保留的 git 记录
关于更多 git subtree,可以看Git Subtree 简明使用手册
3.2 package.json 分析
// create-vue/package.json
{
  "name": "create-vue",
  "version": "3.0.0-beta.6",
  "description": "An easy way to start a Vue project",
  "type": "module",
  "bin": {
    "create-vue": "outfile.cjs"
  },
}bin指定可执行脚本。也就是我们可以使用 npx create-vue 的原因。
outfile.cjs 是打包输出的JS文件
{
  "scripts": {
    "build": "esbuild --bundle index.js --format=cjs --platform=node --outfile=outfile.cjs",
    "snapshot": "node snapshot.js",
    "pretest": "run-s build snapshot",
    "test": "node test.js"
  },
}
执行 npm run test 时,会先执行钩子函数 pretest。run-s 是 npm-run-all 提供的命令。run-s build snapshot 命令相当于 npm run build && npm run snapshot。
根据脚本提示,我们来看 snapshot.js 文件。
3.3 生成快照 snapshot.js
这个文件主要作用是根据const featureFlags = ['typescript', 'jsx', 'router', 'vuex', 'with-tests'] 组合生成31种加上 default 共计 32种 组合,生成快照在 playground目录。
因为打包生成的 outfile.cjs 代码有做一些处理,不方便调试,我们可以修改为index.js便于调试。
// 路径 create-vue/snapshot.js
const bin = path.resolve(__dirname, './outfile.cjs')
// 改成 index.js 便于调试
const bin = path.resolve(__dirname, './index.js')
我们可以在for和 createProjectWithFeatureFlags 打上断点。
createProjectWithFeatureFlags其实类似在终端输入如下执行这样的命令
node ./index.js --xxx --xxx --force
function createProjectWithFeatureFlags(flags) {
  const projectName = flags.join('-')
  console.log(`Creating project ${projectName}`)
  const { status } = spawnSync(
    'node',
    [bin, projectName, ...flags.map((flag) => `--${flag}`), '--force'],
    {
      cwd: playgroundDir,
      stdio: ['pipe', 'pipe', 'inherit']
    }
  )

  if (status !== 0) {
    process.exit(status)
  }
}

// 路径 create-vue/snapshot.js
for (const flags of flagCombinations) {
  createProjectWithFeatureFlags(flags)
}调试:
VSCode打开项目,VSCode高版本(1.50+)可以在create-vue/package.json=>scripts=>"test": "node test.js"。鼠标悬停在test上会有调试脚本提示,选择调试脚本。如果对调试不熟悉,可以看我之前的文章koa-compose,写的很详细。
调试时,大概率你会遇到:create-vue/index.js 文件中,__dirname 报错问题。可以按照如下方法解决。在 import 的语句后,添加如下语句,就能愉快的调试了。
// 路径 create-vue/index.js
// 解决办法和nodejs issues
// https://stackoverflow.com/questions/64383909/dirname-is-not-defined-in-node-14-version
// https://github.com/nodejs/help/issues/2907

import { fileURLToPath } from 'url';
import { dirname } from 'path';

const __filename = fileURLToPath(import.meta.url);
const __dirname = dirname(__filename);
接着我们调试 index.js 文件,来学习。
4. 调试 index.js 主流程
回顾下上文 npm init vue@next 初始化项目的。
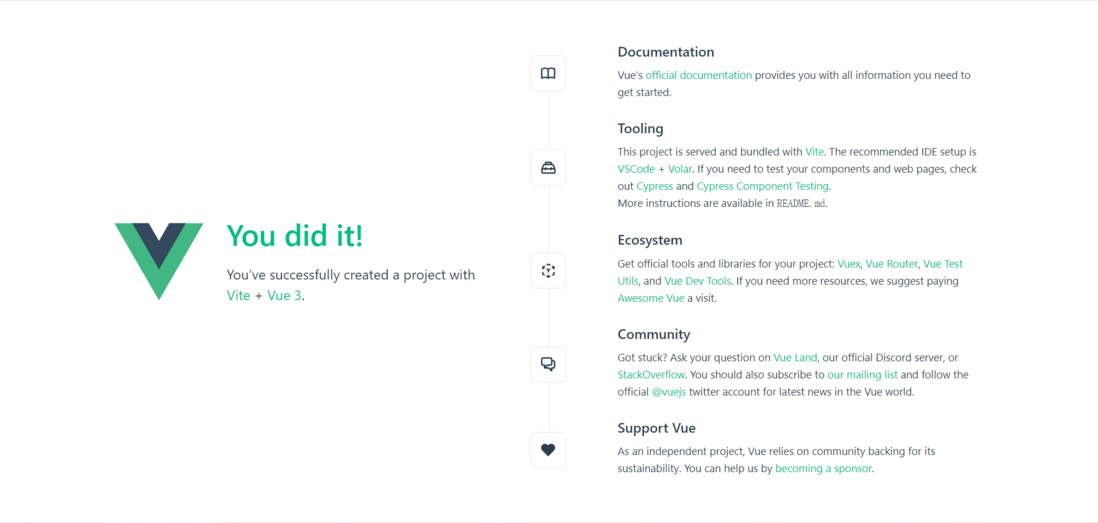
单从初始化项目输出图来看。主要是三个步骤。
1. 输入项目名称,默认值是 vue-project
2. 询问一些配置 渲染模板等
3. 完成创建项目,输出运行提示
async function init() {
  // 省略放在后文详细讲述
}

// async 函数返回的是Promise 可以用 catch 报错
init().catch((e) => {
  console.error(e)
})
4.1 解析命令行参数
// 返回运行当前脚本的工作目录的路径。
const cwd = process.cwd()
// possible options:
// --default
// --typescript / --ts
// --jsx
// --router / --vue-router
// --vuex
// --with-tests / --tests / --cypress
// --force (for force overwriting)
const argv = minimist(process.argv.slice(2), {
    alias: {
        typescript: ['ts'],
        'with-tests': ['tests', 'cypress'],
        router: ['vue-router']
    },
    // all arguments are treated as booleans
    boolean: true
})简单说,这个库,就是解析命令行参数的。看例子,我们比较容易看懂传参和解析结果。
$ node example/parse.js -a beep -b boop
{ _: [], a: 'beep', b: 'boop' }

$ node example/parse.js -x 3 -y 4 -n5 -abc --beep=boop foo bar baz
{ _: [ 'foo', 'bar', 'baz' ],
  x: 3,
  y: 4,
  n: 5,
  a: true,
  b: true,
  c: true,
  beep: 'boop' }
npm init vue@next --vuex --force
4.2 如果设置了 feature flags 跳过 prompts 询问
这种写法方便代码测试等。直接跳过交互式询问,同时也可以省时间。
// if any of the feature flags is set, we would skip the feature prompts
  // use `??` instead of `||` once we drop Node.js 12 support
  const isFeatureFlagsUsed =
    typeof (argv.default || argv.ts || argv.jsx || argv.router || argv.vuex || argv.tests) ===
    'boolean'

// 生成目录
  let targetDir = argv._[0]
  // 默认 vue-projects
  const defaultProjectName = !targetDir ? 'vue-project' : targetDir
  // 强制重写文件夹,当同名文件夹存在时
  const forceOverwrite = argv.force
4.3 交互式询问一些配置
如上文npm init vue@next 初始化的图示
- 输入项目名称
- 还有是否删除已经存在的同名目录
- 询问使用需要 JSX Router vuex cypress 等。
let result = {}

  try {
    // Prompts:
    // - Project name:
    //   - whether to overwrite the existing directory or not?
    //   - enter a valid package name for package.json
    // - Project language: JavaScript / TypeScript
    // - Add JSX Support?
    // - Install Vue Router for SPA development?
    // - Install Vuex for state management? (TODO)
    // - Add Cypress for testing?
    result = await prompts(
      [
        {
          name: 'projectName',
          type: targetDir ? null : 'text',
          message: 'Project name:',
          initial: defaultProjectName,
          onState: (state) => (targetDir = String(state.value).trim() || defaultProjectName)
        },
        // 省略若干配置
        {
          name: 'needsTests',
          type: () => (isFeatureFlagsUsed ? null : 'toggle'),
          message: 'Add Cypress for testing?',
          initial: false,
          active: 'Yes',
          inactive: 'No'
        }
      ],
      {
        onCancel: () => {
          throw new Error(red('✖') + ' Operation cancelled')
        }
      }
    ]
    )
  } catch (cancelled) {
    console.log(cancelled.message)
    // 退出当前进程。
    process.exit(1)
  }
4.4 初始化询问用户给到的参数,同时也会给到默认值
// `initial` won't take effect if the prompt type is null
  // so we still have to assign the default values here
  const {
    packageName = toValidPackageName(defaultProjectName),
    shouldOverwrite,
    needsJsx = argv.jsx,
    needsTypeScript = argv.typescript,
    needsRouter = argv.router,
    needsVuex = argv.vuex,
    needsTests = argv.tests
  } = result
  const root = path.join(cwd, targetDir)

  // 如果需要强制重写,清空文件夹

  if (shouldOverwrite) {
    emptyDir(root)
    // 如果不存在文件夹,则创建
  } else if (!fs.existsSync(root)) {
    fs.mkdirSync(root)
  }

  // 脚手架项目目录
  console.log(`\nScaffolding project in ${root}...`)

 // 生成 package.json 文件
  const pkg = { name: packageName, version: '0.0.0' }
  fs.writeFileSync(path.resolve(root, 'package.json'), JSON.stringify(pkg, null, 2))
4.5 根据模板文件生成初始化项目所需文件
  // todo:
  // work around the esbuild issue that `import.meta.url` cannot be correctly transpiled
  // when bundling for node and the format is cjs
  // const templateRoot = new URL('./template', import.meta.url).pathname
  const templateRoot = path.resolve(__dirname, 'template')
  const render = function render(templateName) {
    const templateDir = path.resolve(templateRoot, templateName)
    renderTemplate(templateDir, root)
  }

  // Render base template
  render('base')

   // 添加配置
  // Add configs.
  if (needsJsx) {
    render('config/jsx')
  }
  if (needsRouter) {
    render('config/router')
  }
  if (needsVuex) {
    render('config/vuex')
  }
  if (needsTests) {
    render('config/cypress')
  }
  if (needsTypeScript) {
    render('config/typescript')
  }
4.6 渲染生成代码模板
// Render code template.
  // prettier-ignore
  const codeTemplate =
    (needsTypeScript ? 'typescript-' : '') +
    (needsRouter ? 'router' : 'default')
  render(`code/${codeTemplate}`)

  // Render entry file (main.js/ts).
  if (needsVuex && needsRouter) {
    render('entry/vuex-and-router')
  } else if (needsVuex) {
    render('entry/vuex')
  } else if (needsRouter) {
    render('entry/router')
  } else {
    render('entry/default')
  }
4.7 如果配置了需要 ts
重命名所有的 .js 文件改成 .ts。
重命名 jsconfig.json 文件为 tsconfig.json 文件。
jsconfig.json 是VSCode的配置文件,可用于配置跳转等。
把index.html 文件里的 main.js 重命名为 main.ts。
// Cleanup.

if (needsTypeScript) {
    // rename all `.js` files to `.ts`
    // rename jsconfig.json to tsconfig.json
    preOrderDirectoryTraverse(
      root,
      () => {},
      (filepath) => {
        if (filepath.endsWith('.js')) {
          fs.renameSync(filepath, filepath.replace(/\.js$/, '.ts'))
        } else if (path.basename(filepath) === 'jsconfig.json') {
          fs.renameSync(filepath, filepath.replace(/jsconfig\.json$/, 'tsconfig.json'))
        }
      }
    )

    // Rename entry in `index.html`
    const indexHtmlPath = path.resolve(root, 'index.html')
    const indexHtmlContent = fs.readFileSync(indexHtmlPath, 'utf8')
    fs.writeFileSync(indexHtmlPath, indexHtmlContent.replace('src/main.js', 'src/main.ts'))
  }
4.8 配置了不需要测试
因为所有的模板都有测试文件,所以不需要测试时,执行删除 cypress、/__tests__/ 文件夹
  if (!needsTests) {
    // All templates assumes the need of tests.
    // If the user doesn't need it:
    // rm -rf cypress **/__tests__/
    preOrderDirectoryTraverse(
      root,
      (dirpath) => {
        const dirname = path.basename(dirpath)

        if (dirname === 'cypress' || dirname === '__tests__') {
          emptyDir(dirpath)
          fs.rmdirSync(dirpath)
        }
      },
      () => {}
    )
  }
4.9 根据使用的 npm / yarn / pnpm 生成README.md 文件,给出运行项目的提示
// Instructions:
  // Supported package managers: pnpm > yarn > npm
  // Note: until <https://github.com/pnpm/pnpm/issues/3505> is resolved,
  // it is not possible to tell if the command is called by `pnpm init`.
  const packageManager = /pnpm/.test(process.env.npm_execpath)
    ? 'pnpm'
    : /yarn/.test(process.env.npm_execpath)
    ? 'yarn'
    : 'npm'

  // README generation
  fs.writeFileSync(
    path.resolve(root, 'README.md'),
    generateReadme({
      projectName: result.projectName || defaultProjectName,
      packageManager,
      needsTypeScript,
      needsTests
    })
  )

  console.log(`\nDone. Now run:\n`)
  if (root !== cwd) {
    console.log(`  ${bold(green(`cd ${path.relative(cwd, root)}`))}`)
  }
  console.log(`  ${bold(green(getCommand(packageManager, 'install')))}`)
  console.log(`  ${bold(green(getCommand(packageManager, 'dev')))}`)
  console.log()
5. npm run test => node test.js 测试
// create-vue/test.js
import fs from 'fs'
import path from 'path'
import { fileURLToPath } from 'url'

import { spawnSync } from 'child_process'

const __dirname = path.dirname(fileURLToPath(import.meta.url))
const playgroundDir = path.resolve(__dirname, './playground/')

for (const projectName of fs.readdirSync(playgroundDir)) {
  if (projectName.endsWith('with-tests')) {
    console.log(`Running unit tests in ${projectName}`)
    const unitTestResult = spawnSync('pnpm', ['test:unit:ci'], {
      cwd: path.resolve(playgroundDir, projectName),
      stdio: 'inherit',
      shell: true
    })
    if (unitTestResult.status !== 0) {
      throw new Error(`Unit tests failed in ${projectName}`)
    }

    console.log(`Running e2e tests in ${projectName}`)
    const e2eTestResult = spawnSync('pnpm', ['test:e2e:ci'], {
      cwd: path.resolve(playgroundDir, projectName),
      stdio: 'inherit',
      shell: true
    })
    if (e2eTestResult.status !== 0) {
      throw new Error(`E2E tests failed in ${projectName}`)
    }
  }
}
主要对生成快照时生成的在 playground 32个文件夹,进行如下测试。
pnpm test:unit:ci

pnpm test:e2e:ci
我们使用了快如闪电般的npm init vue@next,学习npx命令了。学会了其原理。
npm init vue@next => npx create-vue@next
快如闪电的原因在于依赖的很少。很多都是自己来实现。如:Vue-CLI中 vue create vue-project 命令是用官方的npm包validate-npm-package-name,删除文件夹一般都是使用 rimraf。而 create-vue 是自己实现emptyDir和isValidPackageName。
非常建议读者朋友按照文中方法使用VSCode调试 create-vue 源码。源码中还有很多细节文中由于篇幅有限,未全面展开讲述。
学完本文,可以为自己或者公司创建类似初始化脚手架。
目前版本是3.0.0-beta.6。我们持续关注学习它。除了create-vue 之外,我们还可以看看create-vite、create-umi 的源码实现。
最后欢迎加我微信 ruochuan12 交流,参与 源码共读 活动,大家一起学习源码,共同进步。
7. 参考资料
发现 create-vue 时打算写文章加入到源码共读计划中,大家一起学习。而源码共读群里小伙伴upupming比我先写完文章。
@upupming vue-cli 将被 create-vue 替代?初始化基于 vite 的 vue3 项目为何如此简单?
Recommend
About Joyk
Aggregate valuable and interesting links.
Joyk means Joy of geeK