

Monitoring Django Projects with Rollbar
source link: https://www.fullstackpython.com/blog/monitor-django-projects-web-apps-rollbar.html
Go to the source link to view the article. You can view the picture content, updated content and better typesetting reading experience. If the link is broken, please click the button below to view the snapshot at that time.
One fast way to scan for exceptions and errors in your Django web application projects is to add a few lines of code to include a hosted monitoring tool.
In this tutorial we will learn to add the Rollbar monitoring service to a web app to visualize any issues produced by our web app. This tutorial will use Django as the web framework to build the web application but there are also tutorials for the Flask and Bottle frameworks as well. You can also check out a list of other hosted and open source tools on the monitoring page.
Our Tools
Python 3 is strongly recommended for this tutorial because Python 2 will no longer be supported starting January 1, 2020. Python 3.6.4 to was used to build this tutorial. We will also use the following application dependencies to build our application:
- Django web framework, version 2.0.4
- rollbar monitoring instrumentation library, version 0.13.18, to report exceptions and errors
- pip and virtualenv, which come installed with Python 3, to install and isolate these Django and Rollbar libraries from your other applications
- A free Rollbar account where we will send error data and view it when it is captured
If you need help getting your development environment configured before running this code, take a look at this guide for setting up Python 3 and Django on Ubuntu 16.04 LTS.
All code in this blog post is available open source on GitHub under the MIT license within the monitor-python-django-apps directory of the blog-code-examples repository. Use and modify the code however you like for your own applications.
Installing Dependencies
Start the project by creating a new
virtual environment
using the following command. I recommend keeping a separate directory
such as ~/venvs/ so that you always know where all your virtualenvs are
located.
python3 -m venv monitordjango
Activate the virtualenv with the activate shell script:
source monitordjango/bin/activate
The command prompt will change after activating the virtualenv:

Remember that you need to activate your virtualenv in every new terminal window where you want to use the virtualenv to run the project.
We can now install the Django and Rollbar packages into the activated, empty virtualenv.
pip install django==2.0.4 rollbar==0.13.18
Look for output like the following to confirm the dependencies installed correctly.
Collecting certifi>=2017.4.17 (from requests>=0.12.1->rollbar==0.13.18)
  Downloading certifi-2018.1.18-py2.py3-none-any.whl (151kB)
    100% |████████████████████████████████| 153kB 767kB/s
Collecting urllib3<1.23,>=1.21.1 (from requests>=0.12.1->rollbar==0.13.18)
  Using cached urllib3-1.22-py2.py3-none-any.whl
Collecting chardet<3.1.0,>=3.0.2 (from requests>=0.12.1->rollbar==0.13.18)
  Using cached chardet-3.0.4-py2.py3-none-any.whl
Collecting idna<2.7,>=2.5 (from requests>=0.12.1->rollbar==0.13.18)
  Using cached idna-2.6-py2.py3-none-any.whl
Installing collected packages: pytz, django, certifi, urllib3, chardet, idna, requests, six, rollbar
  Running setup.py install for rollbar ... done
Successfully installed certifi-2018.1.18 chardet-3.0.4 django-2.0.4 idna-2.6 pytz-2018.3 requests-2.18.4 rollbar-0.13.18 six-1.11.0 urllib3-1.22
We have our dependencies ready to go so now we can write the code for our Django project.
Our Django Web App
Django makes it easy to generate the boilerplate code
for new projects and apps using the django-admin.py commands. Go to the
directory where you typically store your coding projects. For example, on
my Mac I use /Users/matt/devel/py/. Then run the following command to
start a Django project named djmonitor:
django-admin.py startproject djmonitor
The command will create a directory named djmonitor with several
subdirectories that you should be familiar with when you've previously
worked with Django.
Change directories into the new project.
cd djmonitor
Start a new Django app for our example code.
python manage.py startapp billions
Django will create a new folder named billions for our project.
Let's make sure our Django URLS work properly before before we write
the code for the app.
Now open djmonitor/djmonitor/urls.py and add the highlighted lines so that URLs
with the path /billions/ will be routed to the app we are working on.
""" (comments section)
"""
from django.conf.urls import include
from django.contrib import admin
from django.urls import path

urlpatterns = [
    path('billions/', include('billions.urls')),
    path('admin/', admin.site.urls),
]
Save djmonitor/djmonitor/urls.py and open djmonitor/djmonitor/settings.py.
Add the billions app to settings.py by inserting the highlighted line,
which will become line number 40 after insertion:
# Application definition

INSTALLED_APPS = [
    'django.contrib.admin',
    'django.contrib.auth',
    'django.contrib.contenttypes',
    'django.contrib.sessions',
    'django.contrib.messages',
    'django.contrib.staticfiles',
    'billions',
]
Save and close settings.py.
Reminder: make sure you change the default DEBUG and SECRET_KEY
values in settings.py before you deploy any code to production. Secure
your app properly with the information from the
Django production deployment checklist
so that you do not add your project to the list of hacked applications
on the web.
Next change into the djmonitor/billions directory. Create a new file named
urls.py that will be specific to the routes for the billions app within
the djmonitor project.
Add the following lines to the currently-blank djmonitor/billions/urls.py
file.
from django.conf.urls import url
from . import views

urlpatterns = [
    url(r'(?P<slug>[\wa-z-]+)', views.they, name="they"),
]
Save djmonitor/billions/urls.py. One more file before we can test that
our simple Django app works. Open djmonitor/billions/views.py.
from django.core.exceptions import PermissionDenied
from django.shortcuts import render


def they(request, slug):
    if slug and slug == "are":
        return render(request, 'billions.html', {})
    else:
        raise PermissionDenied("Hmm, can't find what you're looking for.")
Create a directory for your template files named templates under
the djmonitor/billions app directory.
mkdir templates
Within templates create a new file named billions.html that contains
the following Django template markup.
<!DOCTYPE html>
<html>
  <head>
    <title>They... are BILLIONS!</title>
  </head>
  <body>
    <h1><a href="http://store.steampowered.com/app/644930/They_Are_Billions/">They Are Billions</a></h1>
    <img src="https://media.giphy.com/media/2jUHXTGhGo156/giphy.gif">
  </body>
</html>
Alright, all of our files are in place so we can test the application. Within the base directory of your project run the Django development server:
python manage.py runserver
The Django development server will start up with no issues other than an unapplied migrations warning.
(monitordjango) $ python manage.py runserver
Performing system checks...

System check identified no issues (0 silenced).

You have 14 unapplied migration(s). Your project may not work properly until you apply the migrations for app(s): admin, auth, contenttypes, sessions.
Run 'python manage.py migrate' to apply them.

April 08, 2018 - 19:06:44
Django version 2.0.4, using settings 'djmonitor.settings'
Starting development server at http://127.0.0.1:8000/
Quit the server with CONTROL-C.
Only the /billions/ route will successfully hit our billions app. Try
to access "http://localhost:8000/billions/are/". We should see our template
render with the gif:
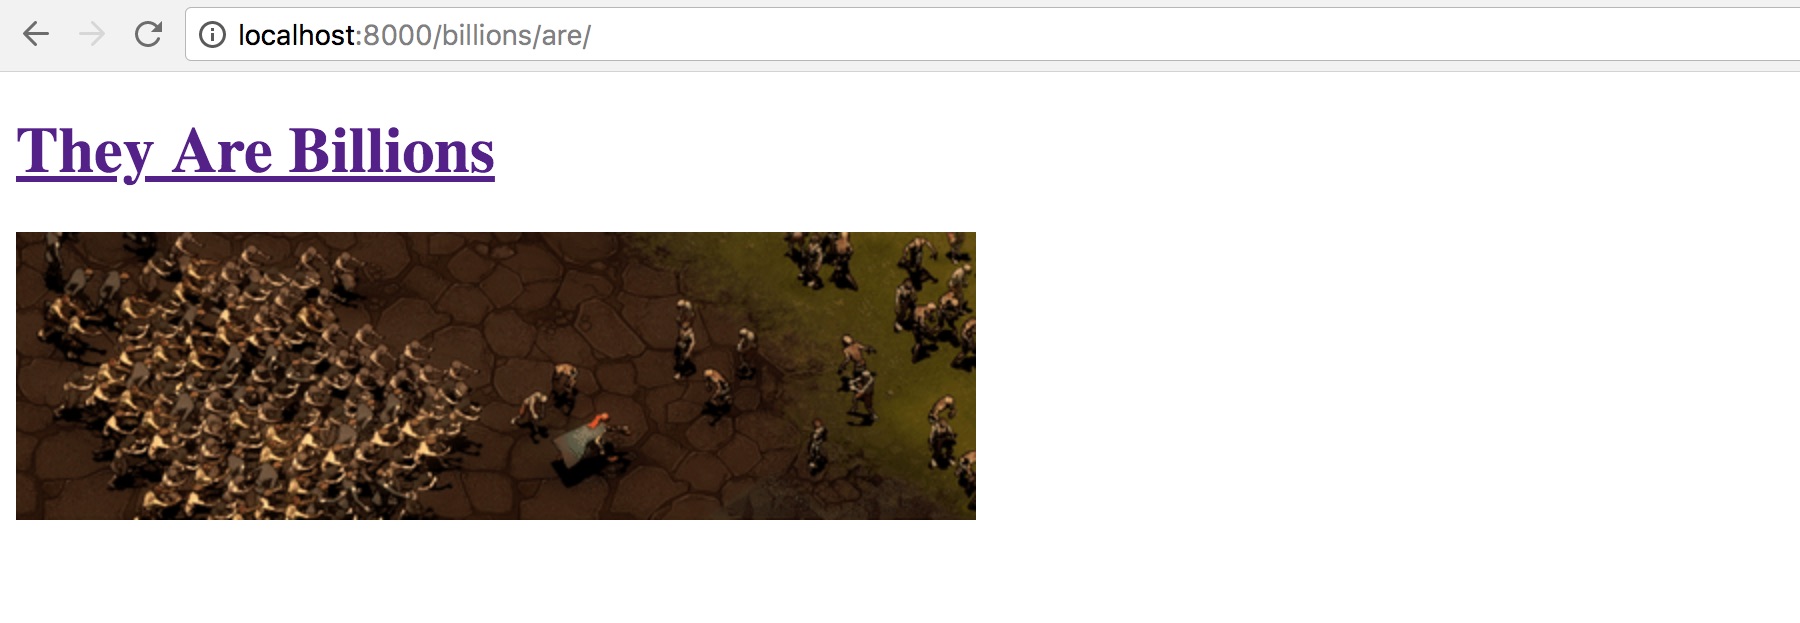
Cool, our application successfully rendered a super-simple HTML page
with a GIF of one of my favorite computer games. What if we try another
path under /billions/ such as "http://localhost:8000/billions/arenot/"?
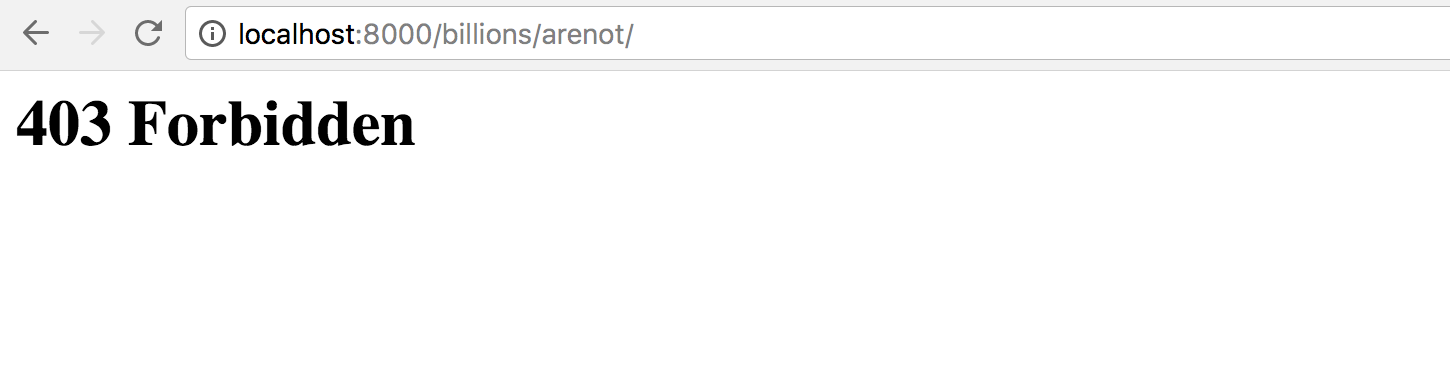
Our 403 Forbidden is raised, which is what we expected based on our code.
That is a somewhat contrived block of code but let's see how we can
catch and report this type of error without changing our views.py
code at all. This approach will be much easier on us when modifying an
existing application than having to refactor the code to report on
these types of errors, if we even know where they exist.
Monitoring with Rollbar
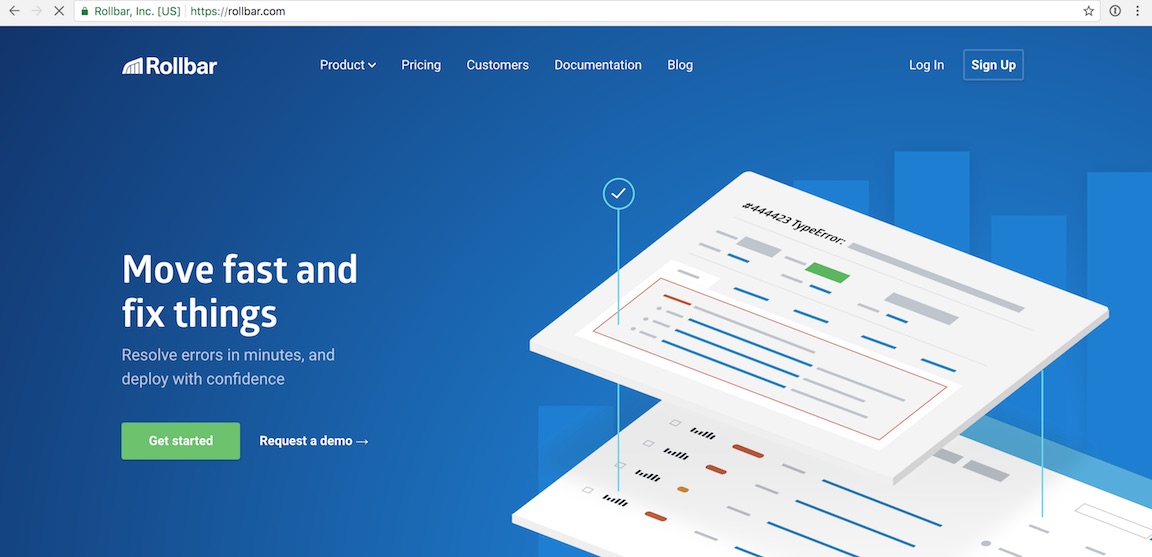
Go to the Rollbar homepage in your browser to add their tool to our Django app.
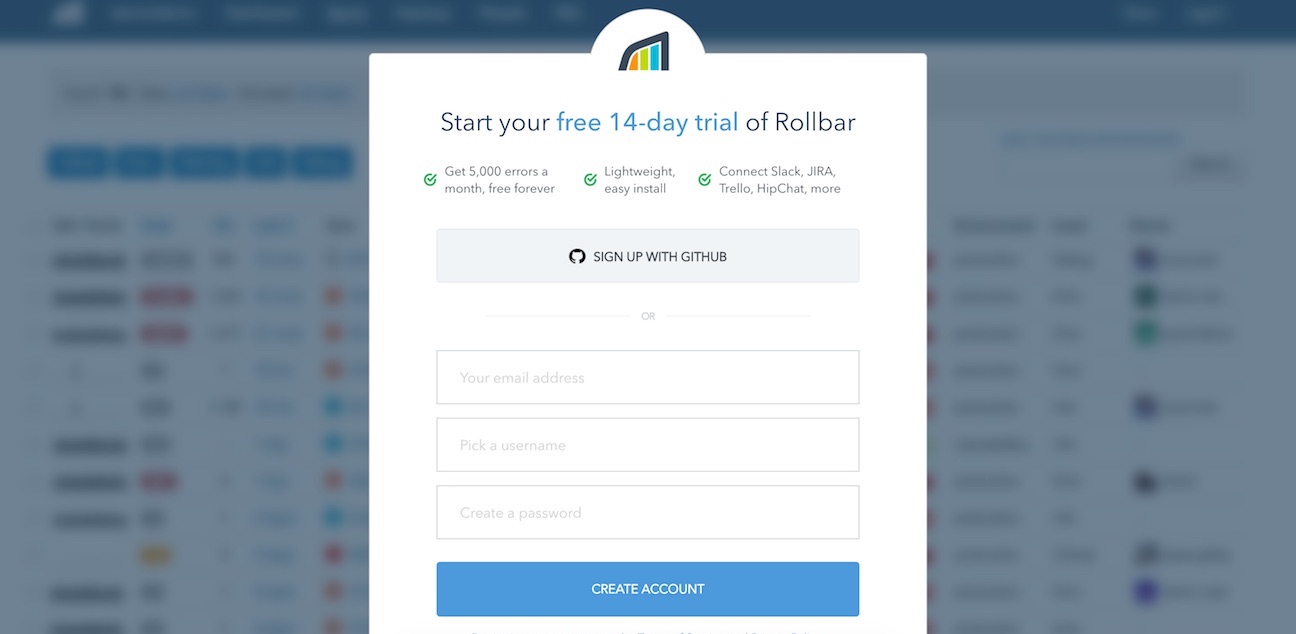
Click the "Sign Up" button in the upper right-hand corner. Enter your email address, a username and the password you want on the sign up page.
After the sign up page you will see the onboarding flow where you can enter a project name and select a programming language. For the project name type in "Full Stack Python" (or whatever project name you are working on) then select that you are monitoring a Python-based application.
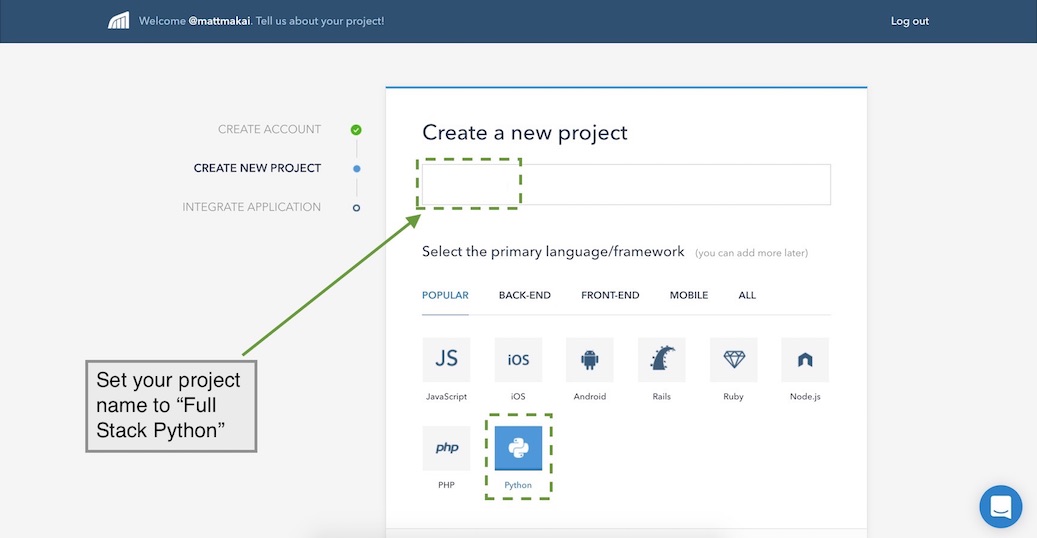
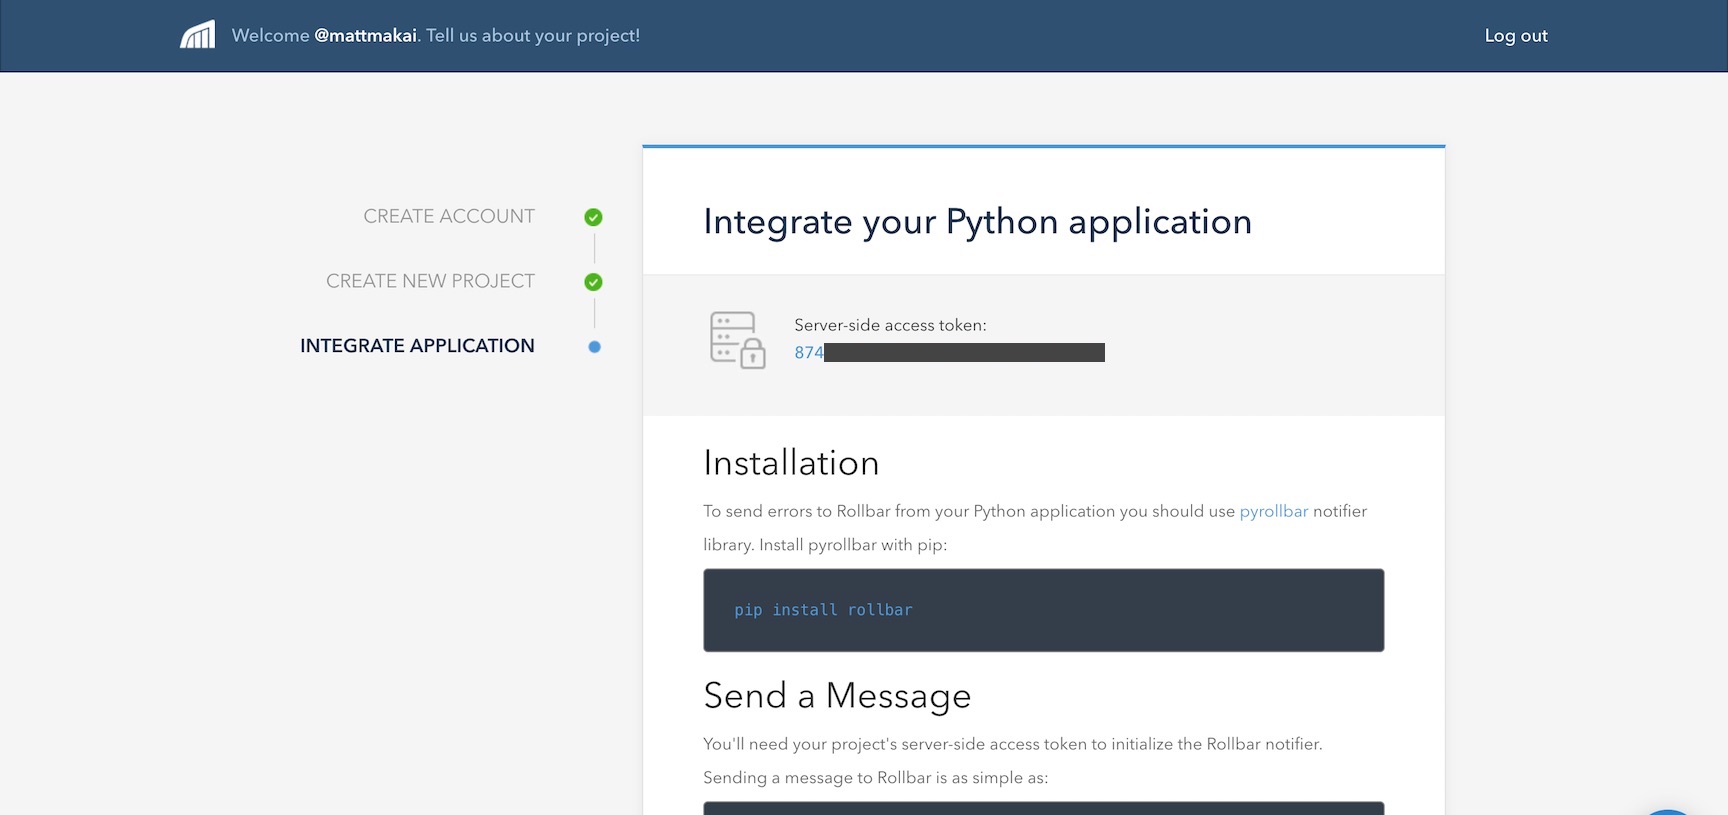
Press the "Continue" button at the bottom to move along. The next screen shows us a few instructions on how to add monitoring.
Let's change our Django project code to let Rollbar collect and aggregate the errors that pop up in our application.
Re-open djmonitor/djmonitor/settings.py and look for the MIDDLEWARE
list. Add rollbar.contrib.django.middleware.RollbarNotifierMiddleware
as the last item:
MIDDLEWARE = [
    'django.middleware.security.SecurityMiddleware',
    'django.contrib.sessions.middleware.SessionMiddleware',
    'django.middleware.common.CommonMiddleware',
    'django.middleware.csrf.CsrfViewMiddleware',
    'django.contrib.auth.middleware.AuthenticationMiddleware',
    'django.contrib.messages.middleware.MessageMiddleware',
    'django.middleware.clickjacking.XFrameOptionsMiddleware',
    'rollbar.contrib.django.middleware.RollbarNotifierMiddleware',
]
Do not close settings.py just yet. Next add the following lines
to the bottom of the file. Change the access_token value to your
Rollbar server side access token and root to the directory where
you are developing your project.
ROLLBAR = {
    'access_token': 'access token from dashboard',
    'environment': 'development' if DEBUG else 'production',
    'branch': 'master',
    'root': '/Users/matt/devel/py/blog-code-examples/monitor-django-apps/djmonitor',
    'patch_debugview': False,
}
If you are uncertain about what your secret token is, it can be found on the Rollbar onboarding screen or "Settings" -> "Access Tokens" within rollbar.com.
Note that I typically store all my environment variables in a .env
We can test that Rollbar is working as we run our application. Run it now using the development server.
python manage.py runserver
Back in your web browser press the "Done! Go to Dashboard" button.
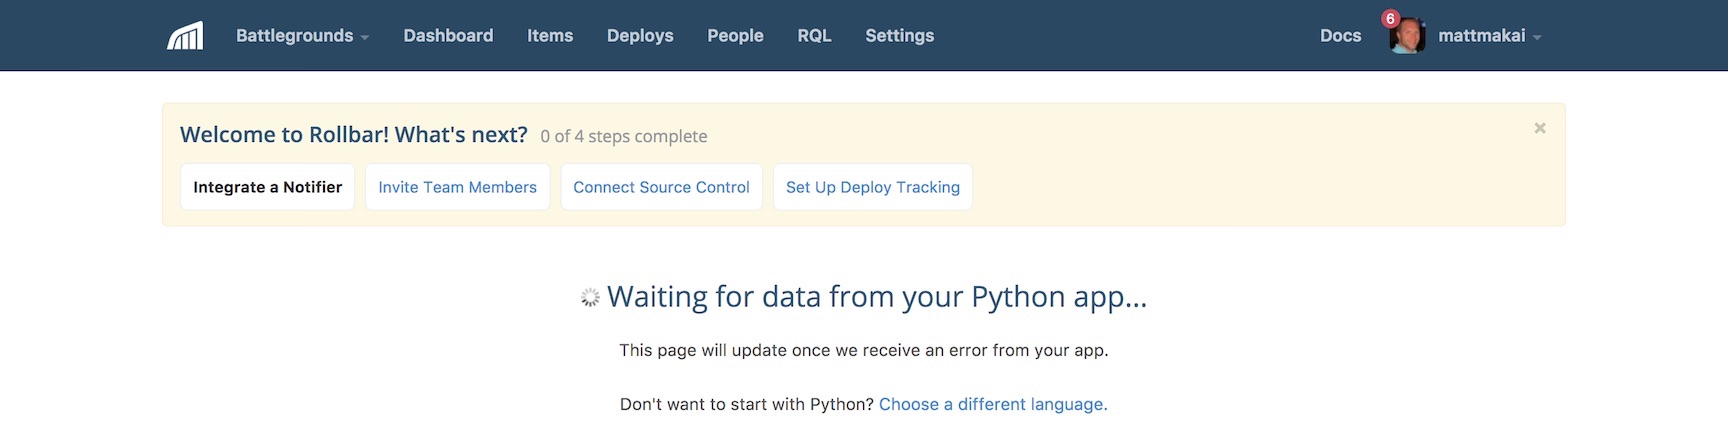
If an event hasn't been reported yet we'll see a waiting screen like this one:
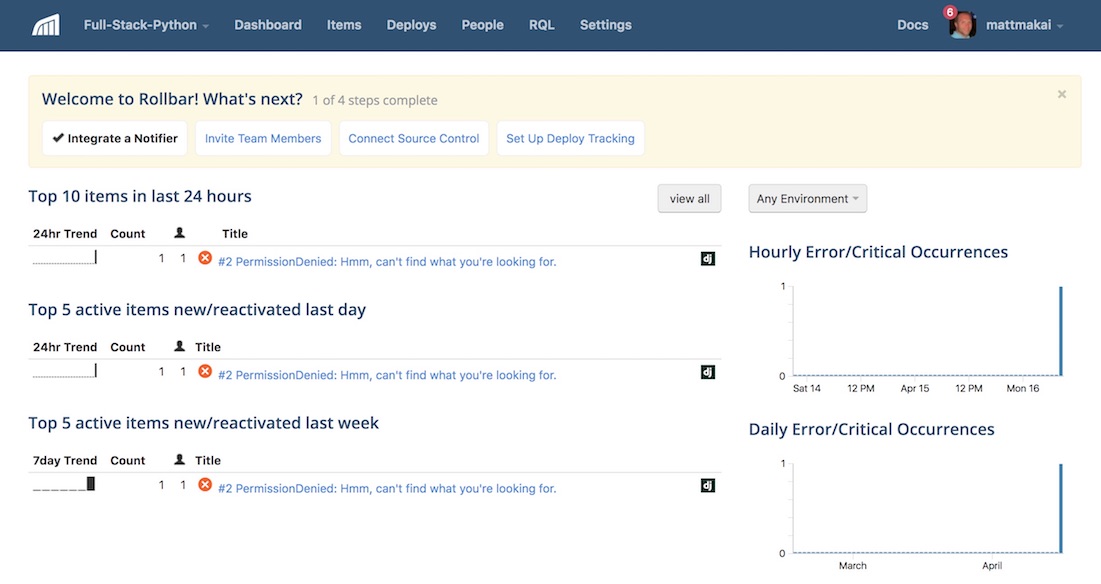
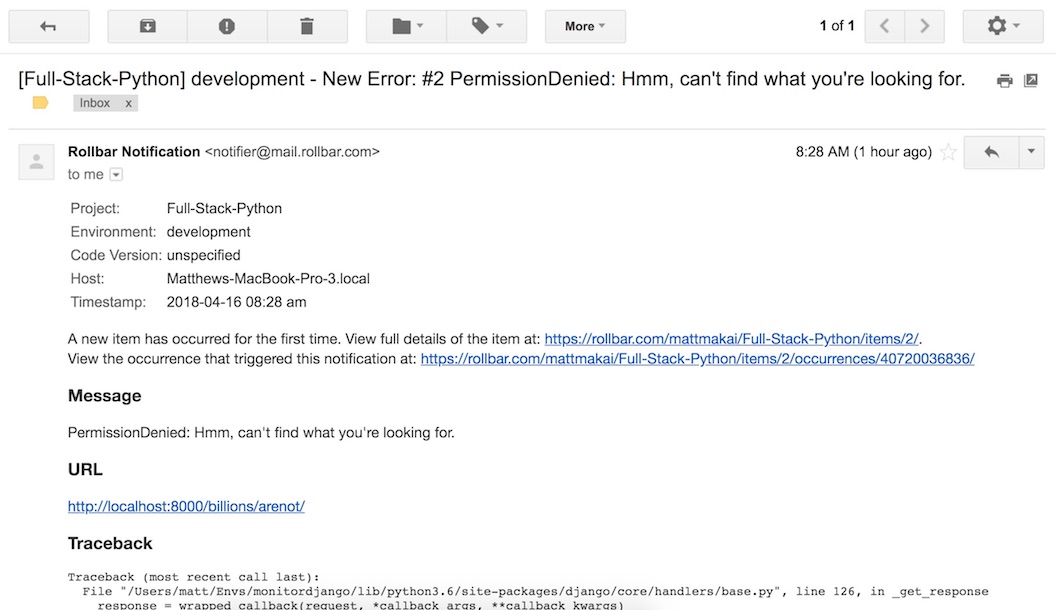
Make sure your Django development still server is running and try to go to "http://localhost:8000/billions/arenot/". A 403 error is immediately reported on the dashboard:
We even get an email with the error (which can also be turned off if you don't want emails for every error):
Alright we now have monitoring and error reporting all configured for our Django application!
What now?
We learned to catch issues in our Django project using Rollbar and view the errors in Rollbar's interface. Next try out Rollbar's more advanced monitoring features such as:
There is plenty more to learn about in the areas of web development and deployments so keep learning by reading about web frameworks. You can also learn more about integrating Rollbar with Python applications via their Python documentation.
Questions? Let me know via a GitHub issue ticket on the Full Stack Python repository, on Twitter @fullstackpython or @mattmakai.
Do you see a typo, syntax issue or wording that's confusing in this blog post? Fork this page's source on GitHub and submit a pull request with a fix or file an issue ticket on GitHub.
Recommend
About Joyk
Aggregate valuable and interesting links.
Joyk means Joy of geeK