

How to Provision Ubuntu 18.04 LTS Linux Servers on DigitalOcean
source link: https://www.fullstackpython.com/blog/provision-ubuntu-1804-linux-servers-digitalocean.html
Go to the source link to view the article. You can view the picture content, updated content and better typesetting reading experience. If the link is broken, please click the button below to view the snapshot at that time.
Python web applications need to be deployed to a production server or service so your users have access to the application.
DigitalOcean is one such service that makes it easy to immediately get access to initially free servers which are low cost (~$5 per month depending on the resources) to continue using after the first few months.
In this tutorial we'll learn how to quickly sign up and spin up an Ubuntu-based Linux server that only you will have access to based on a private SSH key.
Obtain Your Virtual Server
These steps sign you up for a DigitalOcean account and guide you through provisioning a virtual private server called a "Droplet" for $5/month which we configure throughout the rest of the book.
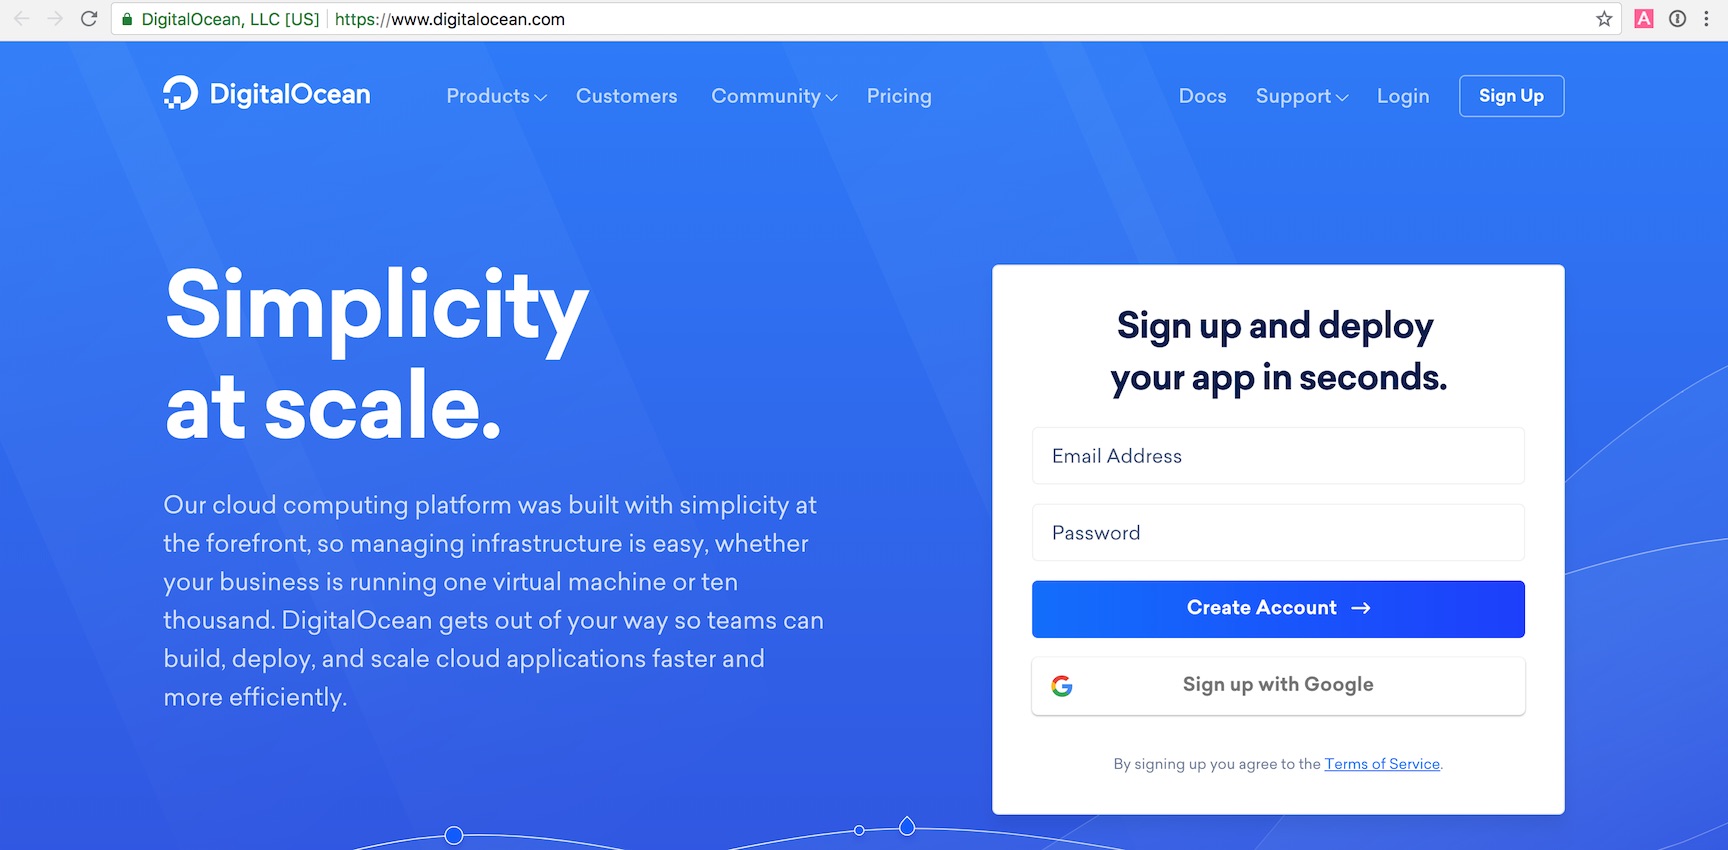
Point your web browser to Digitalocean.com's registration page. Note that this link uses a referral code which gives you $100 in free credit. Feel free to just go to digitalocean.com if you do not want to use the referral link (you will not get the $100 in credit though). Their landing page will look something like the following image.
Register for a new DigitalOcean account. Fill out the appropriate information. When your account is registered and active you can create a new DigitalOcean server, which they call "droplets".
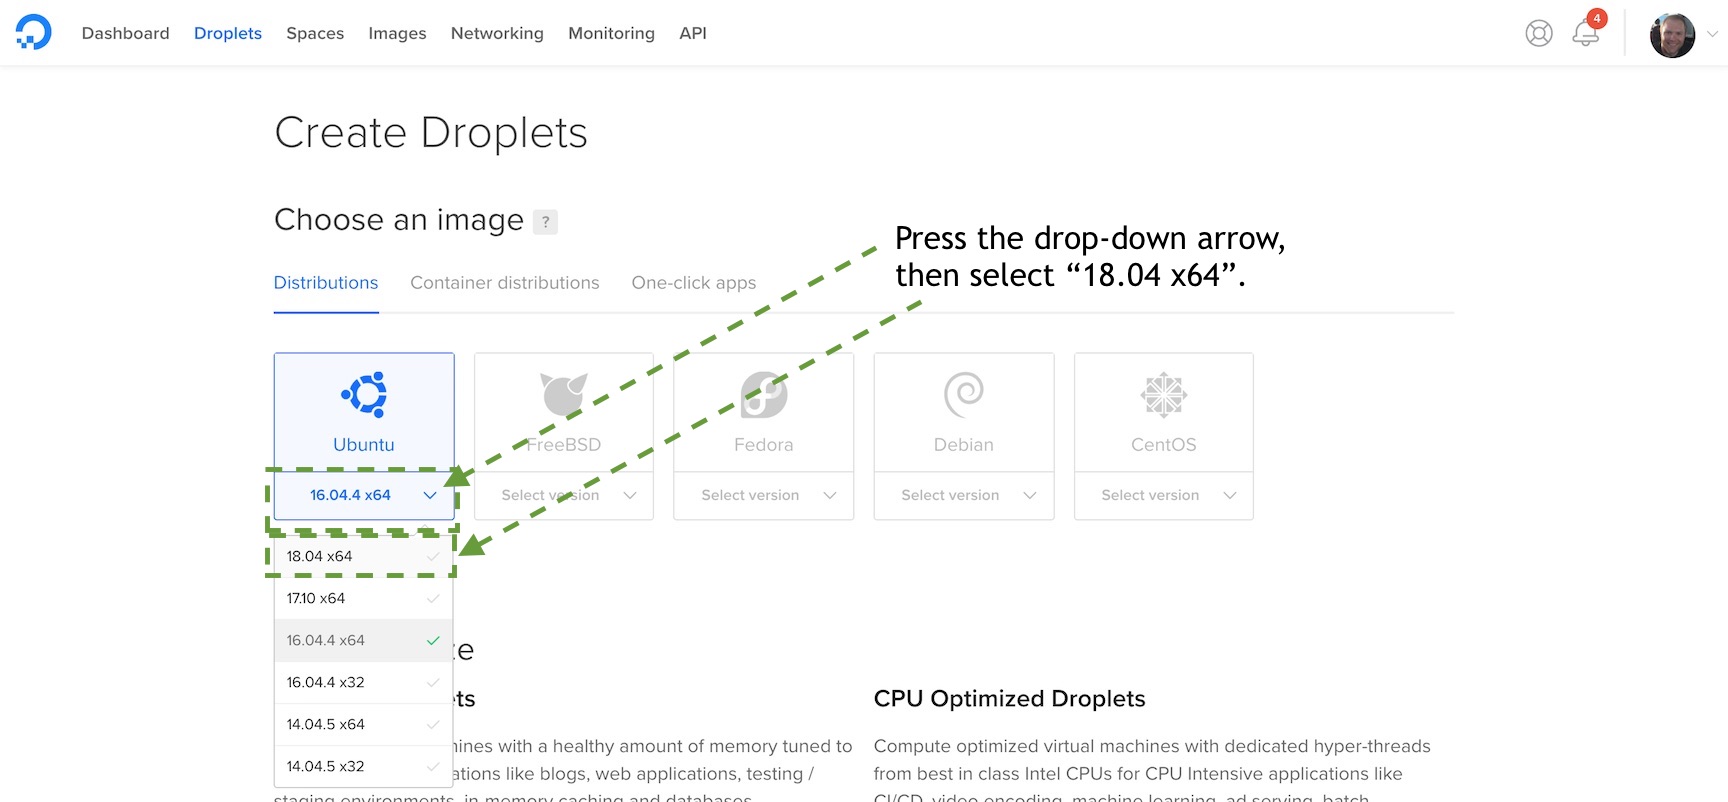
After you finish the registration process you will be able to start creating DigitalOcean servers. Select the "Create" button which opens a drop-down menu. Choose "Droplets" to go to the "Create Droplets" page.

The new droplet configuration screen will appear and look like the following image. The default Ubuntu instance is 16.04, but we will use the newer LTS release 18.04 in this book.
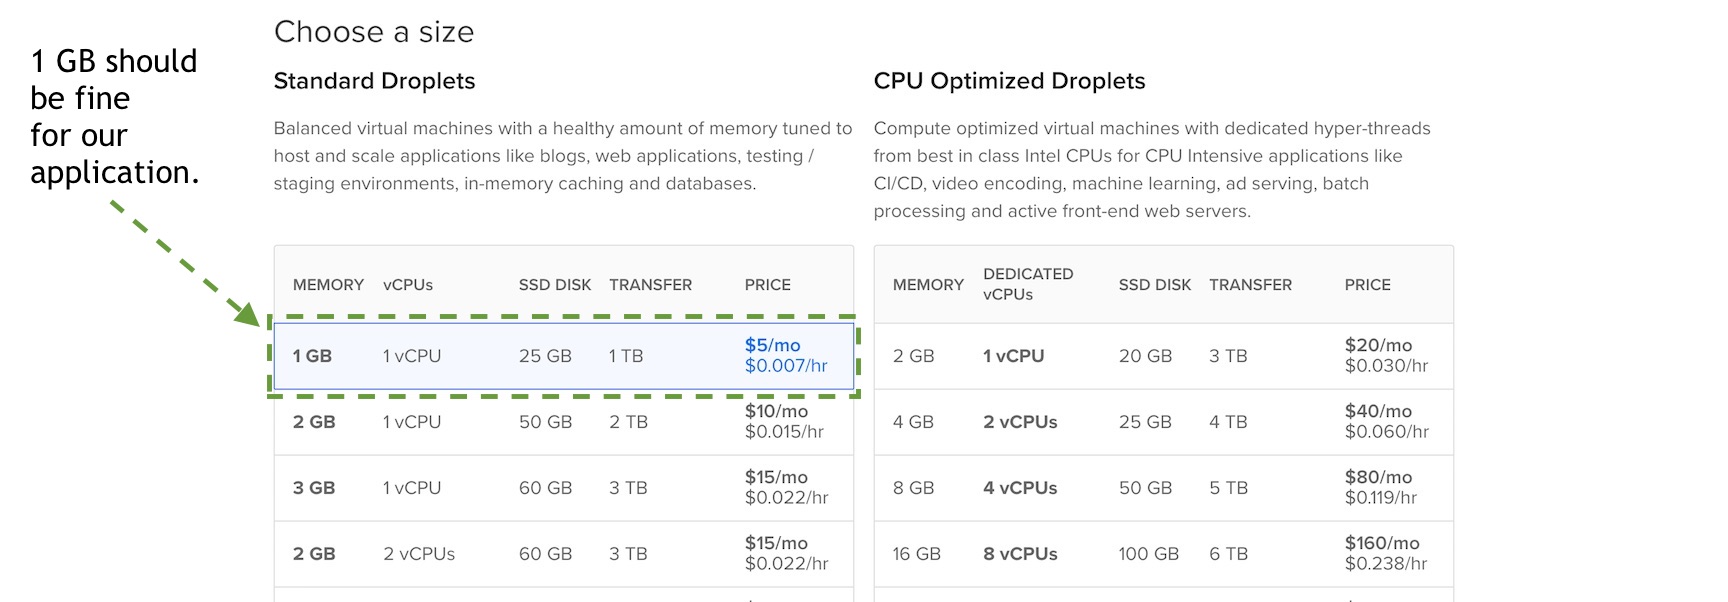
Select the 1 GB memory-sized server for $5 per month. This instance size should be perfect for prototypes, side projects and minimum viable products. Feel free to choose a larger instance size if you want more memory and resources for running your application.
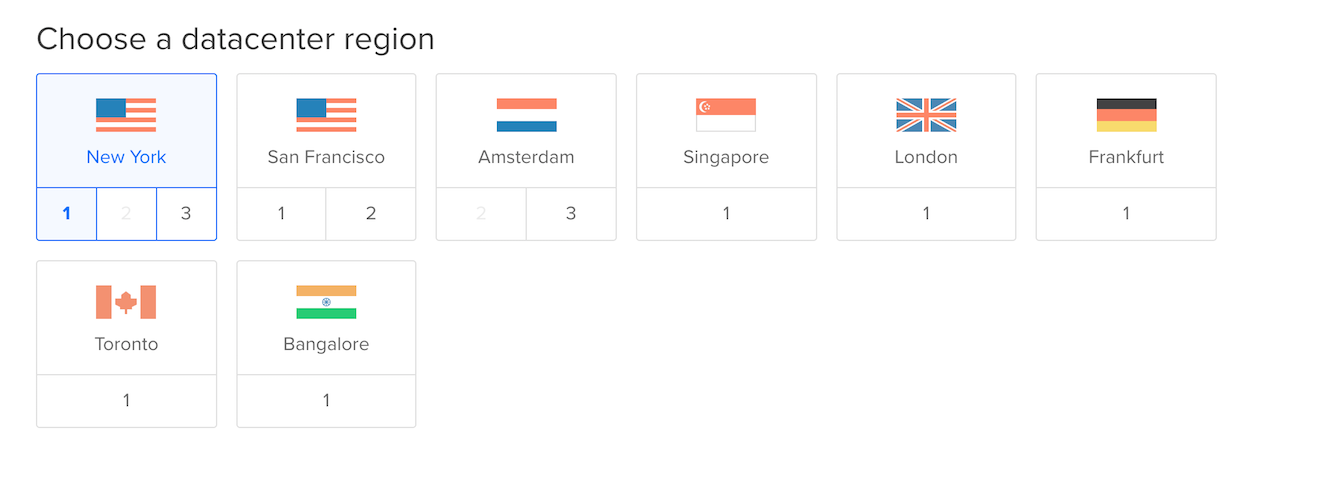
Scroll down and choose the data center region where you want your instance to be located. I typically choose New York because I am on the East Coast of the United Statest in Washington, D.C., and you will want the server to be closest to your users' location.
Next, scroll down and click "New SSH Key". Copy and paste in the contents of your public SSH key. If you do not yet have an SSH key here are a couple of guides that will walk you through creating one:
You can see the contents of a public key using the cat command. For
example on my system the command:
cat root.pub
Outputs the contents of my public key:
ssh-rsa AAAAB3NzaC1yc2EAAAADAQABAAACAQCqAY/Le17HZpa4+eSoh2L9FMYaQ7EnLOGkYbcbsiQNpnF4FTAemF7tbvMvjpVLU6P9AVGs6qEeJdgTE2gH8fq881AUsQ8it1gla2oAlc+vOZmqWPYaLIl5g9DkGwvbITXayobDcw9wTN5tOITOxp3BV5jqanqoqDAPH1RGfT6A5vkJFsmu4w7cPsn9tiqfZZdge3WkpMNT1M3ou+ogrAwE6Ra531s3zYVG9y1688BGdYzbQFfU0+Pou6Z43Do6xbh2hAfQ5hUuTG0OrE3b/yhGcxEWz0Y9+wPGmxm3/0ioTfMWUG3LOQn+oMtKX/PXX/qOJuUjszbqYBvSYS3kv2IVFGV2KEIKC1xgUDfw+HOV4HlIosIbc97zY83m0Ft+tFavPaiQYrar3wCsVfRUltSR4EwNnLmvNYeMVSS8jSP2ZSPwbL8GO7xxAAS9Oy12set1f4OxdPhEUB9rEfAssU1mE6J5eq+Drs8KX04OasLSLt7kP7wWA27I9pU/y9NRHxEsO0YbLG7DzfHGl4QVXwDjIA5GpwjQMwZLt+lyGc4hpnuXg+IUR6MXI90Hh64ch32nSC8j/hjnWCWgj8Cyuc4Rd/2OtO5dHpbjSyU5Yza2lzIqFbFRo7aQNaIkBIioJnc1d6mrg9mLxfd5Ef2ez9bUjqcq4K7uH/JAm0H2Vk1VFQ== [email protected]
Copy and paste this key into the DigitalOcean modal window and give it a memorable name for future reference:
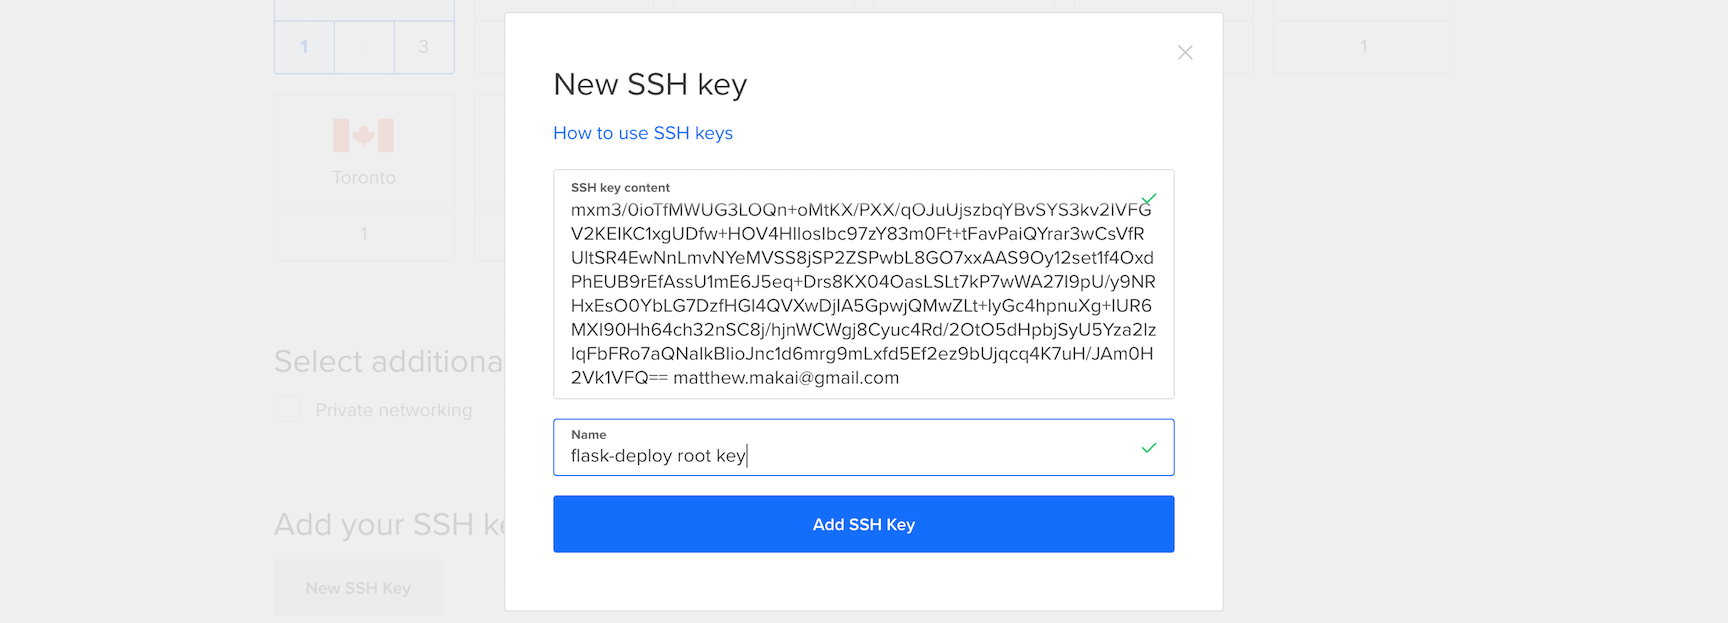
Optionally, give your server a nickname such as flask-deploy-manual.
Then click the big green "Create" button at the bottom of the screen.
The server provisioning process will begin and our Ubuntu Linux 18.04 LTS-powered will soon be ready to go.
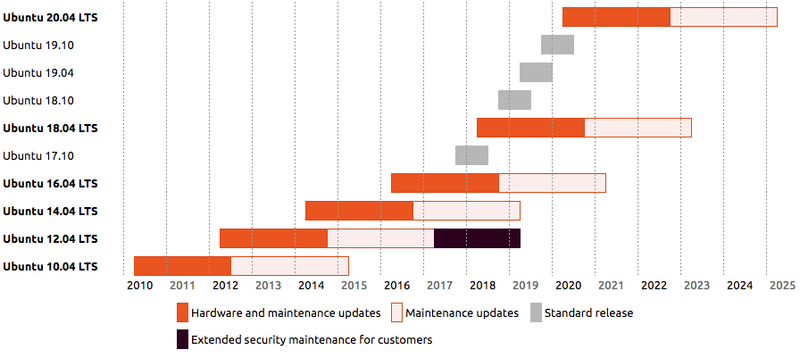
Ubuntu 18.04 is the current Long Term Support (LTS) release and has a 5 year support lifecycle. This version will receive security updates until April 2023 as shown on the Ubuntu release end-of-life page.
You should now be back on the DigitalOcean dashboard.
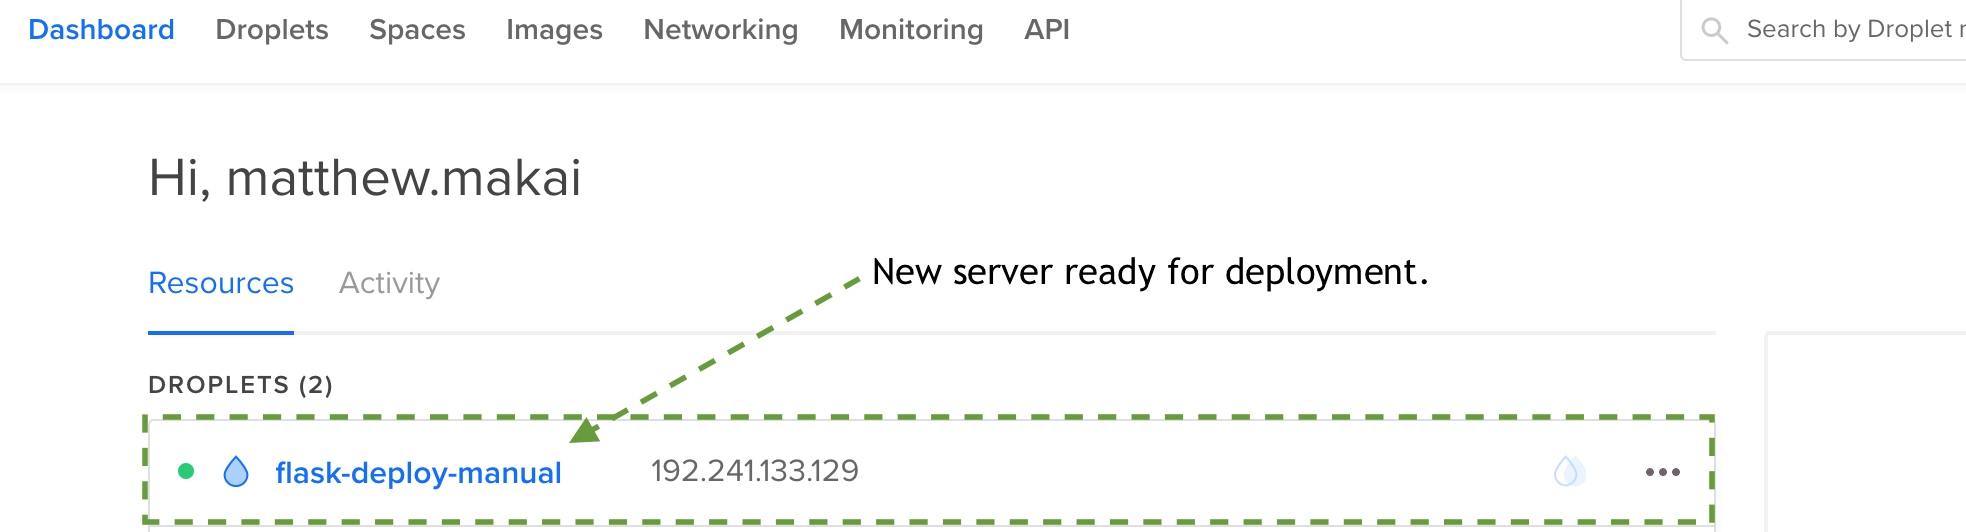
Our server is now up and ready for SSH access.
Connect to the server using the IP address associated with it:
# make sure to replace 192.168.1.1 with your server's IP address
# and the "private_key" name with the name of your private key
ssh -i ./private_key 192.168.1.1
You should now be connected to your new server and can proceed with development or deployment.
What's Next?
We just stood up a new virtual private server on DigitalOcean that can be used as a production or development environment.
Next up I recommend either configuring the development environment or deploying your application with one of the following tutorials:
You can also figure out what to code next in your Python project by reading the Full Stack Python table of contents page.
Questions? Contact me via Twitter @fullstackpython or @mattmakai. I'm also on GitHub with the username mattmakai.
Something wrong with this post? Fork this page's source on GitHub and submit a pull request.
Recommend
About Joyk
Aggregate valuable and interesting links.
Joyk means Joy of geeK