

WSL初体验
source link: https://eelve.com/archives/hellowsl
Go to the source link to view the article. You can view the picture content, updated content and better typesetting reading experience. If the link is broken, please click the button below to view the snapshot at that time.
【前面的话】WSL是Windows Subsystem for Linux的缩写,今天就来体验一把。
壹、安装WSL
1.1 启用或关闭Windows功能
在搜索栏中搜索并打开“启用或关闭Windows功能”,勾选“适用于Linux的Windows子系统”项。只有开启这项设置才能正常安装WSL。然后按照提示稍后重启。
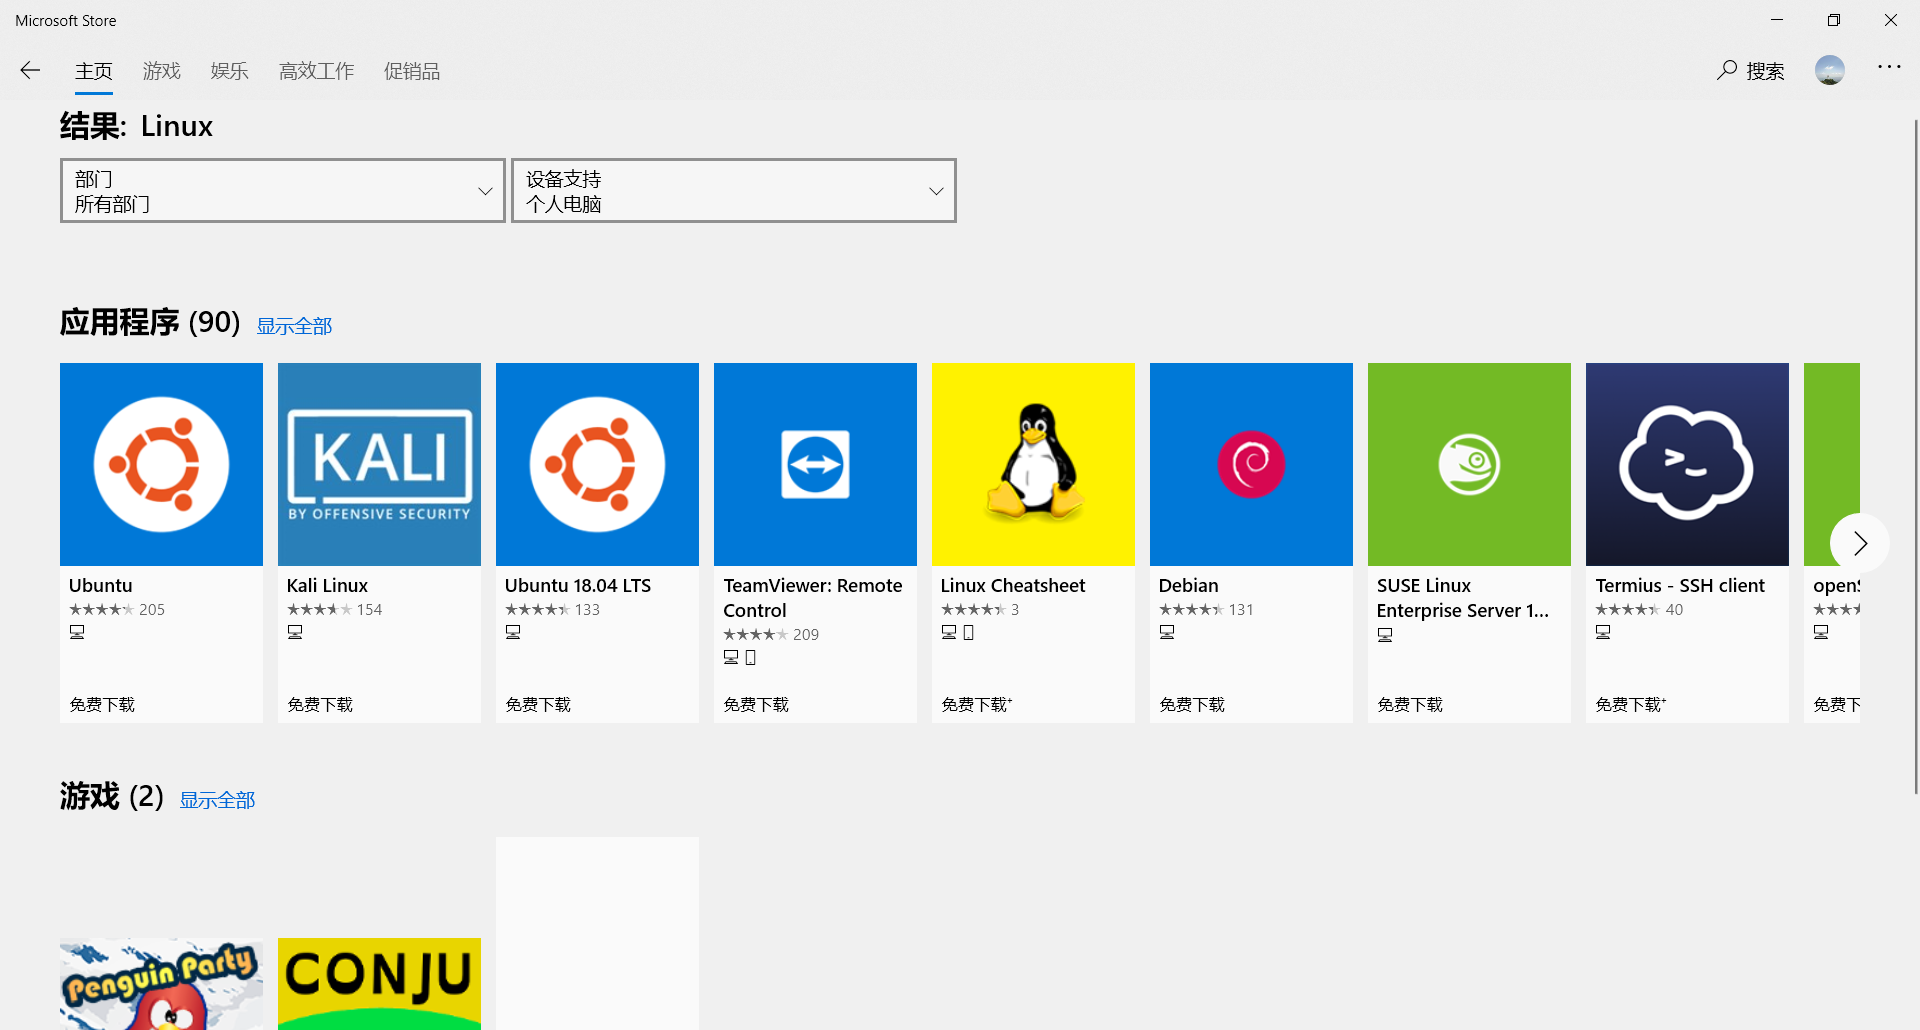
1.2 安装子系统
在微软应用商店搜索 Linux,可以看到一系列 Linux 发行版,根据自己需要选择适合自己的发行版,这里我选用 Ubuntu 18.04 LTS。等待下载完成后启动 Ubuntu 18.04 LTS,等待安装完成,输入账户和密码,我们便得到了一个 Linux 环境了。
贰、使用技巧
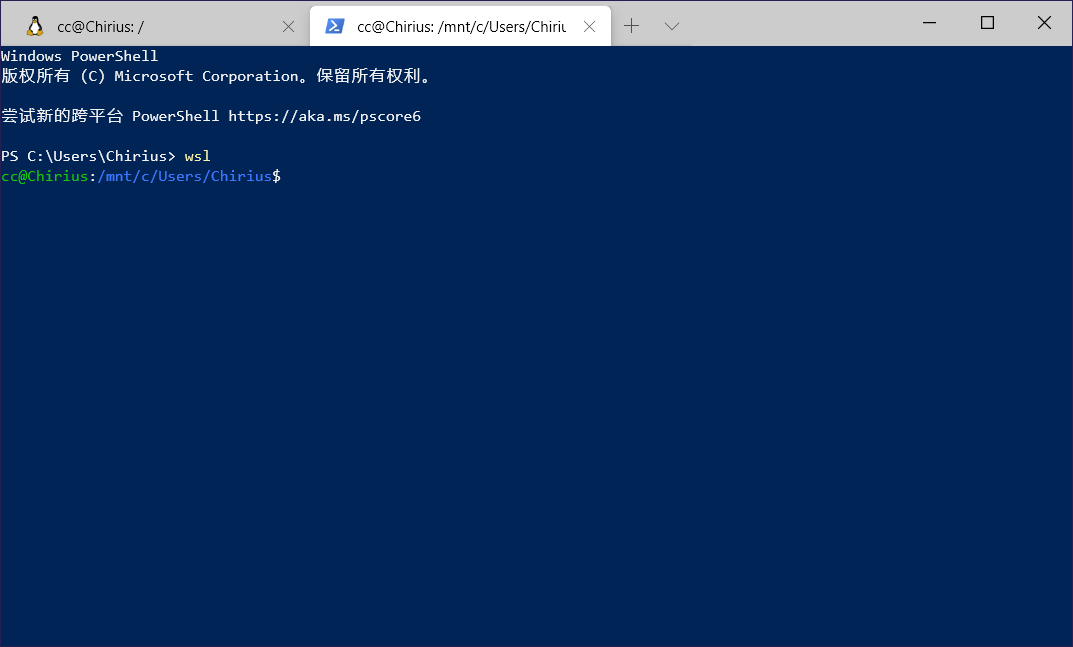
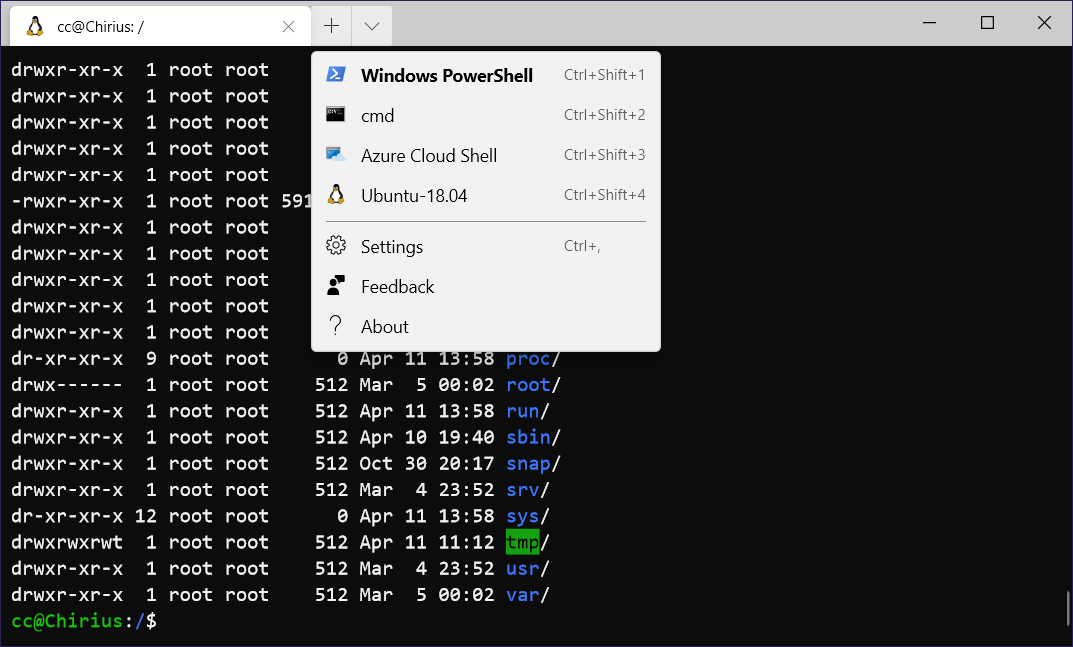
2.1使用其他命令行工具
为什么不推荐自带的命令行呢?因为不支撑复制,这样你就只用手敲各种命令了。这里我推荐Windows Terminal,然后在Windows Terminal中键入WSL,就可以进入命令行了或者直接选择Ubuntu 18.04。
2.2 更改源
Ubuntu 默认的 apt 源是国外的源,实在是太慢了,这里换成阿里云的源。
2.2.1 首先复制源文件备份,便于以后恢复
sudo cp /etc/apt/sources.list /etc/apt/sources.list.bak2.2.2 查看版本信息
cc@Chirius:/mnt/c/Users/Chirius$ lsb_release -cCodename: bionic2.2.3 编辑源文件
cc@Chirius:/mnt/c/Users/Chirius$ sudo vim /etc/apt/sources.list2.2.4 根据 Ubuntu 版本号,添加相应内容:
deb http://mirrors.aliyun.com/ubuntu/ bionic main restricted universe multiverse deb-src http://mirrors.aliyun.com/ubuntu/ bionic main restricted universe multiverse deb http://mirrors.aliyun.com/ubuntu/ bionic-security main restricted universe multiverse deb-src http://mirrors.aliyun.com/ubuntu/ bionic-security main restricted universe multiverse deb http://mirrors.aliyun.com/ubuntu/ bionic-updates main restricted universe multiverse deb-src http://mirrors.aliyun.com/ubuntu/ bionic-updates main restricted universe multiverse deb http://mirrors.aliyun.com/ubuntu/ bionic-backports main restricted universe multiverse deb-src http://mirrors.aliyun.com/ubuntu/ bionic-backports main restricted universe multiverse deb http://mirrors.aliyun.com/ubuntu/ bionic-proposed main restricted universe multiverse deb-src http://mirrors.aliyun.com/ubuntu/ bionic-proposed main restricted universe multiverse然后保存退出
2.2.5 升级系统
cc@Chirius:/mnt/c/Users/Chirius$ sudo apt-get updatecc@Chirius:/mnt/c/Users/Chirius$ sudo apt-get upgrade叁、WSL 文件位置
如果想在 Linux 查看其他分区,WSL 将其它盘符挂载在 /mnt 下。
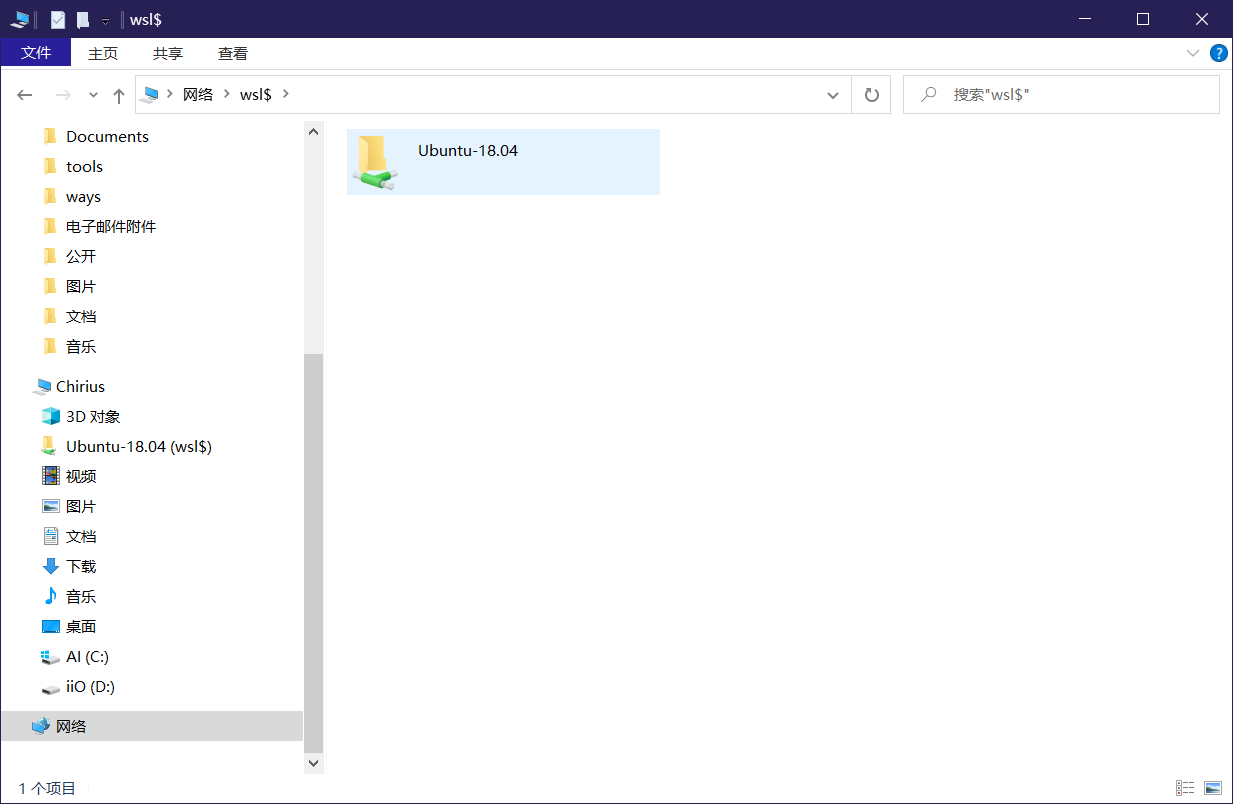
cc@Chirius:/$ cd mntcc@Chirius:/mnt$ lsc dcc@Chirius:/mnt$ pwd/mnt如果想在 Windows 下查看 WSL 文件位置,文件位置在:C:\Users\用户名\AppData\Local\Packages\CanonicalGroupLimited.Ubuntu18.04onWindows_79rhkp1fndgsc\LocalState\rootfs 下。
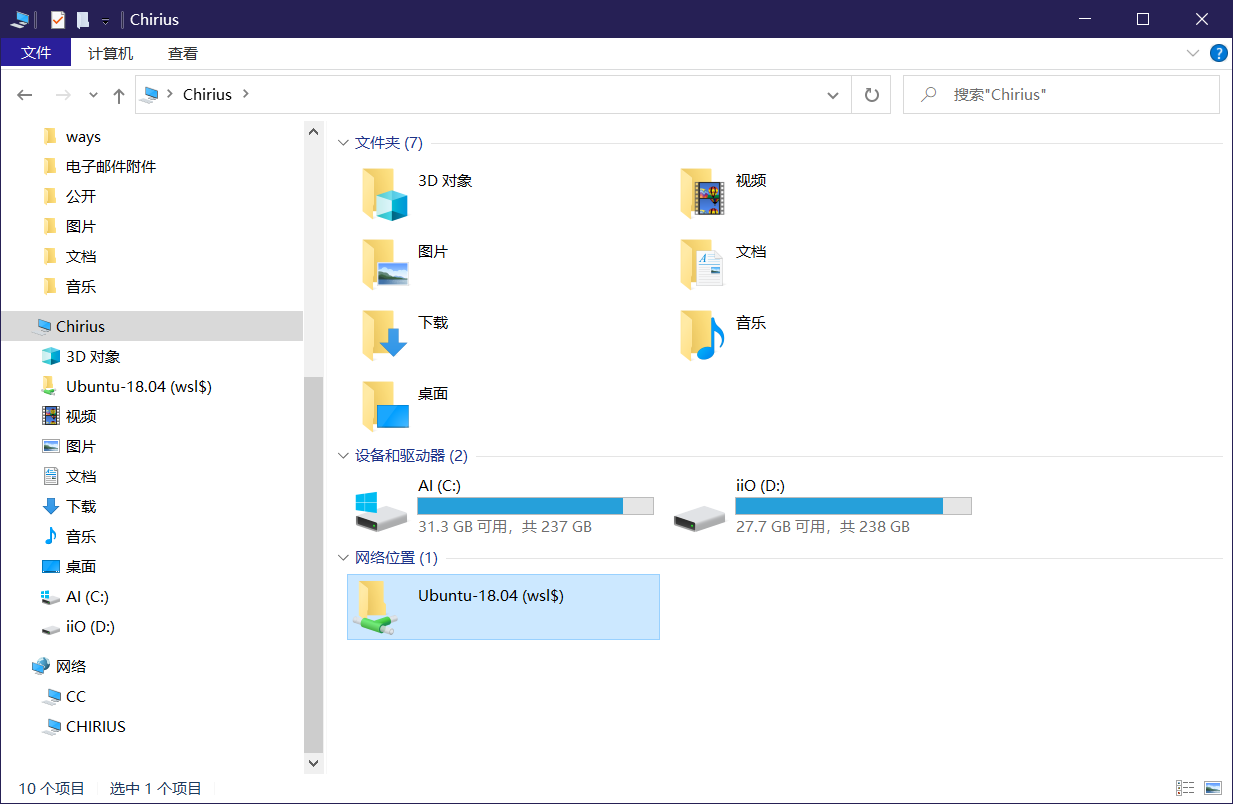
我们还可以在资源管理器中键入\\wsl$
然后我们还可以添加网络位置
肆、添加root密码
由于默认进入子系统之后是你添加的用户,当你需要root权限是可以通过sudo加上相应的命令解决。那还有另外一种方法:设置一个root用户的密码,然后切换到root用户去执行相应的命令。下面就说一下在子系统中设置root用户密码:
首先需要Windows管理员身份运行cmd或者PowerShell,然后执行下面命令
Windows PowerShell版权所有 (C) Microsoft Corporation。保留所有权利。 尝试新的跨平台 PowerShell https://aka.ms/pscore6 PS C:\Users\Chirius> wslcc@Chirius:/mnt/c/Users/Chirius$ sudo passwd root[sudo] password for cc:Enter new UNIX password:Retype new UNIX password:passwd: password updated successfullycc@Chirius:/mnt/c/Users/Chirius$ su rootPassword:root@Chirius:/mnt/c/Users/Chirius#我们可以看到就已经可以切换到root用户了。
【后面的话】在Windows2004版本中会发布WSL2,后面再来继续体验。

Recommend
About Joyk
Aggregate valuable and interesting links.
Joyk means Joy of geeK