

Camera Hacking and Emulation - Getting Started
source link: https://jam1.re/blog/camera-hacking-and-emulation
Go to the source link to view the article. You can view the picture content, updated content and better typesetting reading experience. If the link is broken, please click the button below to view the snapshot at that time.
Camera Hacking and Emulation - Getting Started
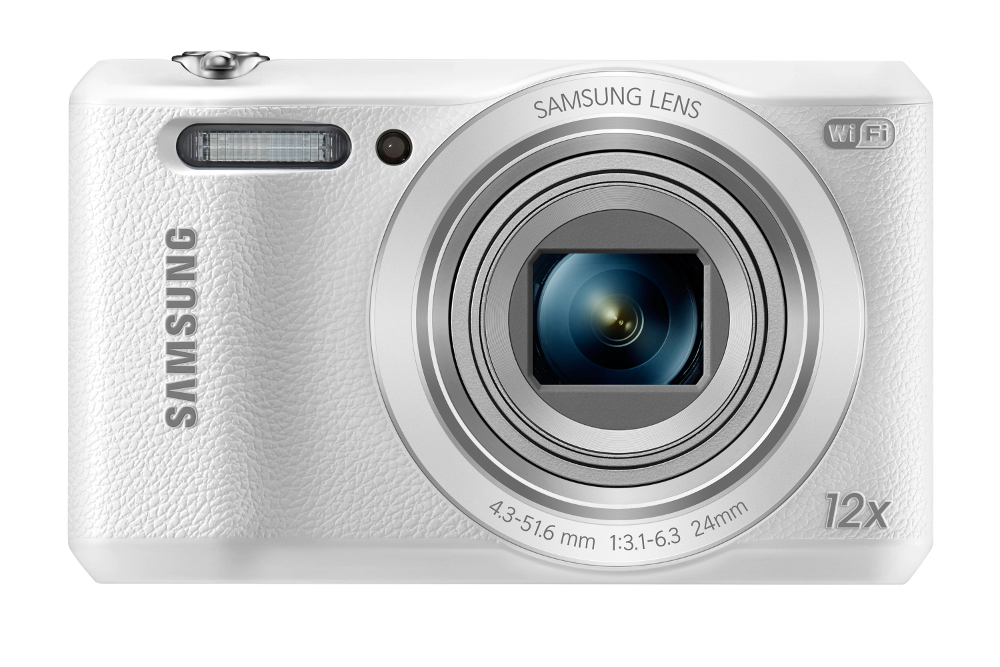
Back in early January I decided to issue a challenge to myself—pick up a device and hack it. The goal being to, without any other's work to go off of, get code execution. My chosen target the Samsung wb35f "Smart Camera" has turned out to be a great selection so far, a wonderful mix of documentation-less hardware, outdated software and a trail of discontinued supported technologies.
Recon
So considering I knew absolutely nothing about this camera that had been sitting on a shelf gathering dust for a couple years, I first needed to get an understanding of the camera itself to know what I was working with. My rather unsuccessful process for this was composed of digging around online for any useful hardware specs, previous research, and features. Ultimately this didn't turn up much, with any specs being focused on the zoom/camera quality (simply unbelievable we live in an age where someone thinks the resolution of a camera is more important than the serial number for its chip...). However features its "SMART features" provide a promising attack surface:
- Share your best photos instantly with Family and Friends with Built-in Wi-Fi with NFC
- SMART features - Social Media Upload, E-mail, Photo beam, Direct Link, Mobile Link, PC Auto-backup, Remote Viewfinder, All Share
Since this was the only thing I had to go off of at the time, I played around with the camera some to see how the features work. The "Share with smartphone" feature especially intrigued me as it opens an unsecured WiFi network designed for an android phone to connect to while using some Samsung Camera app. After connecting to the annoyingly-short-lifetime network, I ran a quick nmap scan in an attempt to see what I had to work with, resulting in the following findings:
Camera ip during "files from Smartphone" mode:
192.168.101.1

Open Ports during "Select Files from Smartphone" mode:
49152/tcp
49153/tcp

-----------------------------------------------------

Camera ip during "Remote viewfinder" mode:
192.168.102.1

Open Ports during "Remote viewfinder" mode:
49152/tcp
49153/tcp
Armed with this knowledge, I proceeded to pull the companion app from the google play CDN and threw it into a run of the mill Java decompiler in order to get a better understanding of what requests were being made by the phone. While I found what HTTP endpoints were exposed, I had no luck crafting a request that wasn't rejected by the Camera. Growing increasingly frustrated with connecting to a WiFi network that closed after 2-3 minutes, I figured I'd have more luck reading assembly than I was having reading the spaghetti Java code. (Brief notes on the network available here)
Getting the firmware
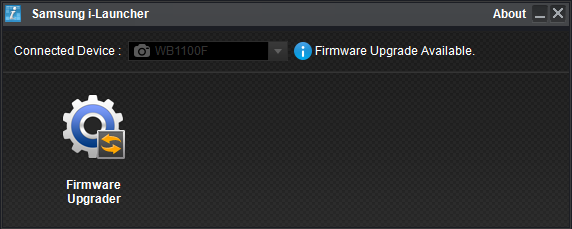
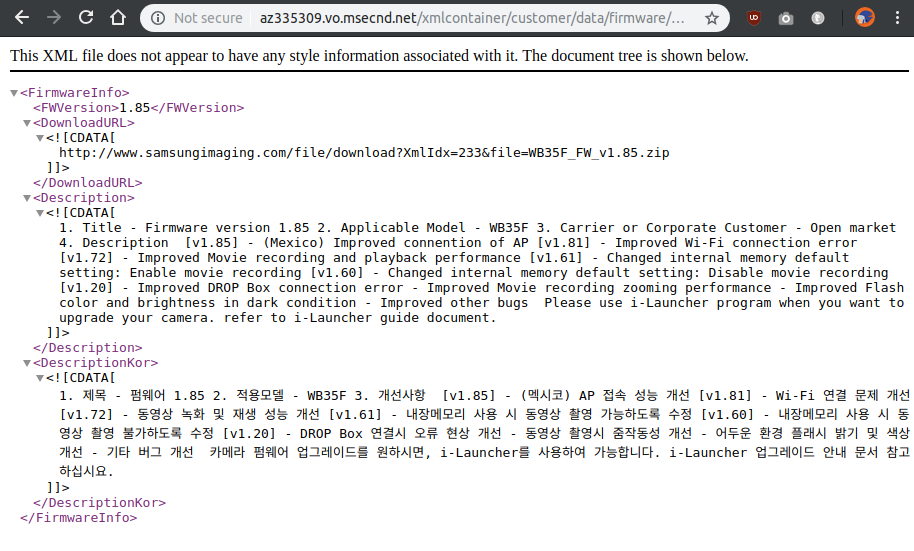
The process of getting the firmware was rather simple due to a lack of encryption/authentication by the updating process and the fact there is an update process in the first place. The process consisted of Downloading the iLauncher firmware installer from Samsung, inspecting HTTP requests with Wireshark and plugging in the camera. Then just going through the requests to a Samsung domain, finding the download link to the firmware zip in an XML document.
If you'd like to save yourself the effort of replicating while still following along, I've made a simple firmware downloader for the WB35F's firmware. All it does is request the XML file, download the zip from the provided link, and unzip the file.
Teardown
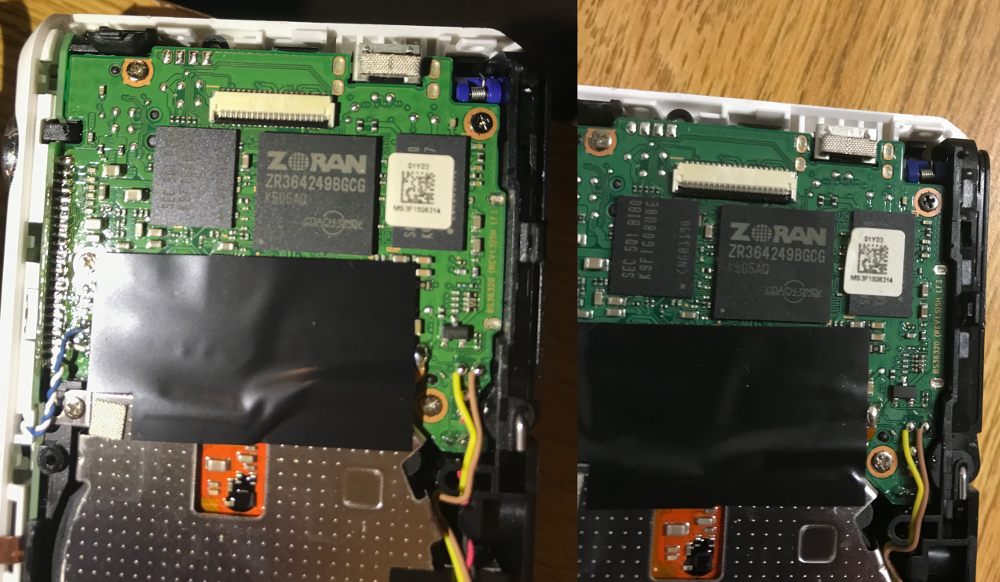
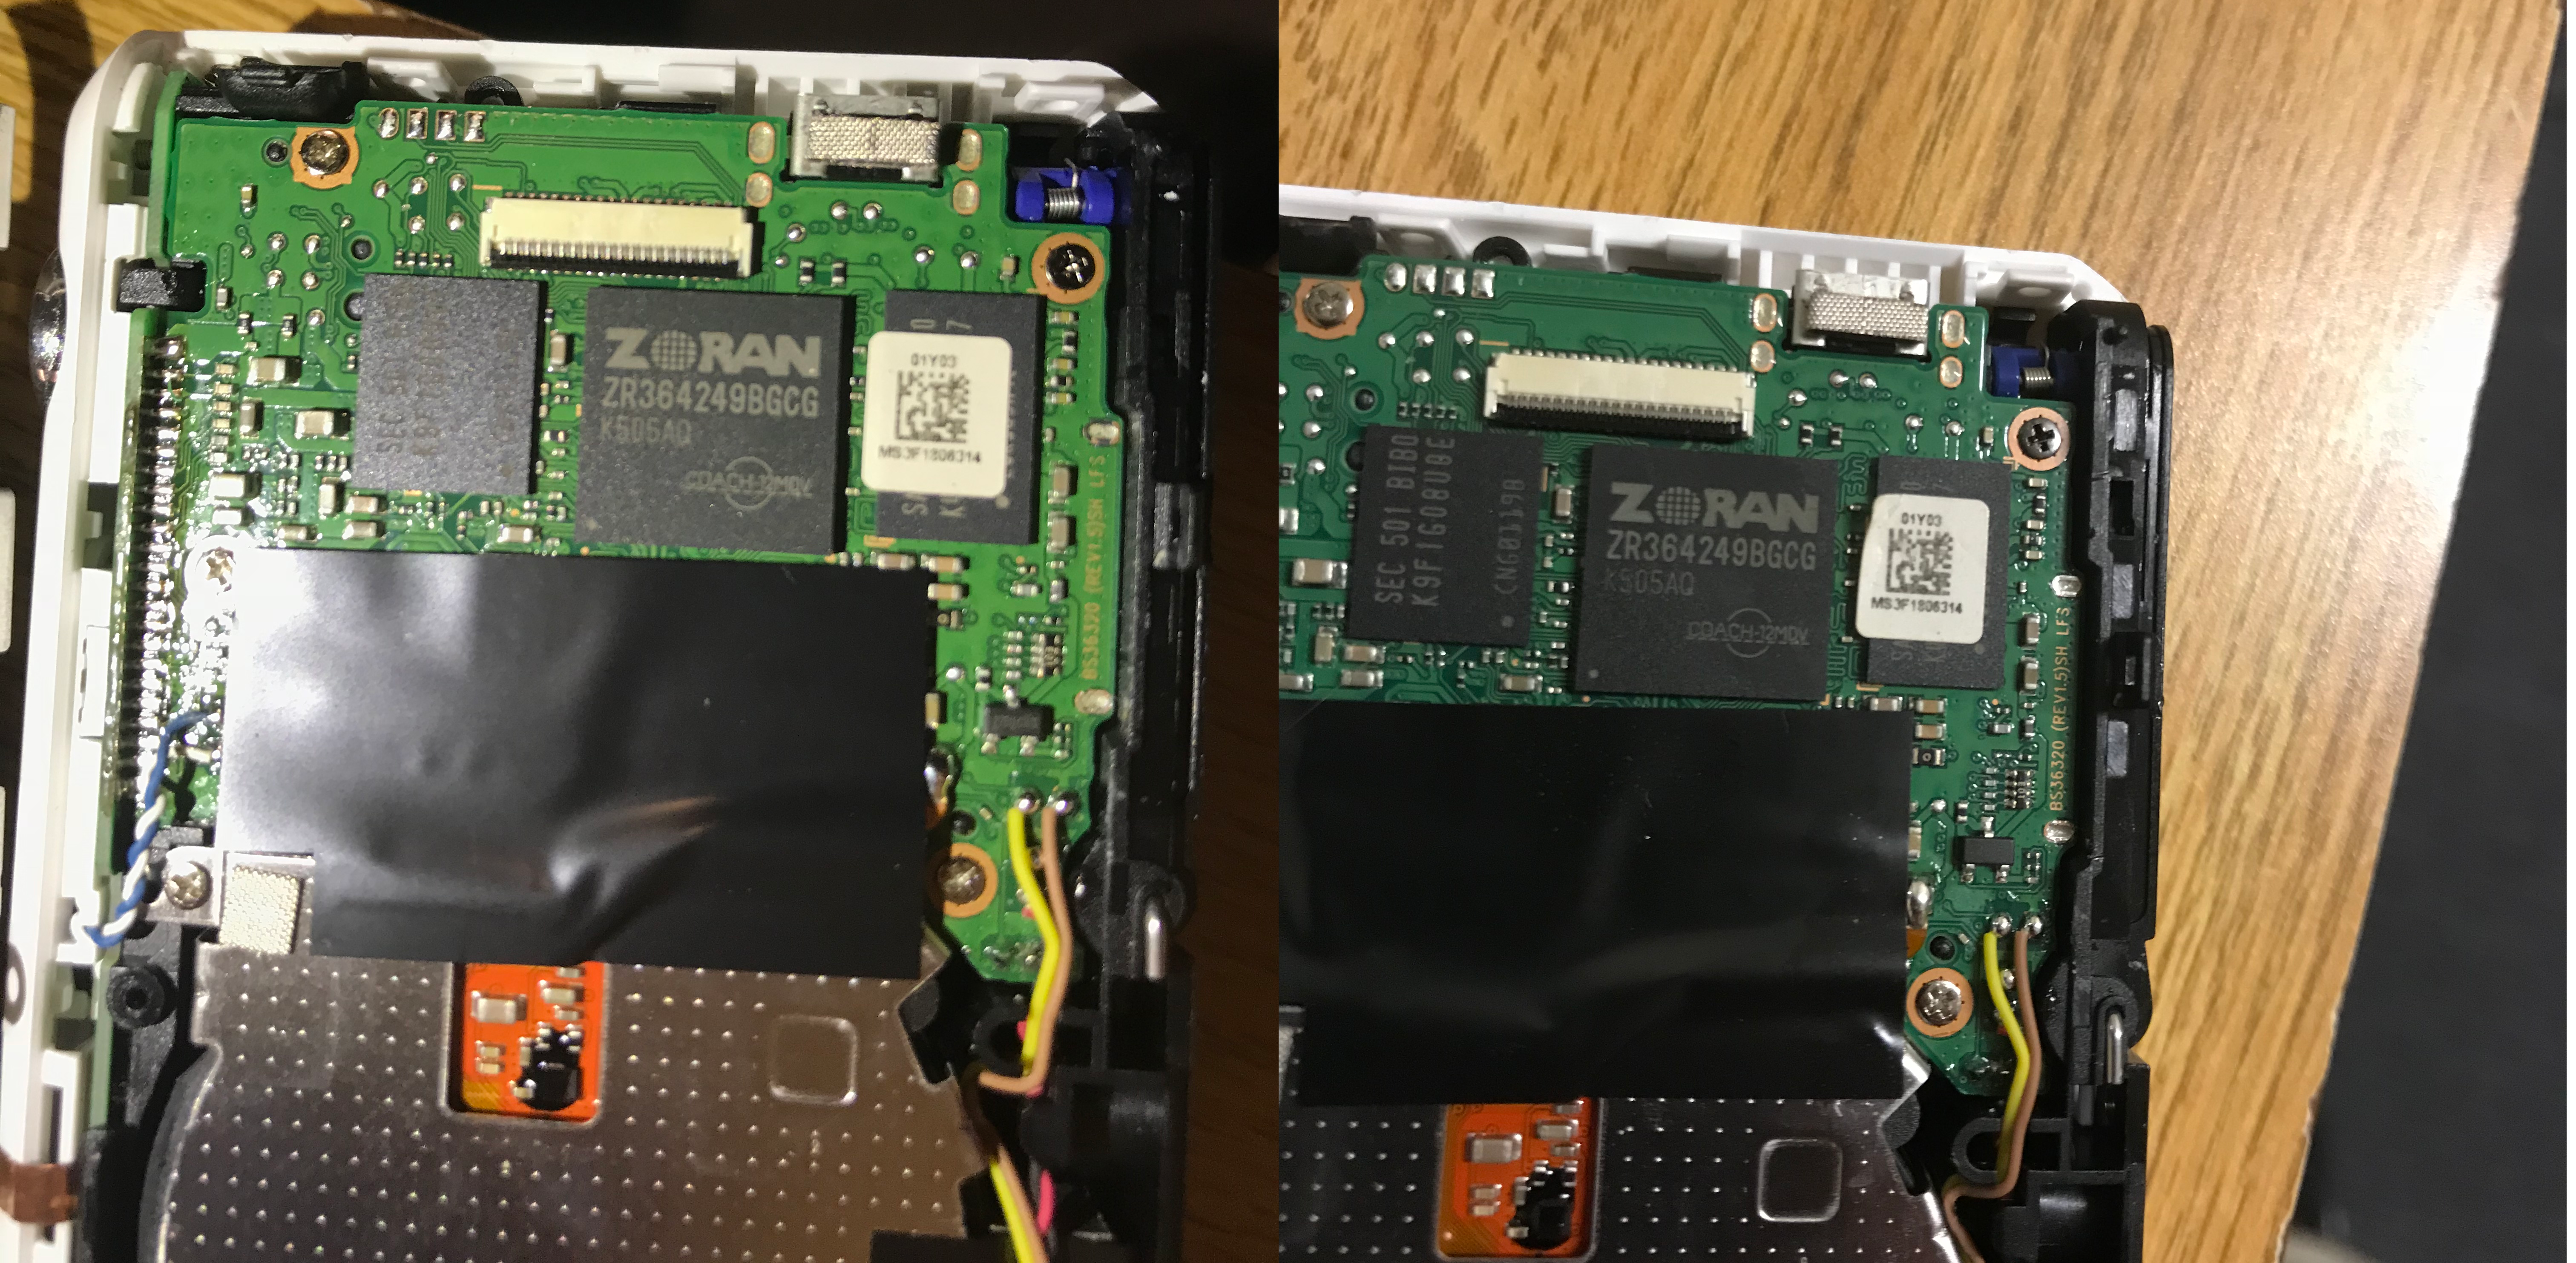
During the process of getting the firmware, I decided to put in a bit more effort towards finding any sort of information about the hardware. Since at this point I knew I'd be starting to reverse the firmware soon, my goal was to find a hardware data sheet to get an idea of what hardware is mapped to what address space. Since scouring the internet for any information about what this device is made of turned up dry aside from a not up to par iFixIt community teardown, I decided to do a teardown of my own.
After searching a lot for information on the main chip, the COACH-12MDV, and aside from some leaked datasheets for earlier versions of the chip (which sadly are pretty non-applicable aside from some info on the basic firmware architecture) and putting a name to the face "Camera On A CHip". However having serials for the DRAM turned out to be handy later. (And maybe that's a serial port of some sort at the top?)
Firmware Loading
   jam > ~ > re > wb35f > file WB35F_DSC_UP_8500.elf
   WB35F_DSC_UP_8500.elf: data
The file we get from the zip, while toting the ".elf" file extension, is not actually an elf. Opening it in a hex editor yields:
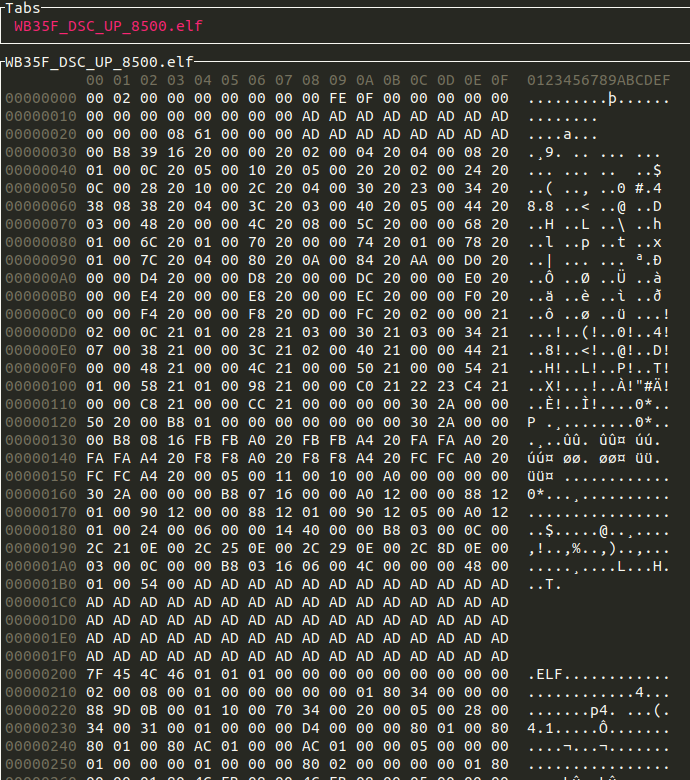
We have a 0x200 byte header of some sort, then an actual elf file (as seen from its distinctive file magic). When confronted with a header we don't really need to understand, first thing's first is just chop it off to see if that works. In this case it does, but, as I later found out, there's more of these headers followed by ELFs. So, reeling back on the laziness just enough to make it work, I used 010 Editor to search 7F 45 4C 46 (the start of the ELF header), exported the results as a CSV and wrote a script to split the file at those points. This results in losing any information stored in the container file, but since there don't appear to be any file names or anything else that could be deciphered within a worthwhile amount of time it's no real loss.
Firmware reversing
First we are greeted by 13 elfs, which when file is run on them produces:
firm_0.elf:  ELF 32-bit LSB executable, MIPS, MIPS32 rel2 version 1 (SYSV), statically linked, not stripped
firm_10.elf: ELF 32-bit LSB executable, MIPS, MIPS32 version 1 (SYSV), statically linked, not stripped
firm_11:     ELF 32-bit LSB executable, MIPS, MIPS32 version 1 (SYSV), statically linked, not stripped
firm_12.elf: ELF 32-bit LSB executable, MIPS, MIPS32 version 1 (SYSV), statically linked, not stripped
firm_1.elf:  ELF 32-bit LSB executable, MIPS, MIPS-II version 1 (SYSV), statically linked, stripped
firm_2.elf:  ELF 32-bit LSB executable, MIPS, MIPS32 rel2 version 1 (SYSV), statically linked, stripped
firm_3.elf:  ELF 32-bit LSB executable, MIPS, MIPS32 rel2 version 1 (SYSV), statically linked, stripped
firm_4.elf:  ELF 32-bit LSB executable, MIPS, MIPS32 rel2 version 1 (SYSV), statically linked, stripped
firm_5.elf:  ELF 32-bit LSB executable, MIPS, MIPS32 rel2 version 1 (SYSV), statically linked, stripped
firm_6.elf:  ELF 32-bit LSB relocatable, MIPS, MIPS32 rel2 version 1 (SYSV), not stripped
firm_7.elf:  ELF 32-bit LSB relocatable, MIPS, MIPS32 rel2 version 1 (SYSV), not stripped
firm_8.elf:  ELF 32-bit LSB relocatable, MIPS, MIPS32 rel2 version 1 (SYSV), not stripped
firm_9.elf:  ELF 32-bit LSB executable, MIPS, MIPS32 version 1 (SYSV), statically linked, not stripped
Things of note:
- This processor, as already figured out from the teardown, is 32-bit Little Endian MIPS based.
- All the ELFs are properly formatted
- Symbols not stripped (yay)
- It's (mostly) statically linked
Originally I started reversing this with IDA but GHIDRA has since been released with MIPS decompilation, a feature that makes it quite a bit more attractive for this project. Going through each file I used the symbols to figure out the breakdown of these elfs:
   firm0 - COACH kernel, uses FileX file for FAT/exFAT SD access, ThreadX for RTOS functions, in-house code for NAND access
   firm8 - Myriad/Openwave's "OpenWave Mobile Browser"
   firm6 - video decoding
   firm9 - CopMasking
   firm10 - CopNmrLoop1
   firm11 - CopQTTable
   firm1 - CopTransform
   firm2 - Zcam functions
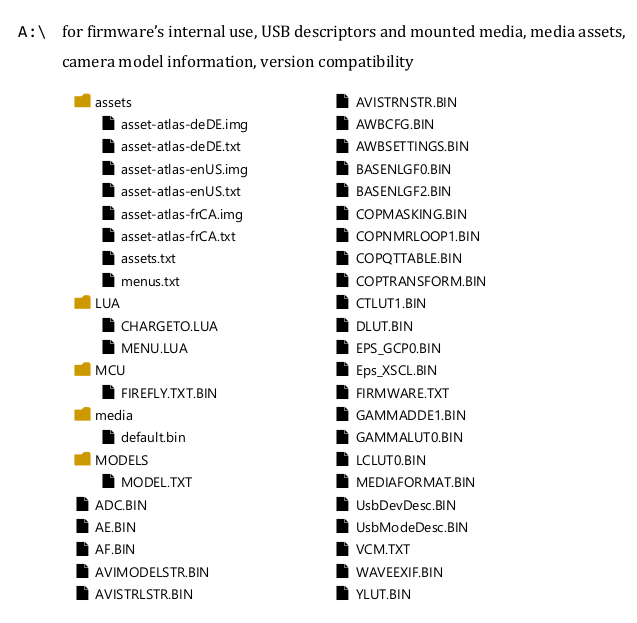
Interestingly enough, after some digging I found Jan Kučera's Master Thesis titled "Computational photography of light-field camera and application to panoramic photography", which features an appendix detailing some of the technical specifications of the Lytro Camera of the author's own findings. The file system, while not only matching in drive lettering scheme to a log file left on my camera's SD, also includes files of identical names to some of the firmware files (CopMasking, CopNmrLoop1, CopQTTable), all of which were determined by going through the strings of the elfs. While this ended up being a bit of dead end for me, it certainly is an interesting place to find similar research being done. [Download link of thesis] (2.7 MB)
Emulation
If you thought the corner cutting hacky solutions were over, guess again. As someone who isn't great at soldering, doesn't feel comfortable toting my still-dissassembled camera to the nearest makerspace and isn't even sure whether or not the aforementioned test points do anything, hardware debugging isn't much of an option at the moment. So, as someone who is still naturally lazy and loves the effortlessness of dynamic analysis aiding in some parts of reverse engineering, I decided this would be a good first project for learning how to use Unicorn, an emulation engine. The idea behind unicorn is it handles the universal parts of emulation (memory, executing basic instructions, etc) so that you just have to write a loader for your code binary and use the provided hooks to implement the system-specific parts of emulation.
A quick breakdown of the important parts of the emulator, in order:
- Elf file loading (using pyelftools)
from elftools.elf.elffile import ELFFile from unicorn import * from unicorn.mips_const import *
file_handle = open('./firm_0_COACH_kern.elf', 'rb')
elf = ELFFile(file_handle) sections = list(elf.iter_sections())
entry = elf['e_entry']
uc = Uc(UC_ARCH_MIPS, UC_MODE_32)
- Map memory (since everything has to be 0x1000 aligned under unicorn, I just map everything together as rwx, originally I properly mapped memory based on the elf's sections. I used this script to print out elf data in order to figure out what needs to be mapped where)
# Needed memory mappings # 80000180 - 8009FCB8 | r-x | .exception through .spc0.972___COUNTER__ # 8009FCB8 - 800CA4C8 | rw- | .eh_frame through .bss # 90008000 - 90009C00 | -w- | .spd0 through .spd4 # BFC08000 - BFC09C00 | rwx | .spc0 through .spc4
uc.mem_map(0x80000000, 0xD0000) # We have to map r-x and rw- together because unicorn :( uc.mem_map(0x90000000, 0xA000) uc.mem_map(0xBFC00000, 0xA000)
- Map hardware and load ELF sections into memory
# Map peripherials(?) PERIPHERIAL_LIST = [ ("unk_1", (0xB0400000, 0x1000)), # 0xB0400840 is written to at the beginning ("unk_2", (0xB0801000, 0x1000)), # 0xB0801034 is written in CpuInit ("jtag?", (0xB0802000, 0x1000)), # fake read from B0802040 ("unk_4", (0xB0800000, 0x1000)), # 0xB08002C8 ("dcu", (0xB8000000, 0x3000)), # 0xB800207C is DRAM Controller attr 1, 0xB8002198 is attr 0 ("unk_5", (0x807FF000, 0x1000)), # 0x807FFF98 is used for somemthing idk #("unk_6", (0x8044C000, 0x1000)), # gonna keep mapping memory till something breaks (0x8044C644) #("unk_7", (0x805CF000, 0x1000)), #("unk_8", (0x8044D000, 0x3000)), ]
for peripherial in PERIPHERIAL_LIST: mapping = peripherial[1] uc.mem_map(mapping[0], mapping[1])
for i, section in enumerate(sections): if section["sh_addr"] == 0: continue print(f'LOAD {i:2} {section["sh_flags"] & 0xFF:03b} {section["sh_addr"]:08X} {section["sh_addr"] + section.data_size:08X} {section.name}') uc.mem_write(section["sh_addr"], section.data())
- And lastly, jump to the entrypoint
uc.emu_start(entry, 0x8009F6CC)
Once that is working, all that's left to do is add hooks in order to implement "external" functionality (mostly hardware I/O) and also adding hooks to extend the functionality of the system. For example if I have a printf function in my firmware (which isn't hard to find if that's the case, just follow the strings that IDA/GHIDRA/etc finds automatically), I can write a code hook (UC_HOOK_CODE) to log all printfs by writing code that does the following:
- Check if the program counter is equivalent to the address of our printf function
- If so, read the address of the format string from the first argument register
- Call a function to read the format string from memory, like so:
def get_string(addr): s = "" c = uc.mem_read(addr, 1) while c != b'\x00': s += c.decode('latin8') addr += 1 c = uc.mem_read(addr, 1) return s
- Either print the format string as-is or use the additional arguments to actually format it then print it out.
- When you're done, write the return address register to the program counter, returning the function before it's actually run.
This effectively "replaces" the function with the implementation you've made in your language of choice.
Improving Emulation Quality
After a couple bug fixes, I ran into a problem where in an initialization function it encounters an infinite loop if the upper 5 bits of the SRSCtl register isn't set.

With emulation, we can easily solve this by just changing the value of the SRSCtl register adding a code hook for breaking the loop regardless of the SRSCtl register value.
After fixing this issue, the printf hook kicked into place once this issue was resolved, alerting me of a fatal error of a DRAM size read failing.
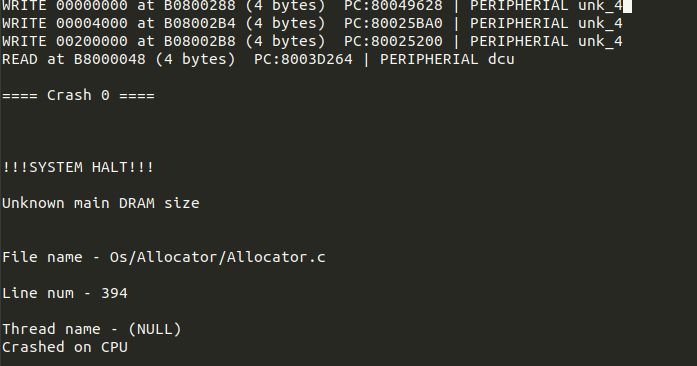
Thanks to the printf hook and logging read and writes to hardware I can see exactly which read causes the crash, where it happens, and the associated crash message. Jumping to the PC for the second to last DCU (DRAM Control Unit) read in GHIDRA and touching up the disassembly some yields:
undefined4 DcuGetDramAttributes (undefined4 param_1, uint * size_out, undefined4 * pageSize ? _out, undefined4 * param_4, undefined4 * param_5) { uint dram_size; undefined4 pageSize ? ;
// Line that causes DRAM size read to fail switch (__dcu_dram_size_b8002010) { default: return 0; case 1: if (size_out != (uint * ) 0x0) { * size_out = 0x800000; } pageSize ? = 0x200; if (pageSize ? _out == (undefined4 * ) 0x0) goto LAB_80039b8c; goto LAB_80039b88; case 2: dram_size = 0x1000000; break; case 3: dram_size = 0x2000000; break; case 4: // This is the one used for my DRAM part (K9F1G08U0E-SCB0000) dram_size = 0x4000000; break; case 5: dram_size = 0x8000000; break; case 6: dram_size = 0x10000000; } if (size_out != (uint * ) 0x0) { * size_out = dram_size; } pageSize ? = 0x400; if (pageSize ? _out != (undefined4 * ) 0x0) { LAB_80039b88: * pageSize ? _out = pageSize ? ; } LAB_80039b8c: if (param_4 != (undefined4 * ) 0x0) { * param_4 = 0x80000000; } if (param_5 != (undefined4 * ) 0x0) { * param_5 = 0xa0000000; } return 1; }
Since the read is passed into a switch statement, we can pretty easily figure out what the proper value is (in order to better emulate the DCU) by looking at how the returned value is used in order (it's the DRAM size, as we can figure out from the error) and then figure out what the proper value is. From the teardown I learned the DRAM serial is K9F1G08U0E-SCB0000, which, with a little bit of googling can be found to be a Samsung 512 Mbit DRAM unit, which converted to bytes is 0x4000000 so we know that when it reads from this address it should return 4 (as 0x4000000 == case 4).
Currently, I'm still working on improving emulation and documenting various parts of the firmware in GHIDRA, however I still plan on looking into those test points as the firmware has a lot of references to debugging over UART/Samba as well as searching for a potential exploit to mess around with. I plan on posting an update in a couple months, as well as more posts in the meantime so follow me on twitter or use the rss feed if you want to stay updated on that.
Recommend
About Joyk
Aggregate valuable and interesting links.
Joyk means Joy of geeK