

Showing Maps in Widgets
source link: https://useyourloaf.com/blog/showing-maps-in-widgets/
Go to the source link to view the article. You can view the picture content, updated content and better typesetting reading experience. If the link is broken, please click the button below to view the snapshot at that time.
If you want to show a map view in a widget your first thought might be to use a MapKit Map view. Unfortunately WidgetKit doesn’t allow it. What you can do is create a snapshot of the map and show that.
I’m not going to cover the basics of creating a widget in this post. I’m concentrating on the generation of the map snapshot in the widget timeline provider. If you’re new to widget development see WidgetKit for iOS - Getting Started.
Showing A Map With MapKit
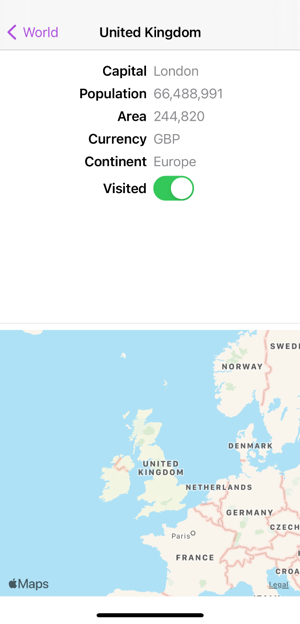
The MapKit framework lets you embed maps or satellite images in your App. SwiftUI added direct support in iOS 14, removing the need to use UIViewRepresentable to wrap MKMapView. Here’s a quick example of a SwiftUI view that shows some details about a country together with a map of the country:
struct CountryView: View {
  let country: Country

  var body: some View {
    VStack {
      CountryFields(country: country)
      Divider()
      Map(coordinateRegion: .constant(country.region))
    }
    .navigationBarTitle(Text(country.name), displayMode: .inline)
  }
}
There are a few ways to create the map view and configure how the user interacts with the map. In this case I created the map view with an MKCoordinateRegion that represents the borders of the country. The initializer takes a binding to a region that is updated as the user moves around the map. I don’t care about that so I’m passing a constant value:
Map(coordinateRegion: .constant(country.region))
The resulting view looks like this:
Showing Maps In A Widget
Unfortunately we can’t use the same approach for a widget. WidgetKit restricts us to a subset of SwiftUI views and Map is not allowed. Nor can you fallback to UIKit, by wrapping an MKMapView, as UIViewRepresentable is not supported with widgets.
What you can do is use MKMapSnapshotter to capture a map into an image. This is not a new API, it has existed since iOS 7, but it’s new to me so I’ll walk through the main steps.
Note: The snapshot does not include any overlays or annotations you add to the map. You’ll have to draw them on the resulting image yourself if you need them.
My timeline entry has the mandatory date, a country model and the map snapshot image:
struct MapEntry: TimelineEntry {
  let date: Date
  let country: Country
  let image: UIImage
}
We need to generate the map snapshot in the getTimeline method of the TimelineProvider. The main steps:
- Create an
MKMapSnapshotter.Optionsobject and configure the snapshot. - Create an
MKMapSnapshotterusing the configured options. - Start the snapshot request and handle the result in the completion handler.
Configuring The Map Snapshot
I’ve extracted the first two steps into a method that takes my country model and desired size and returns the configured MKMapSnapshotter object:
private func makeSnapshotter(for country: Country, with size: CGSize)
  -> MKMapSnapshotter {
  let options = MKMapSnapshotter.Options()
  options.region = country.region
  options.size = size

  // Force light mode snapshot
  options.traitCollection = UITraitCollection(traitsFrom: [
    options.traitCollection,
    UITraitCollection(userInterfaceStyle: .light)
  ])

  return MKMapSnapshotter(options: options)
}
The most important configuration option is to set the region of the map to capture. I’m using an MKCoordinateRegion that I get from the country. You can alternatively use an MKMapRect if that’s more convenient. I’m also setting the size of the image that I want created.
You can change the type of map to capture. For example, if you want a hybrid satellite image and street map that shows building information:
options.mapType = .hybrid
options.showsBuildings = true
I’m forcing the image output to use light mode by modifying the traitCollection. Note that I’m using the UITraitCollection(traitsFrom:) method to merge the trait I want with any existing traits:
options.traitCollection = UITraitCollection(traitsFrom: [
  options.traitCollection,
  UITraitCollection(userInterfaceStyle: .light)
])
Requesting The Map Snapshot
We can now build our timeline. I first load a random country. I’ll skip the details of this but the data comes from a file shared by the main app:
func getTimeline(in context: Context,
  completion: @escaping (Timeline<MapEntry>) -> Void) {
  let countries = loadCountries().randomSample(count: 1)
  if let country = countries.first {
We can then create our map snapshotter configured with the map region for the country and the display size of the widget:
    let mapSnapshotter = makeSnapshotter(for: country,
      with: context.displaySize)
Finally we start the snapshot request and build the timeline entry in the completion handler:
    mapSnapshotter.start { (snapshot, error) in
      if let snapshot = snapshot {
        let date = Date()
        let nextUpdate = Calendar.current.date(byAdding: .hour,
          value: 1,
          to: date)!
        let entry = MapEntry(date: date,
          country: country,
          image: snapshot.image)
        let timeline = Timeline(entries: [entry],
          policy: .after(nextUpdate))
        completion(timeline)
      }
    }
  }
}
If we get back a snapshot object we use the image it contains to build our MapEntry and then call the timeline provider completion handler with a policy to update after 1 hour.
To complete the picture my map widget entry view that shows the image:
struct MapWidgetEntryView : View {
  var entry: MapEntry
  var body: some View {
    Image(uiImage: entry.image)
      .widgetURL(entry.country.url)
  }
}
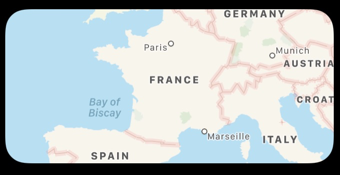
The final appearance of the widget at medium size:
Read More
Recommend
About Joyk
Aggregate valuable and interesting links.
Joyk means Joy of geeK