

GitHub - ines/spacy-course: ?? Advanced NLP with spaCy: A free online course
source link: https://github.com/ines/spacy-course
Go to the source link to view the article. You can view the picture content, updated content and better typesetting reading experience. If the link is broken, please click the button below to view the snapshot at that time.
README.md
Advanced NLP with spaCy: A free online course
This repo contains both an online course, as well as a modern web framework for building online courses with interactive code, slides and multiple-choice questions. In the course, you'll learn how to use spaCy to build advanced natural language understanding systems, using both rule-based and machine learning approaches.
I originally developed the content for DataCamp, but I wanted to make a free version so you don't have to sign up for their service. As a weekend project, I ended up putting together my own little app to present the exercises and content in a fun and interactive way. The front-end is powered by Gatsby and Reveal.js and the back-end code execution uses Binder ?
This course is mostly intended for self-study. Yes, you can cheat – the solutions are all in this repo, there's no penalty for clicking "Show hints" or "Show solution", and you can mark an exercise as done when you think it's done.
✨ Features
- Supports slides, interactive code exercises and multiple-choice questions pretty much out-of-the-box.
- Executes code live and validates user submissions with tests functions using Jupyter kernels via Binder.
- Allows authoring content in 100% Markdown with custom elements.
- Uses the
localStorageto keep track of which exercises were already (marked as) completed. - Runs super fast thanks to Gatsby and uses all the hip and modern web stuff like React Hooks, GraphQL and service workers under the hood.
- Is open-source and published under the MIT license (code and framework) and CC BY-NC (spaCy course materials).
? FAQ
So should I not take your DataCamp course anymore? Probably not, no.
Can I use this to build my own course? Probably, yes! If you've been looking for a DIY way to publish your materials, I hope that my little framework can be useful. I mostly built it for my course, but it strictly separates the content and customisations from the app source, so it shouldn't be difficult to fork this repo, edit the chapters, meta and theme and make it your own. In theory, it should also work for non-Python languages, as long as they're supported by Jupyter/Binder. See the "Usage & API" section below for more details.
Why the different licenses? The source of the app, UI components and Gatsby framework for building interactive courses is licensed as MIT, like pretty much all of my open-source software. The course materials themselves (slides and chapters), are licensed under CC BY-NC. This means that you can use them freely – you just can't make money off them.
? Usage & API
I mostly built this project for my own course, but it should be very easy to
fork and adapt. I made sure to strictly separate the content and the app
functionality and source. So if you want to fork the repo and create your own
course, you should only have to edit the chapters, exercises and meta.json,
update the visual assets in /static and optionally adjust the theme colours.
In theory, it should even work for languages other than Python – but I haven't
tested this yet. You can then build your repo with
Binder and deploy it via something like
Netlify.
How it works
When building the site, Gatsby will look for .py files and make their contents
available to query via GraphQL. This lets us use the raw code within the app.
Under the hood, the app uses Binder to serve up an image
with the package dependencies, including the spaCy models. By calling into
JupyterLab, we can then execute
code using the active kernel. This lets you edit the code in the browser and see
the live results. Also see my juniper repo
for more details on the implementation.
To validate the code when the user hits "Submit", I'm currently using a slightly
hacky trick. Since the Python code is sent back to the kernel as a string, we
can manipulate it and add tests – for example, exercise exc_01_02_01.py will
be validated using test_01_02_01.py (if available). The user code and test are
combined using a string template. At the moment, the testTemplate in the
meta.json looks like this:
from wasabi import Printer
__msg__ = Printer()
__solution__ = """${solution}"""
${solution}

${test}
try:
    test()
except AssertionError as e:
    __msg__.fail(e)
If present, ${solution} will be replaced with the string value of the
submitted user code. In this case, we're inserting it twice: once as a string so
we can check whether the submission includes something, and once as the code, so
we can actually run it and check the objects it creates. ${test} is replaced
by the contents of the test file. I'm also making
wasabi's printer available as __msg__, so
we can easily print pretty messages in the tests. Finally, the try/accept
block checks if the test function raises an AssertionError and if so, displays
the error message. This also hides the full error traceback (which can easily
leak the correct answers).
A test file could then look like this:
def test():
    assert "spacy.load" in __solution__, "Are you calling spacy.load?"
    assert nlp.meta["lang"] == "en", "Are you loading the correct model?"
    assert nlp.meta["name"] == "core_web_sm", "Are you loading the correct model?"
    assert "nlp(text)" in __solution__, "Are you processing the text correctly?"
    assert "print(doc.text)" in __solution__, "Are you printing the Doc's text?"

    __msg__.good(
        "Well done! Now that you've practiced loading models, let's look at "
        "some of their predictions."
    )
With this approach, it's not always possible to validate the input perfectly – there are too many options and we want to avoid false positives.
Directory Structure
├── binder
|   └── requirements.txt  # Python dependency requirements for Binder
├── chapters              # chapters, one Markdown file per chapter
├── exercises             # code files, tests and assets for exercises
├── public                # compiled site
├── slides                # slides, one Markdown file per presentation
├── src                   # Gatsby/React source, independent from content
├── static                # static assets like images, available in slides/chapters
├── meta.json             # course metadata
└── theme.sass            # UI theme colors and settings
Setting up Binder
The requirements.txt in the repository defines the
packages that are installed when building it with Binder. For this course, I'm
using the source repo as the Binder repo, as it allows to keep everything in
once place. It also lets the exercises reference and load other files (e.g.
JSON), which will be copied over into the Pyt hon environment. I build the
binder from a branch binder, though, which I only update if Binder-relevant
files change. Otherwise, every update to master would trigger an image
rebuild.
You can specify the binder settings like repo, branch and kernel type in the
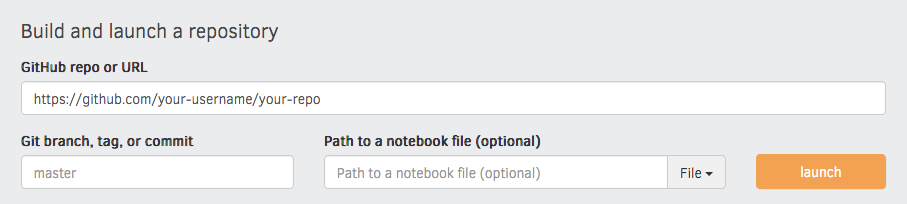
"juniper" section of the meta.json. I'd recommend running the very first
build via the interface on the Binder website, as this
gives you a detailed build log and feedback on whether everything worked as
expected. Enter your repository URL, click "launch" and wait for it to install
the dependencies and build the image.
Running the app
To start the local development server, install Gatsby and then all other dependencies.
npm install -g gatsby-cli  # Install Gatsby globally
npm install                # Install dependencies
npm run dev                # Run the development server
For hosting, I recommend Netlify. It works with GitHub and Gatsby out-of-the-box.
File formats
Chapters
Chapters are placed in /chapters and are Markdown files
consisting of <exercise> components. They'll be turned into pages, e.g.
/chapter1. In their frontmatter block at the top of the file, they need to
specify type: chapter, as well as the following meta:
---
title: The chapter title
description: The chapter description
prev: /chapter1 # exact path to previous chapter or null to not show a link
next: /chapter3 # exact path to next chapter or null to not show a link
id: 2 # unique identifier for chapter
type: chapter # important: this creates a standalone page from the chapter
---
Slides
Slides are placed in /slides and are markdown files consisting of
slide content, separated by ---. They need to specify the following
frontmatter block at the top of the file:
---
type: slides
---
The first and last slide use a special layout and will display the headline
in the center of the slide. Speaker notes (in this case, the script) can be
added at the end of a slide, prefixed by Notes:. They'll then be shown on the
right next to the slides. Here's an example slides file:
---
type: slide
---

#Processing pipelines

Notes: This is a slide deck about processing pipelines.

---

#Next slide

- Some bullet points here
- And another bullet point

<img src="/image.jpg" alt="An image located in /static" />
Custom Elements
When using custom elements, make sure to place a newline between the opening/closing tags and the children. Otherwise, Markdown content may not render correctly.
<exercise>
Container of a single exercise.
Argument Type Descriptionid
number / string
Unique exercise ID within chapter.
title
string
Exercise title.
type
string
Optional type. "slides" makes container wider and adds icon.
children
-
The contents of the exercise.
<exercise id="1" title="Introduction to spaCy">

Content goes here...

</exercise>
<codeblock>
Argument
Type
Description
id
number / string
Unique identifier of the code exercise.
source
string
Name of the source file (without file extension). Defaults to exc_${id} if not set.
solution
string
Name of the solution file (without file extension). Defaults to solution_${id} if not set.
test
string
Name of the test file (without file extension). Defaults to test_${id} if not set.
children
string
Optional hints displayed when the user clicks "Show hints".
<codeblock id="02_03">

This is a hint!

</codeblock>
<slides>
Container to display slides interactively using Reveal.js and a Markdown file.
Argument Type Descriptionsource
string
Name of slides file (without file extension).
<slides source="chapter1_01_introduction-to-spacy">
</slides>
<choice>
Container for multiple-choice question.
Argument Type Description children nodes Only<opt> components for the options.
<choice>

<opt text="Option one">You have selected option one! This is not good.</opt>
<opt text="Option two" correct="true">Yay! </opt>

</choice>
<opt>
A multiple-choice option.
Argument Type Descriptiontext
string
The option text to be displayed. Supports inline HTML.
correct
string
"true" if the option is the correct answer.
children
string
The text to be displayed if the option is selected (explaining why it's correct or incorrect).
? Roadmap and todos
- Add Python CI tests. Not 100% sure how this should be wired up yet – but
ideally,
pytestcould somehow assemble the tests just like thetestTemplatedoes and then run all solutions against the tests to make sure there are no bugs. - Front-end tests. Also, if someone wants to port this over to TypeScript, I'd accept the PR ?
- PDF slides. Since the app is using Reveal.js, this should be possible.
- Testing it for other languages like R. I'd be really curious to see if it
works. We'd have to adjust the
node.extensioncheck here for other files to be included via GraphQL.
Recommend
About Joyk
Aggregate valuable and interesting links.
Joyk means Joy of geeK