
48

一起来搭建CentOS-Tomcat9环境
source link: https://www.linuxprobe.com/linux-install-tomcat9.html
Go to the source link to view the article. You can view the picture content, updated content and better typesetting reading experience. If the link is broken, please click the button below to view the snapshot at that time.
导读
Tomcat是Apache 软件基金会(Apache Software Foundation)的Jakarta 项目中的一个核心项目,由Apache、Sun 和其他一些公司及个人共同开发而成。由于有了Sun 的参与和支持,最新的Servlet 和JSP 规范总是能在Tomcat 中得到体现,Tomcat 5支持最新的Servlet 2.4 和JSP 2.0 规范。因为Tomcat 技术先进、性能稳定,而且免费,因而深受Java 爱好者的喜爱并得到了部分软件开发商的认可,成为目前比较流行的Web 应用服务器。
本文讲解在Linux CentOS下安装Tomcat9,以及Web项目的部署发布。
环境:阿里云ECS 云服务器Linux CentOS
使用XShell客户端连接服务器,进行操作实践。
1、下载Tomcat
部署到 /usr/local/tomcat,创建好文件夹、目录。
使用wget指令:
wget http://mirrors.shu.edu.cn/apache/tomcat/tomcat-9/v9.0.10/bin/apache-tomcat-9.0.10.tar.gz
结果如下,成功下载了apache-tomcat-9.0.10.tar.gz

2、解压缩
tar -zxvf apache-tomcat-9.0.10.tar.gz
自动解压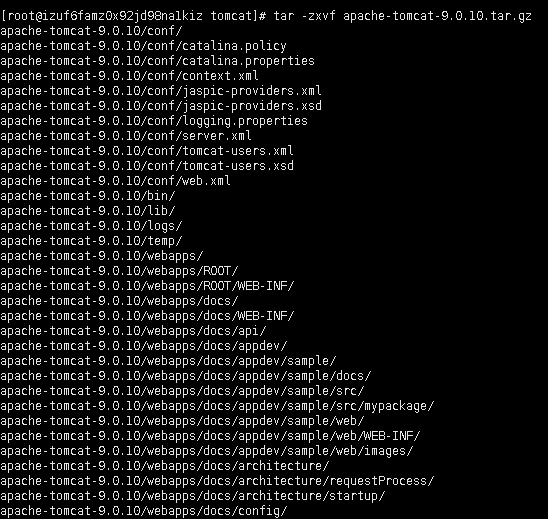
3、启动tomcat
进入tomcat下的bin目录
[root@izuf6famz0x92jd98na1kiz bin]# ./catalina.sh start

发现 tomcat started
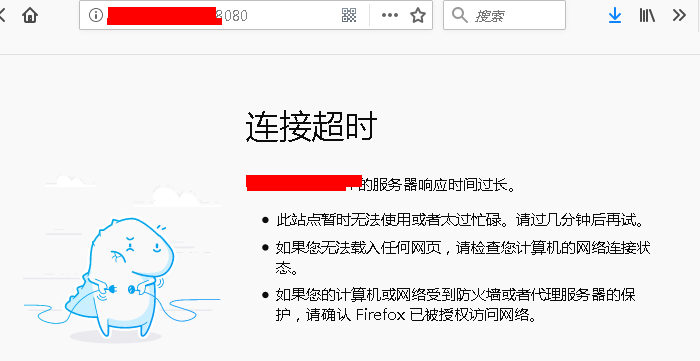
4、通过浏览器访问
经搜索查询,可能是 阿里云服务器,对安全性的要求,使得,无法直接访问:
解决方式:
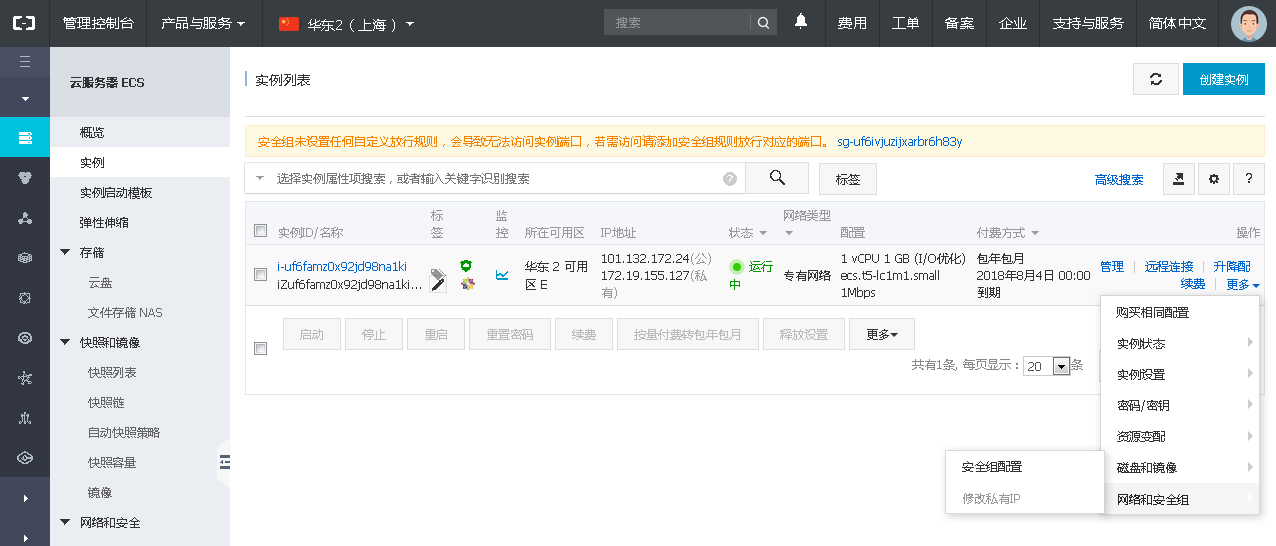
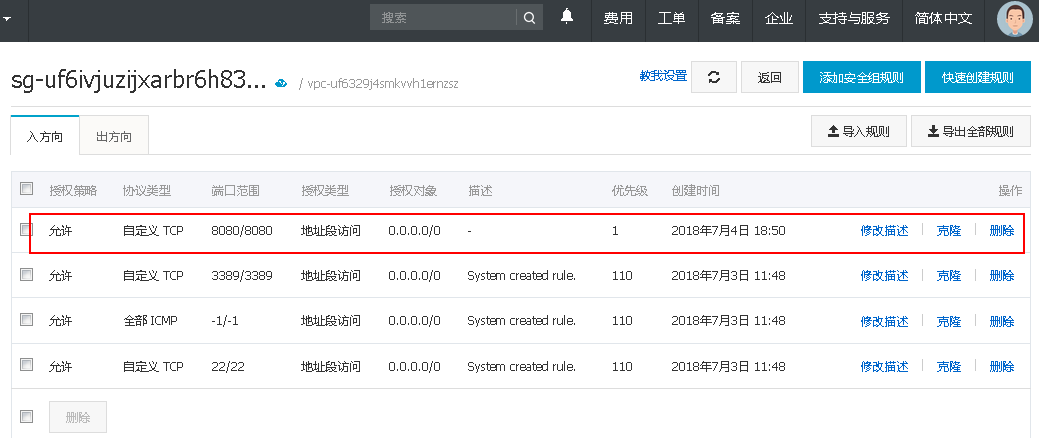
(1)进入阿里云主机控制台,安全组,如下图所示,点击配置规则

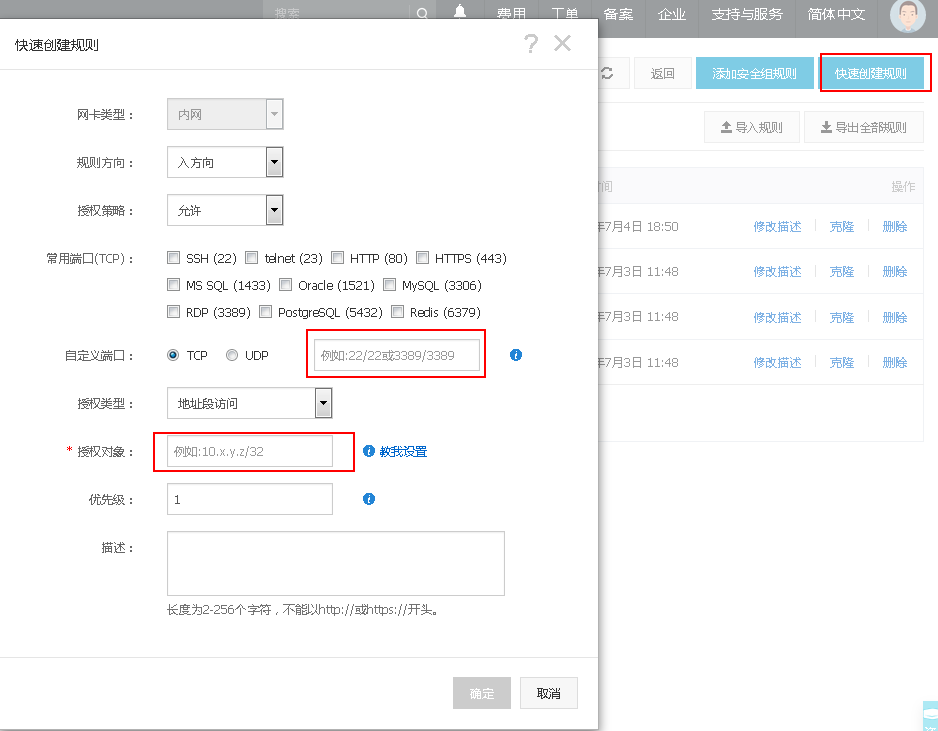
(2)配置规则,添加规则允许任何IP访问8080
(3)再次访问,就成功了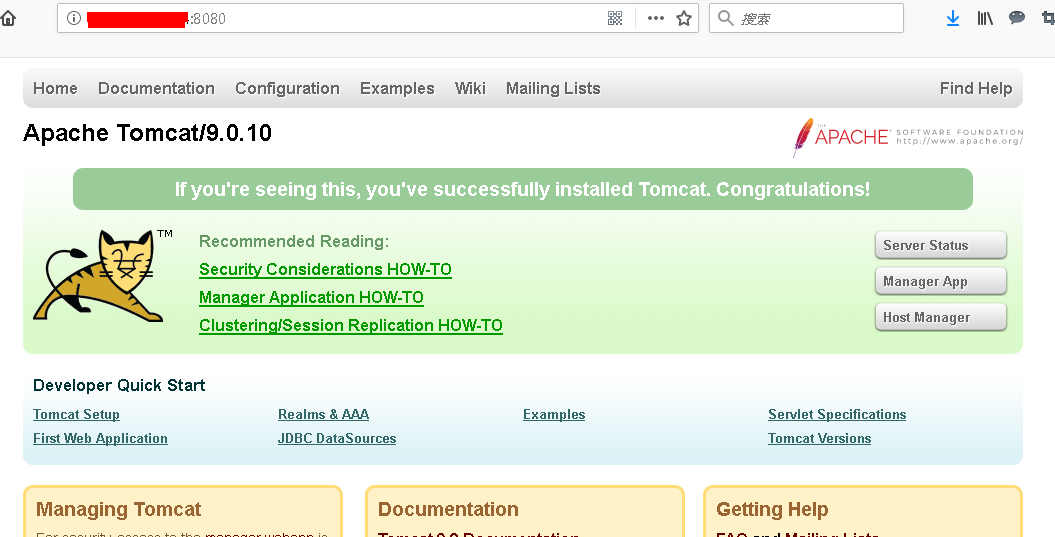
成功完成 tomcat 服务器的下载和安装!
[这样,直接进入 apache-tomcat 文件夹下的 bin 目录中,运行起来tomcat,会有一个问题:一旦重新启动 reboot 服务器,tomcat也关闭了。]
5、Tomcat配置服务和自启动(可选,可以不设置)
把tomcat加入服务当中,到tomcat的bin目录中把catalina.sh复制到/etc/init.d里并命名为tomcat
[root@izuf6famz0x92jd98na1kiz /]# cp /usr/local/tomcat/apache-tomcat-9.0.10/bin/catalina.sh /etc/init.d/tomcat

shell~#cp /usr/local/apache-tomcat/bin/catalina.sh /etc/init.d/tomcat

编辑此文件

[root@izuf6famz0x92jd98na1kiz /]# cd /etc/init.d
[root@izuf6famz0x92jd98na1kiz init.d]# ls
aegis  agentwatch  functions  netconsole  network  README  tomcat
[root@izuf6famz0x92jd98na1kiz init.d]# vi tomcat

shell~#vi tomcat

在#!/bin/sh下加入

### BEGIN INIT INFO
# Provides: tomcat
# Required-Start: $remote_fs $network
# Required-Stop: $remote_fs $network
# Default-Start: 2 3 4 5
# Default-Stop: 0 1 6
# Short-Description: The tomcat Java Application Server
### END INIT INFO

在分割线下加入环境变量

JAVA_HOME=/usr/java/jdk1.7.0_07
export JAVA_HOME
PATH=$JAVA_HOME/bin:$PATH
export PATH
CATALINA_HOME=/usr/local/apache-tomcat

给这个脚本与权限

shell~#chmod 755 tomcat

添加tomcat服务这里用chkconfig

shell~#chkconfig --add tomcat

如果这里出现提示

insserv: warning: script 'tomcat' missing LSB tags and overrides
insserv: There is a loop between service nginx and tomcat if stopped
insserv: loop involving service tomcat at depth 2
insserv: loop involving service nginx at depth 1
insserv: Stopping tomcat depends on nginx and therefore on system facility `$all' which can not be true!
insserv: exiting now without changing boot order!

则需要安装chkconfig安装方法

shell~#apt-get install chkconfig

就可以如出现以下表示成功

tomcat                    0:off  1:off  2:on   3:on   4:on   5:on   6:off

也可以在输入以下命令查看一下

shell~#chkconfig --list tomcat

tomcat                    0:off  1:off  2:on   3:on   4:on   5:on   6:off

如果345 为关闭状态。执行如下命令设置tomcat为开机自启动。

 shell~# chkconfig tomcat on

启动一下看看

shell~# service tomcat start
Using CATALINA_BASE: /usr/local/apache-tomcat
Using CATALINA_HOME: /usr/local/apache-tomcat
Using CATALINA_TMPDIR: /usr/local/apache-tomcat/temp
Using JRE_HOME: /usr/java/jdk1.7.0_07
Using CLASSPATH: /usr/local/apache-tomcat/bin/bootstrap.jar:/usr/local/apache-tomcat/bin/tomcat-juli.jar

启动,停止,重启

shell~# service tomcat start

shell~# service tomcat stop

shell~# service tomcat restart
Recommend
About Joyk
Aggregate valuable and interesting links.
Joyk means Joy of geeK