

GitHub - MikeGarde/php-setup-guide: How to setup your Mac for PHP development
source link: https://github.com/MikeGarde/php-setup-guide
Go to the source link to view the article. You can view the picture content, updated content and better typesetting reading experience. If the link is broken, please click the button below to view the snapshot at that time.
WARNING
homebrew has removed PHP 5.6 and this guide needs to be updated
PHP Development on MacOs High Sierra
This guide will get your machine ready for web development using PHP, Apache, and XDebug. As a consequence we will also setup a handful of other tools. If you find a problem with anything please let me know by creating an issue.
Show hidden files
defaults write com.apple.finder AppleShowAllFiles YES && killall FinderHomebrew
/usr/bin/ruby -e "$(curl -fsSL https://raw.githubusercontent.com/Homebrew/install/master/install)"
brew doctor
Apache
Your macOs shipped with a copy of Apache, unfortunately it is missing key pieces we need so we will install a second
copy of Apache. Note that apachectl -k graceful and other apachectl commands will still be how you interact with
appache. Also, if you're doing this after a clean install you won't be running apache so the first command may result
in an error, you can ignore that error and run the second command.
sudo apachectl stop
sudo launchctl unload -w /System/Library/LaunchDaemons/org.apache.httpd.plist 2>/dev/null
Install Apache using brew
brew install httpdStart Apache Server
apachectl startYou can test by visiting http://localhost:8080
We are going to install both PHP 5.6 and 7.1, as 7.2 is not yet stable. However your machine will only be able to use one version at a time.
brew tap homebrew/php
brew install php71 --with-httpd
brew unlink php71
brew install php56 --with-httpd
PHP Xdebug
Note that un-linking is not required here because the proper version will be referenced in the php.ini file.
brew install php71-xdebug
brew install php56-xdebug
Config Files
Create development folder, note that if you decide to use a different location note it in future instructions you will have to
reference it properly, I am using the folder dev inside my home folder.
mkdir ~/dev
mkdir ~/dev/logs
mkdir ~/dev/logs/xdebug
git clone https://github.com/MikeGarde/php-setup-guide.git ~/dev/php-setup-guide
These commands will allow for easy access to all of our config files.
ln -s $(brew --prefix)/etc/php/7.1/php.ini ~/dev/php71.ini
ln -s $(brew --prefix)/etc/php/5.6/php.ini ~/dev/php56.ini
ln -s $(brew --prefix)/etc/php/7.1/conf.d/ext-xdebug.ini ~/dev/php71-xdebug.ini
ln -s $(brew --prefix)/etc/php/5.6/conf.d/ext-xdebug.ini ~/dev/php56-xdebug.ini
ln -s $(brew --prefix)/etc/httpd/httpd.conf ~/dev/httpd.conf
ln -s $(brew --prefix)/etc/httpd/extra/httpd-vhosts.conf ~/dev/httpd-vhosts.conf
ln -s ~/dev/php-setup-guide/localhost.php ~/dev/index.php
dnsmasq
This will route all traffic ending with .test to your machine so that you don't have to setup each project and domain.
Note, you don't have to use .test, you can replace it with whatever you want however .dev was purchased by Google and
Chrome may not honor your desired actions in the future. Other options are .localhost .example where as .local may
compete with other devices on your network.
After the install when you create the directory etc you may get an error if the directory already exists however this should
work, you can verify by running vi $(brew --prefix)/etc/dnsmasq.conf (:q to quit) however it shouldn't be necessary.
brew install dnsmasq
cd $(brew --prefix); mkdir etc; echo 'address=/.test/127.0.0.1' > etc/dnsmasq.conf'
sudo cp -v $(brew --prefix dnsmasq)/homebrew.mxcl.dnsmasq.plist /Library/LaunchDaemons
sudo launchctl load -w /Library/LaunchDaemons/homebrew.mxcl.dnsmasq.plist
sudo mkdir /etc/resolver
sudo bash -c 'echo "nameserver 127.0.0.1" > /etc/resolver/test'
ping -c 1 me.test # will demonstrate that your machine will resolve me.test to your local machine
cd ~
Apache Setup
Now that we are routing .test traffic to your machine we will get apache to resolve it to the proper directory within
your development folder.
Open ~/dev/php-setup-guide/httpd.conf and replace all YOUR_HOME_FOLDER references with your home folder location and YOUR_USER_NAME. Next
use the resulting file and replace ~/dev/httpd.conf with it.
Open ~/dev/httpd-vhosts.conf, you can delete everything and replace it with this.
<VirtualHost *:80>
    DocumentRoot "/Users/YOUR_HOME_FOLDER/dev"
    ServerName localhost
    ServerAlias localhost
</VirtualHost>

<VirtualHost *:80>
    DocumentRoot "/Users/YOUR_HOME_FOLDER/dev/php-setup-guide"
    ServerAlias php-setup-guide.test
    ErrorLog "/Users/YOUR_HOME_FOLDER/dev/logs/php-setup-guide-error_log"
    CustomLog "/Users/YOUR_HOME_FOLDER/dev/logs/php-setup-guide-access_log" common
</VirtualHost>
Anytime you modify httpd.conf or httpd-vhosts.conf file you will need to restart apache,
sudo apachectl -k gracefulXdebug Setup
Add the following to both of your ~/dev/xdebug.ini files, the last two lines are for more detailed debugging.
xdebug.remote_enable=1
xdebug.remote_port=9000
xdebug.remote_host=127.0.0.1
;xdebug.profiler_enable=1
;xdebug.profiler_output_dir="/Users/YOURNAME/dev/logs/xdebug"
sudo apachectl -k gracefulIf there is a problem with using port 9000 you can change it but note it when setting up Xdebug in your IDE.
Composer
Follow instructions at Composer, when done make it globally available by moving it.
mv composer.phar /usr/local/bin/composerAnd You're Done, Let's Test
If you haven't already...
sudo apachectl -k gracefulhttp://php-setup-guide.test/ will show you a hello world while http://localhost/ will give you phpinfo and links to your projects.
Adding Projects
Open ~/dev/httpd-vhosts.conf and copy the php-setup-guide example, if you don't need separated logging simply remove
the ErrorLog and/or CustomLog lines.
Switching between PHP 5.6 and 7.1
| Switching to 5.6 | Switching to 7.1 |
|---|---|
brew unlink php71 |
brew unlink php56 |
brew link php56 |
brew link php71 |
Update httpd.conf appropriately.
#LoadModule php5_module /usr/local/opt/php56/libexec/apache2/libphp5.so
LoadModule php7_module /usr/local/opt/php71/libexec/apache2/libphp7.so
sudo apachectl -k gracefulQCacheGrind for PHP Memory Profiling
brew install qcachegrind
brew install graphviz
Enable Xdebug profile logging in your appropriate ~/dev/php56-xdebug.ini file.
xdebug.profiler_enable=1
xdebug.profiler_output_dir="/Users/mikegarde/dev/logs/xdebug"
sudo apachectl -k gracefulTo see results make a request to your machine invoking xdebug, this will create a new file in ~/dev/logs/xdebug. Reference that
when running the following or open ⌘ + space qcachegrind and open the file. Note that using the command line will give you
additional information when performing actions within QCacheGrind.
qcachegrind # OR
qcachegrind ~/dev/logs/xdebug/cachegrind.out.23938
Extra Stuff I Use
AWS CLI
brew install awscli
aws configure
Python 3
brew install python3
curl -O https://bootstrap.pypa.io/get-pip.py
sudo python get-pip.py
rm get-pip.py
Good Stuff
- IntelliJ IDEA or PhpStorm, well worth the investment.
- Sourcetree for git.
- ForkLift for file management, SFTP, and S3 buckets.
- Sublime Text for text editing AND multiple selections using regular expressions.
- Postman for calling API's.
- Sequel Pro for MySQL.
- Better Snap Tools for window management.
- Whatpulse because it's interesting.
- f.lux for screen brightness/color, nice when working late.
PHP Specific Stuff
- Rollbar you'll stop hating your users. "Something wen't wrong, sorry I can't explain what I was doing."
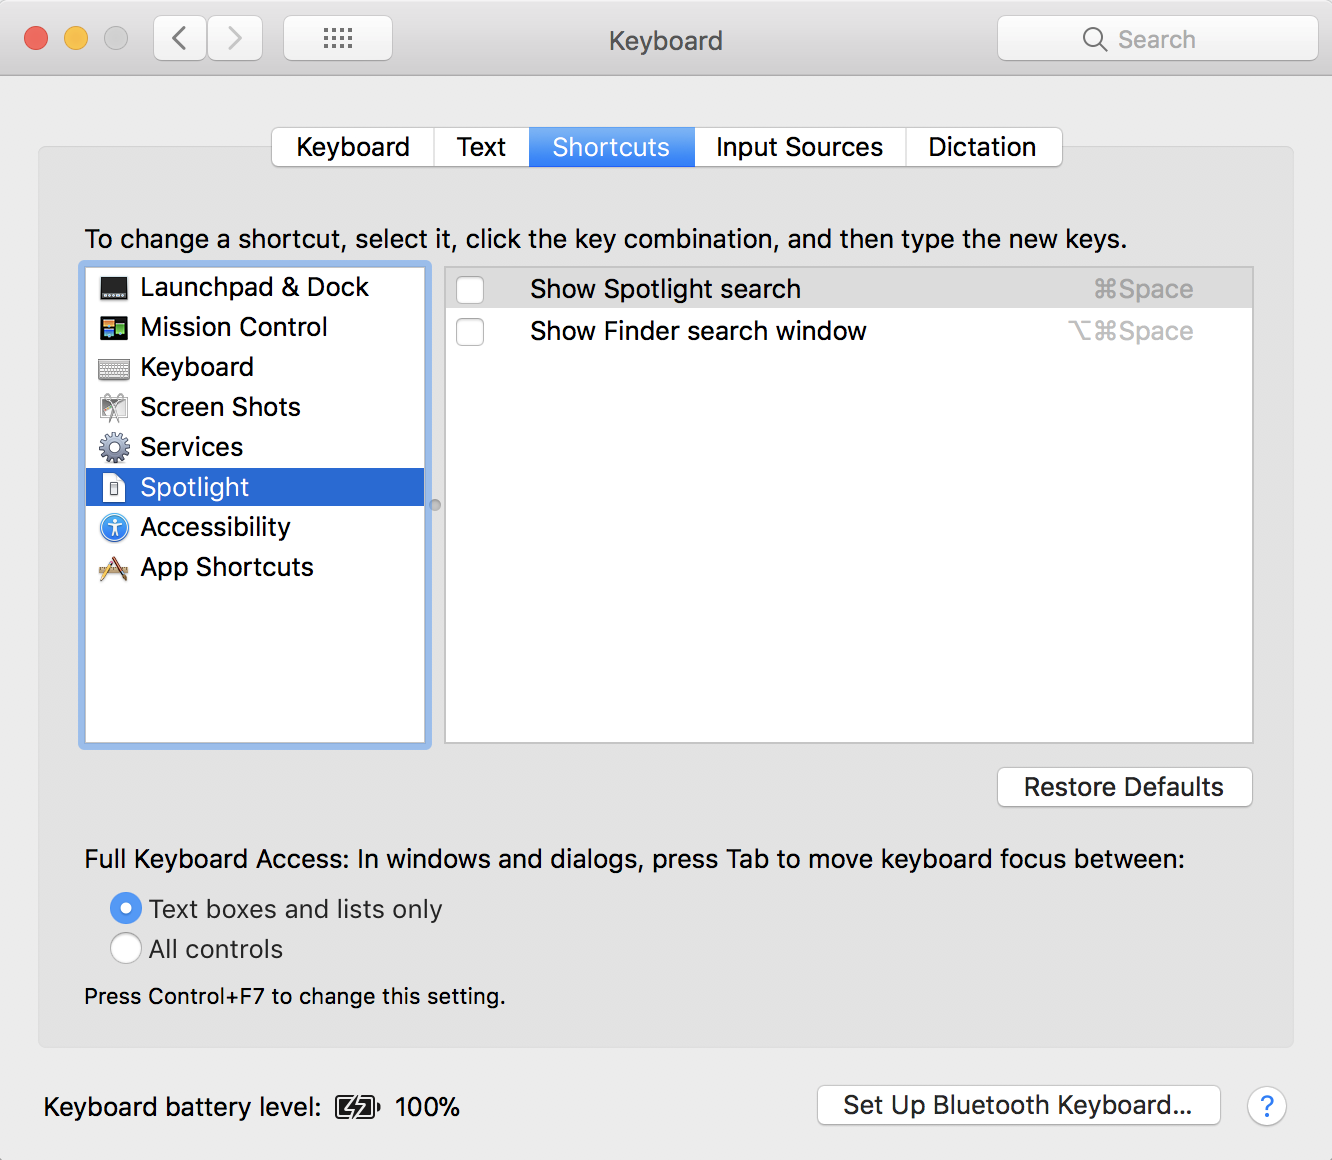
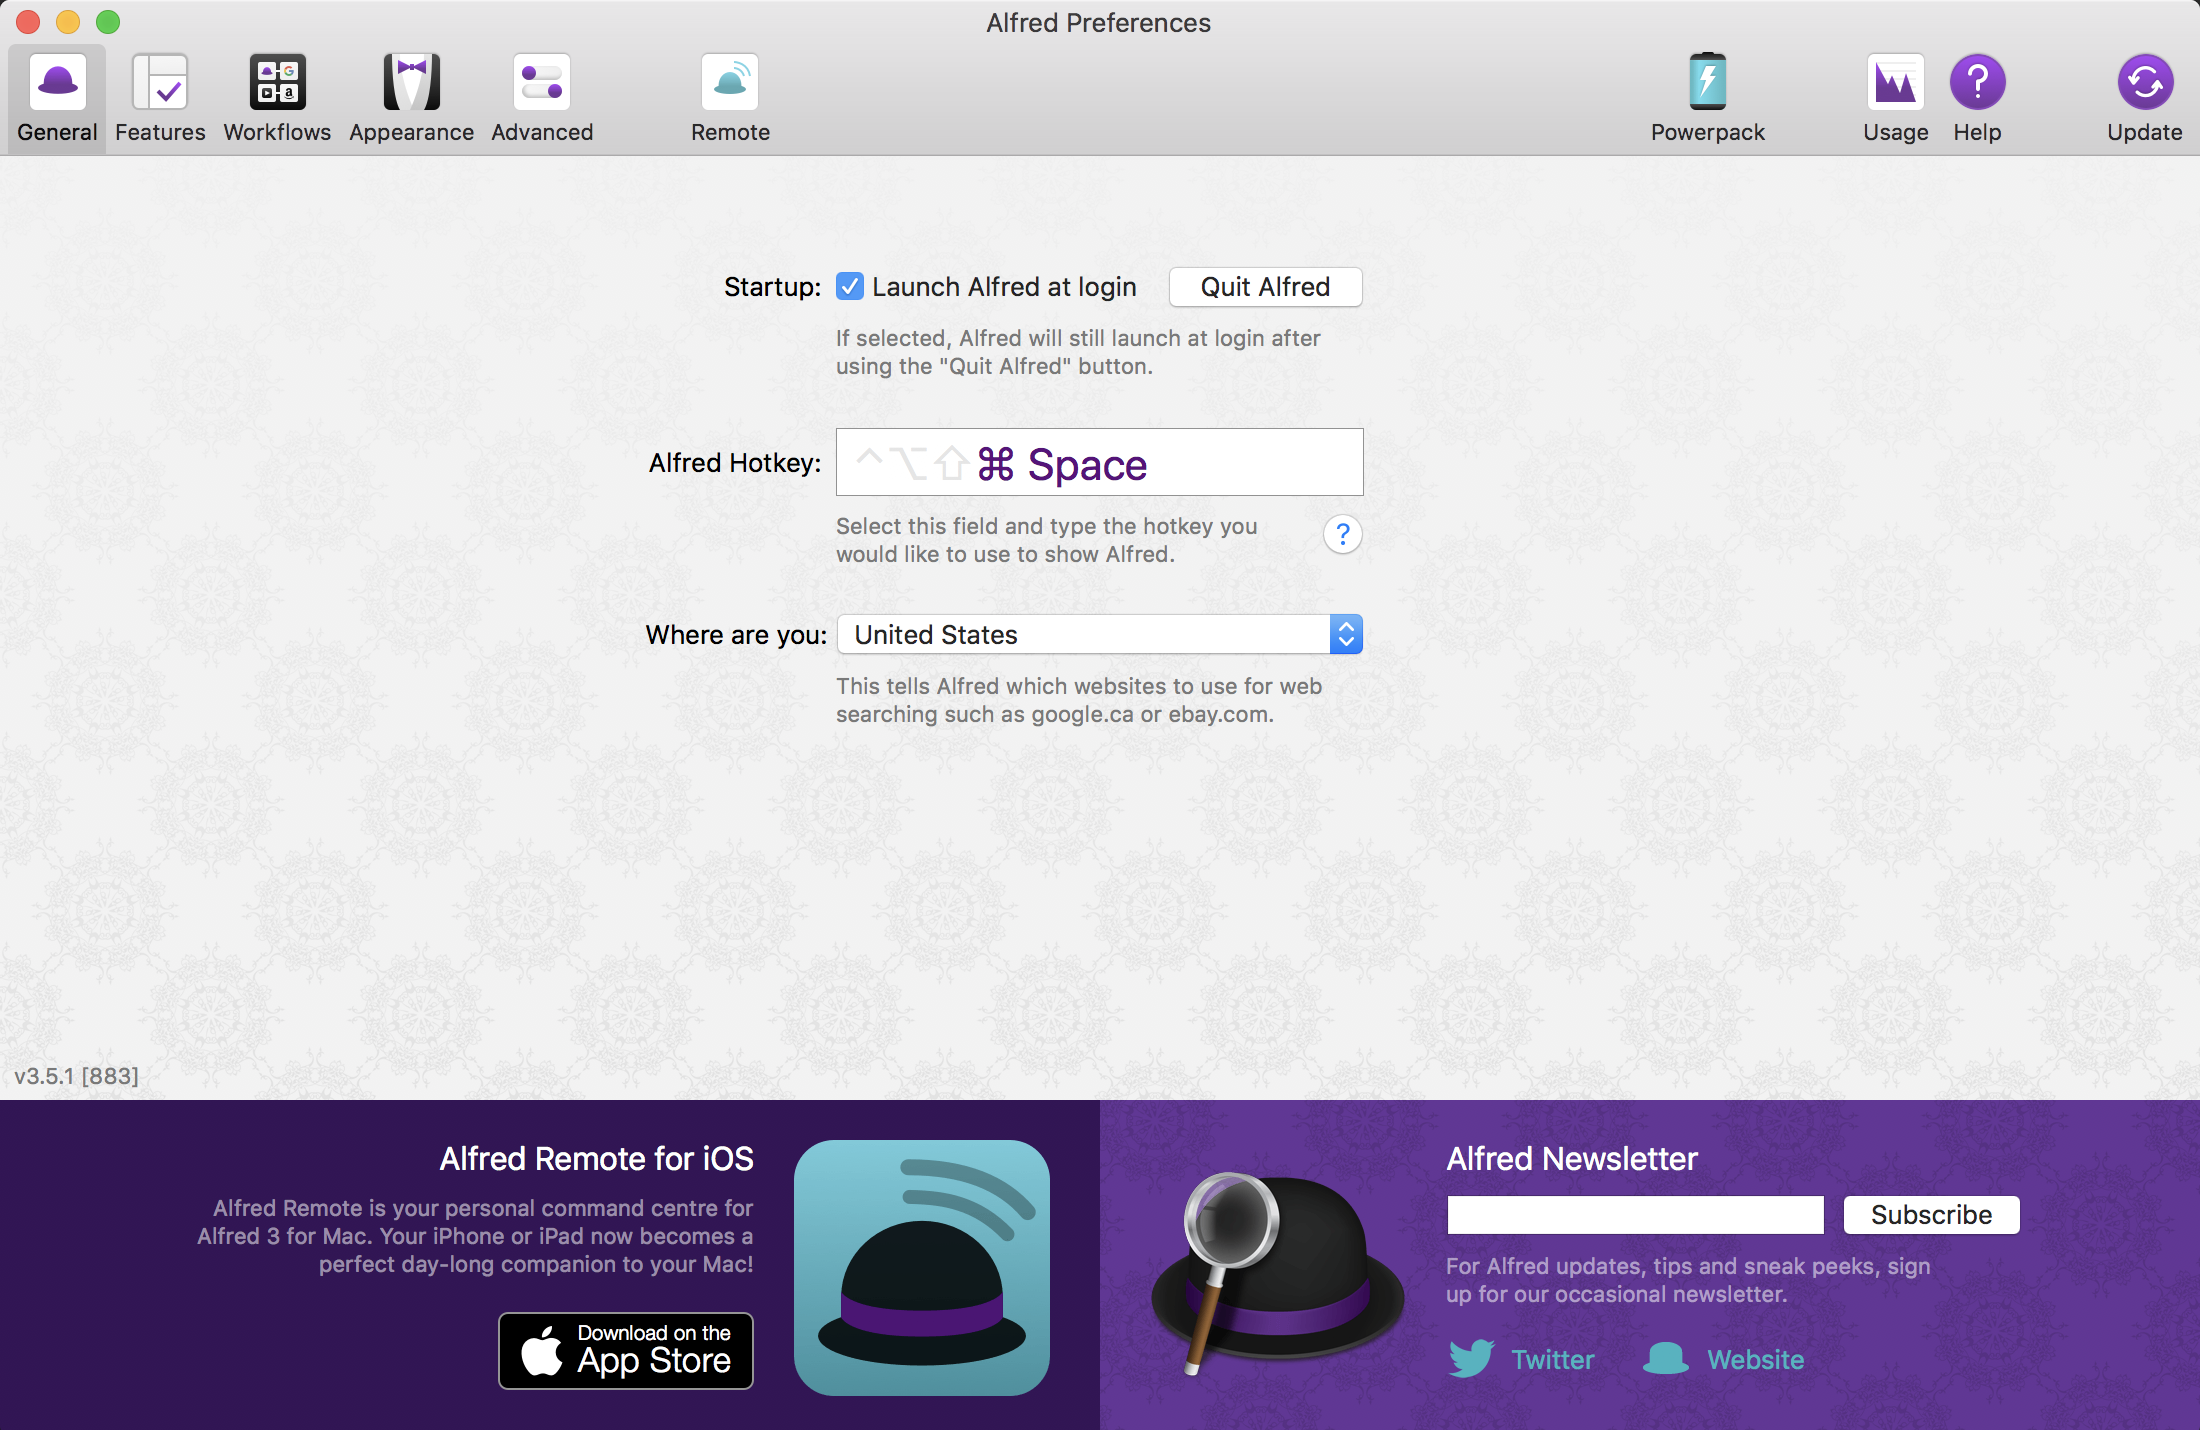
Keyboard Shortcuts
Download Alfred 3, I disable ⌘ + space in my keyboard shortcuts an setup Alfred to open using the same command.
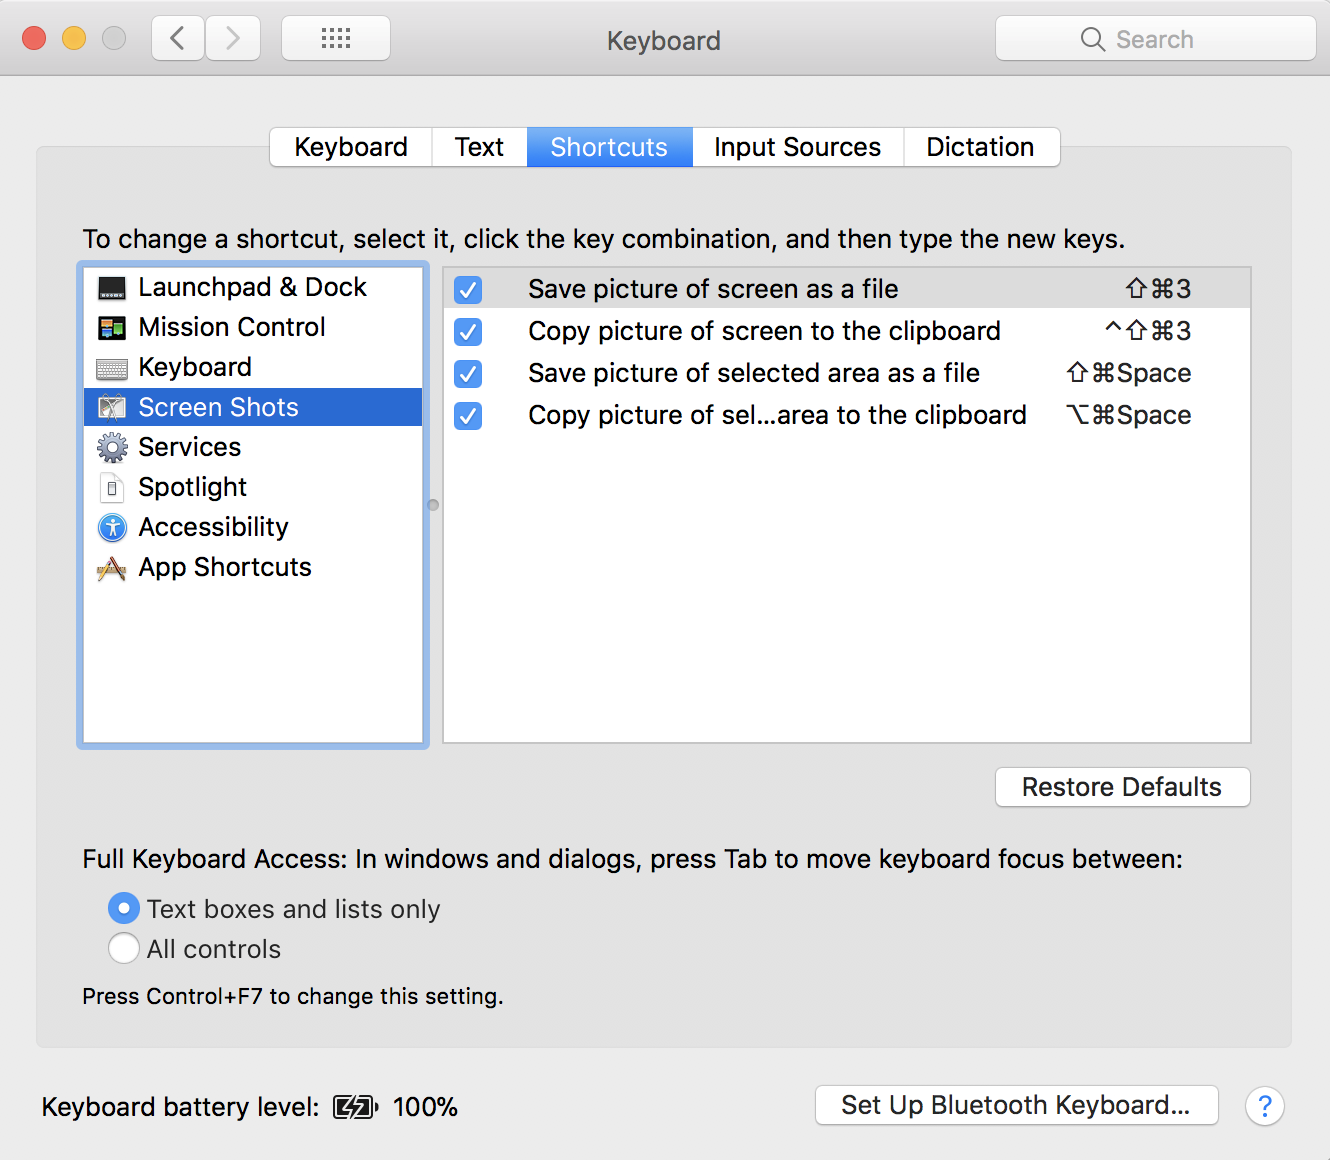
Screen shot replacement commands.
Recommend
About Joyk
Aggregate valuable and interesting links.
Joyk means Joy of geeK