

使用nginx搭建高可用,高并发的wcf集群 - 一线码农
source link: http://www.cnblogs.com/huangxincheng/p/7707830.html
Go to the source link to view the article. You can view the picture content, updated content and better typesetting reading experience. If the link is broken, please click the button below to view the snapshot at that time.
使用nginx搭建高可用,高并发的wcf集群
很多情况下基于wcf的复杂均衡都首选zookeeper,这样可以拥有更好的控制粒度,但zk对C# 不大友好,实现起来相对来说比较麻烦,实际情况下,如果
你的负载机制粒度很粗糙的话,优先使用nginx就可以搞定,既可以实现复杂均衡,又可以实现双机热备,以最小的代码量实现我们的业务,下面具体分享下。
一:准备的材料
1. 话不多说,一图胜千言,图中的服务器都是采用vmware虚拟化,如下图:
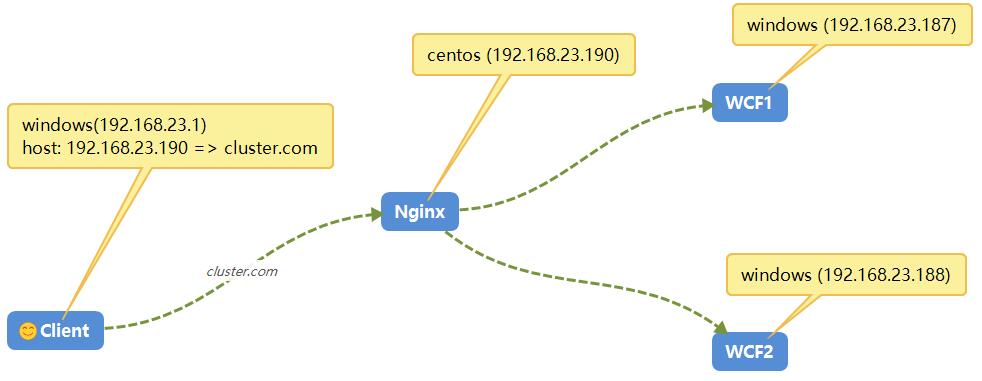
《1》 三台windows机器 ,两个WCF的windows服务器承载(192.168.23.187,192.168.23.188),一台Client的服务器(192.168.23.1)
《2》 一台Centos机器,用来承载web复杂均衡nginx(192.168.23.190)。
《3》在所有的Client的Hosts文件中增加host映射:【192.168.23.190 cluster.com】,方便通过域名的形式访问nginx所在服务器的ip地址。
二:环境搭建
1. WCF程序
既然是测试,肯定就是简单的程序,代码就不完全给出了。
《1》 HomeService实现类代码如下(输出当前server的ip地址,方便查看):
 1     public class HomeService : IHomeService
 2     {
 3         public string DoWork(string msg)
 4         {
 5             var ip = Dns.GetHostAddresses(Dns.GetHostName()).FirstOrDefault(i => i.AddressFamily ==
 6                                                                AddressFamily.InterNetwork).ToString();
 7
 8             return string.Format("当前 request 由 server={0} 返回", ip);
 9         }
10     }
《2》 App.Config代码
 1 <?xml version="1.0" encoding="utf-8" ?>
 2 <configuration>
 3   <startup>
 4     <supportedRuntime version="v4.0" sku=".NETFramework,Version=v4.5.2" />
 5   </startup>
 6   <system.serviceModel>
 7     <behaviors>
 8       <serviceBehaviors>
 9         <behavior name="">
10           <serviceMetadata httpGetEnabled="true" httpsGetEnabled="true" />
11           <serviceDebug includeExceptionDetailInFaults="false" />
12         </behavior>
13       </serviceBehaviors>
14     </behaviors>
15     <services>
16       <service name="WcfService.HomeService">
17         <endpoint address="/HomeService" binding="basicHttpBinding" contract="WcfService.IHomeService">
18           <identity>
19             <dns value="localhost" />
20           </identity>
21         </endpoint>
22         <endpoint address="mex" binding="mexHttpBinding" contract="IMetadataExchange" />
23         <host>
24           <baseAddresses>
25             <add baseAddress="http://192.168.23.187:8733" />
26           </baseAddresses>
27         </host>
28       </service>
29     </services>
30   </system.serviceModel>
31 </configuration>
因为windows的两台机器的ip地址是192.168.23.187,192.168.23.188,所以部署的时候注意一下config中的baseAddress地址。
2. centos上的nginx搭建
nginx我想大家用的还是比较多的,去官网下载最新的就好【nginx-1.13.6】:http://nginx.org/en/download.html,下载之后,就是常规的三板斧安装!!!
[root@localhost nginx-1.13.6]# yum install -y gcc gcc-c++ automake pcre pcre-devel zlib zlib-devel openssl openssl-devel
[root@localhost nginx-1.13.6]# ./configure --prefix=/usr/myapp/nginx
[root@localhost nginx-1.13.6]# make && make install
然后在nginx的安装目录下面找到conf文件,修改里面的nginx.conf 配置。
[root@localhost nginx]# cd conf
[root@localhost conf]# ls
fastcgi.conf            koi-utf             nginx.conf           uwsgi_params
fastcgi.conf.default    koi-win             nginx.conf.default   uwsgi_params.default
fastcgi_params          mime.types          scgi_params          win-utf
fastcgi_params.default  mime.types.default  scgi_params.default
[root@localhost conf]# vim nginx.conf
详细配置如下,注意下面“标红”的地方,权重按照1:5的方式进行调用,关于其他的配置,大家可以在网上搜一下就可以了。
#user  nobody;
worker_processes  1;

#error_log  logs/error.log;
#error_log  logs/error.log  notice;
#error_log  logs/error.log  info;

#pid        logs/nginx.pid;


events {
    worker_connections  1024;
}


http {
    include       mime.types;
    default_type  application/octet-stream;

    #log_format  main  '$remote_addr - $remote_user [$time_local] "$request" '
    #                  '$status $body_bytes_sent "$http_referer" '
    #                  '"$http_user_agent" "$http_x_forwarded_for"';

    #access_log  logs/access.log  main;

    sendfile        on;
    #tcp_nopush     on;

    #keepalive_timeout  0;
    keepalive_timeout  65;

    #gzip  on;

    upstream  cluster.com{
                 server 192.168.23.187:8733 weight=1;
                 server 192.168.23.188:8733 weight=5;
                 }

    server {
        listen       80;
        server_name  localhost;

        #charset koi8-r;

        #access_log  logs/host.access.log  main;

        location / {
            root   html;
            index  index.html index.htm;
            proxy_pass http://cluster.com;
            #设置主机头和客户端真实地址,以便服务器获取客户端真实IP
            proxy_set_header X-Forwarded-Host $host;
            proxy_set_header X-Forwarded-Server $host;
            proxy_set_header X-Forwarded-For $proxy_add_x_forwarded_for;
            proxy_set_header  X-Real-IP  $remote_addr;
        }

        #error_page  404              /404.html;

        # redirect server error pages to the static page /50x.html
        #
        error_page   500 502 503 504  /50x.html;
        location = /50x.html {
            root   html;
        }

        # proxy the PHP scripts to Apache listening on 127.0.0.1:80
        #
        #location ~ \.php$ {
        #    proxy_pass   http://127.0.0.1;
        #}

        # pass the PHP scripts to FastCGI server listening on 127.0.0.1:9000
        #
        #location ~ \.php$ {
        #    root           html;
        #    fastcgi_pass   127.0.0.1:9000;
        #    fastcgi_index  index.php;
        #    fastcgi_param  SCRIPT_FILENAME  /scripts$fastcgi_script_name;
        #    include        fastcgi_params;
        #}

        # deny access to .htaccess files, if Apache's document root
        # concurs with nginx's one
        #
        #location ~ /\.ht {
        #    deny  all;
        #}
    }


    # another virtual host using mix of IP-, name-, and port-based configuration
    #
    #server {
    #    listen       8000;
    #    listen       somename:8080;
    #    server_name  somename  alias  another.alias;

    #    location / {
    #        root   html;
    #        index  index.html index.htm;
    #    }
    #}


    # HTTPS server
    #
    #server {
    #    listen       443 ssl;
    #    server_name  localhost;

    #    ssl_certificate      cert.pem;
    #    ssl_certificate_key  cert.key;

    #    ssl_session_cache    shared:SSL:1m;
    #    ssl_session_timeout  5m;

    #    ssl_ciphers  HIGH:!aNULL:!MD5;
    #    ssl_prefer_server_ciphers  on;

    #    location / {
    #        root   html;
    #        index  index.html index.htm;
    #    }
    #}

}
3. client端的程序搭建
《1》 第一件事就是将 192.168.23.190 映射到本机的host中去,因为服务不提供给第三方使用,所以加host还是很轻松的。
192.168.23.190 cluster.com
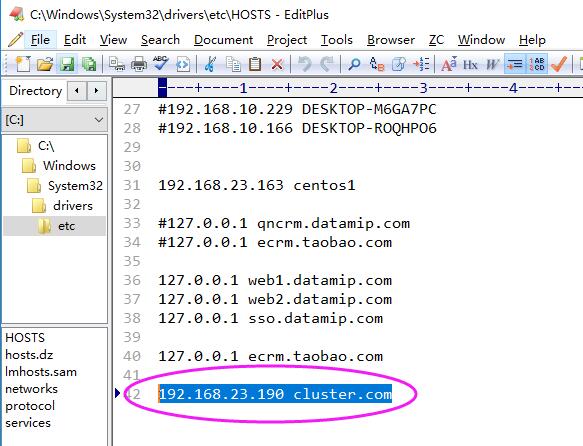
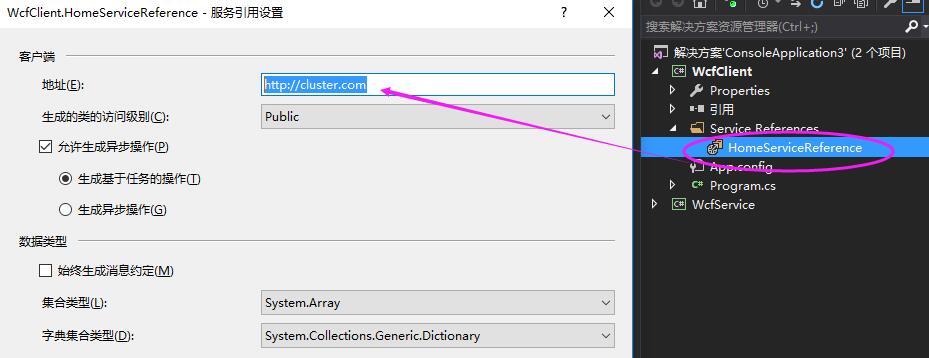
《2》 然后就是client端程序添加服务引用,因为添加了host映射,所以服务引用地址就是"http://cluster.com"。 代码如下:
 1     class Program
 2     {
 3         static void Main(string[] args)
 4         {
 5             for (int i = 0; i < 1000; i++)
 6             {
 7                 HomeServiceClient client = new HomeServiceClient();
 8
 9                 var info = client.DoWork("hello world!");
10
11                 Console.WriteLine(info);
12
13                 System.Threading.Thread.Sleep(1000);
14             }
15
16             Console.Read();
17         }
18     }
最后来执行以下程序,看看1000次循环中,是不是按照权重1:5 的方式对后端的wcf进行调用的???
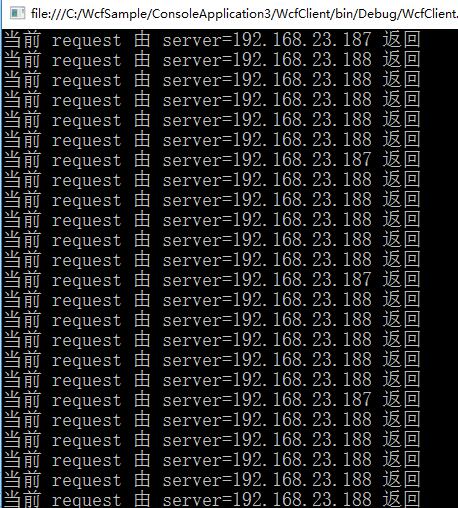
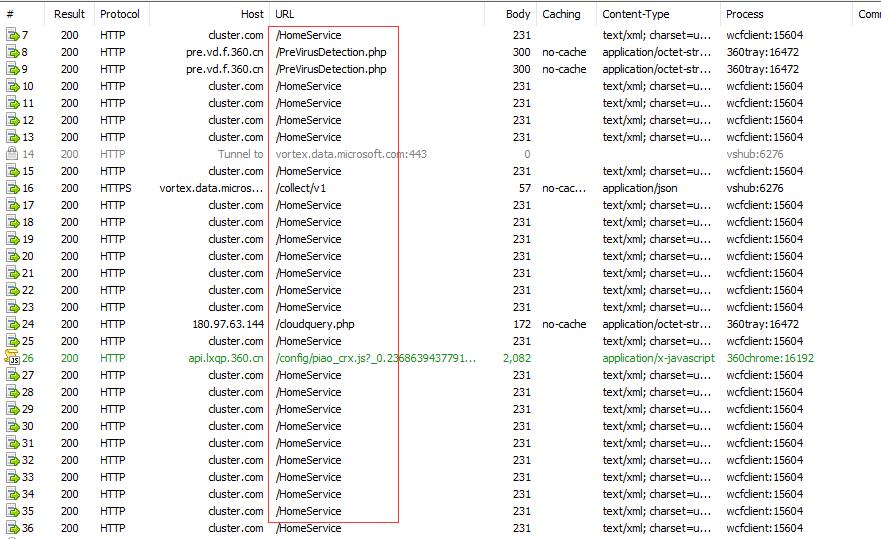
看到没有,是不是很牛逼,我只需要通过cluster.com进行服务访问,nginx会自动给我复杂均衡,这就是我们开发中非常简单化的wcf复杂均衡。
希望本篇对你有帮助~~~~ 附完整源代码:cluster.zip
Recommend
About Joyk
Aggregate valuable and interesting links.
Joyk means Joy of geeK