

How To Make a Simple Multiplayer Online Car Game with JavaScript
source link: https://medium.com/@gdomaradzki/how-to-make-a-simple-multiplayer-online-car-game-with-javascript-89d47908f995
Go to the source link to view the article. You can view the picture content, updated content and better typesetting reading experience. If the link is broken, please click the button below to view the snapshot at that time.
How To Make a Simple Multiplayer Online Car Game with JavaScript
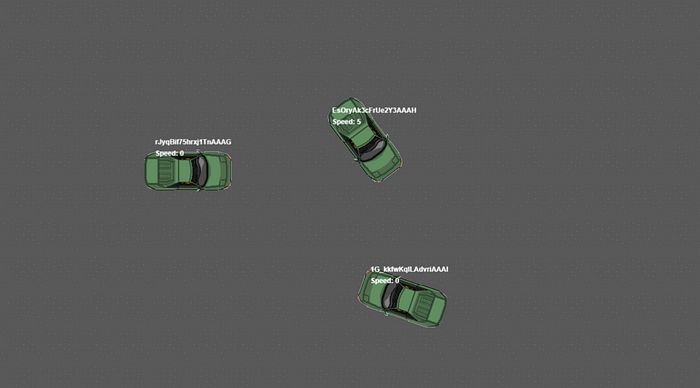
Hello everyone, today I’ll be writing about how to make a simple multiplayer online game. By the end of this tutorial you’ll have a functional server where players can connect and drive around, there’ll only be basic features and you’ll learn how to make all of this from scratch, having enough room to expand as much as you want!
You can check the game here, if there’s no players online, just join with two different tabs:
Please keep in mind that my code is not anywhere being perfect, but I guarantee it to you that I’m working and studying hard to get as better as I can, so if you see something you’d do differently, don’t hesitate to comment.
You can check this project’s GitHub repository here
Configuring Project
We’ll start by configuring our project, so create a folder somewhere named basic-car-game (or whatever name you want).
Access it with your Command line/Powershell/Bash or whatever you use and run npm init answering the questions that are prompted to you.
Now lets install a few dependencies:
npm i --save-dev babel-cli babel-core babel-loader babel-preset-env babel-register html-webpack-plugin nodemon webpack [email protected]
to install our development dependencies.
and run to install our dependencies:
npm i --save body-parser cors express socket.io
Now open your package.json file and lets add a few scripts:
"scripts": {
    "build": "webpack --progress --colors",
    "dev": "nodemon client/server.js --exec babel-node"
},
Now on your root folder, create a new file named .gitignore and simply add
/node_modules/
this will prevent node_modules to be pushed to your git repository.
Create a new file named webpack.config.js :
This will let us use ES6 features and will also bundle our game in a dist folder.
Go to our root folder and create a folder named vendor and add the phaser.min.js file from the repository.
Client
Now on your root folder create another folder, this time name it client and add two files inside of it:
index.html
Here we reset the page’s margin and add two scripts, phaser and our socket.io which is retrieved from the server.
index.js
This will start our game, setting the screen resolution inside our super function
don’t worry about the Game import for now.
Inside your client folder, create the following folder structure:
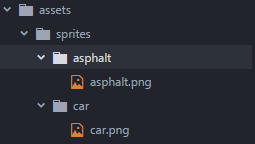
You can find both sprites here, I created the asphalt sprite myself, and got the car sprite from the internet searching “free topdown pixel car”, if the real owner/creator of the car sprite wants atribution or for me to take it down just comment here or message me.
Inside your client folder, create another folder named config with two files named fileloader.js and index.js :
index.js
fileloader.js
Here we define the default background color for our game’s canvas, and we also load two sprites: asphalt and car .
Now create a new folder inside our client folder named state , and inside of this new folder we’ll create a few others:
- world
- utils
- sockets
- predictions
- player
So lets start by the world folder. Create a file named createWorld.js inside of it:
Now create the utils folder and a file named index.js inside of it:
That’s it for the utils folder, lets create the sockets folder:
newPlayer.js
We use this socket event to emit to our server that we are creating a new player in our game
updatePlayers.js
We use this socket event to update all players positions and data.
Now on the predictions folder create a file named playerMovementInterpolation.js :
This will be the only interpolation we’ll be doing.
Now create a folder named player which will contain two files:
createPlayer.js
Here we add our car sprite to the game and enable physics for it.
index.js
In this file we finally assign a sprite to our player, give him a few properties, and make him able to drive around.
Now go to your state folder and create a file named Game.js :
Your client folder should look like this:
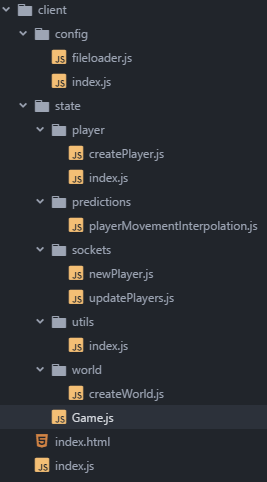
We are done with the client folder.
Server
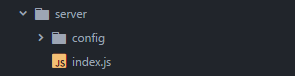
Now we need to handle our game’s server, so create a folder called server and add a folder named config inside of it, and in the root of server add a file named index.js :
Inside of config folder create a new file named index.js :
And inside the server’s root index.js :
That’s it for this tutorial, we created a basic multiplayer online game, where players can connect and drive around, we also display the player’s name (which is his socket’s id) and his current speed!
If you liked this short tutorial, follow me on medium or github and star the repository. Don’t forget to check soon as I’ll be doing more of these!
Recommend
About Joyk
Aggregate valuable and interesting links.
Joyk means Joy of geeK