

Onboarding Users in SAP Quality Issue Resolution
source link: https://community.sap.com/t5/technology-blogs-by-sap/onboarding-users-in-sap-quality-issue-resolution/ba-p/13649566
Go to the source link to view the article. You can view the picture content, updated content and better typesetting reading experience. If the link is broken, please click the button below to view the snapshot at that time.
This blog provides you with a step-by-step procedure for onboarding customer and supplier users to SAP Quality Issue Resolution using SAP IdP (Identity Provider). Before we start, let's gain a clear understanding of SAP Quality Issue Resolution.
Introduction
SAP Quality Issue Resolution is a collaborative problem-solving solution built on the SAP Business Technology Platform (BTP). It involves both customers and suppliers working together to identify issues, determine their root causes, resolve them, and implement preventive measures to prevent their recurrence using standard methodologies, such as 8D.
To effectively address a problem, it is important that you involve both the customer and supplier users in the solution. When they are onboarded, they can start assembling their teams and work collaboratively on the problem-solving process.
Please note that this blog is only relevant for those users who use SAP IdP (Identity Provider) to create and authorize users for SAP Quality Issue Resolution.
Learning Outcome
By the end of this blog, you will be able to:
- Create customer and supplier users in SAP IdP
- Create user groups and assign users to user groups
- Create roles from role templates
- Create role collections
- Assign roles to role collections
Target Audience
Anyone who uses SAP IdP to onboard customers and suppliers to SAP Quality Issue Resolution.
Prerequisites
Before you start, make sure you have met the following prerequisites:
Creating a Role Collection
In SAP BTP, a role collection is a group of related roles that are bundled together for assignment to IdP user groups.
In SAP Quality Issue Resolution, you create a different role collection for each of the roles that you have created. Also, all the supplier groups you create in IdP should be assigned to the same role collection of the supplier.
Follow the steps below to create a role collection.
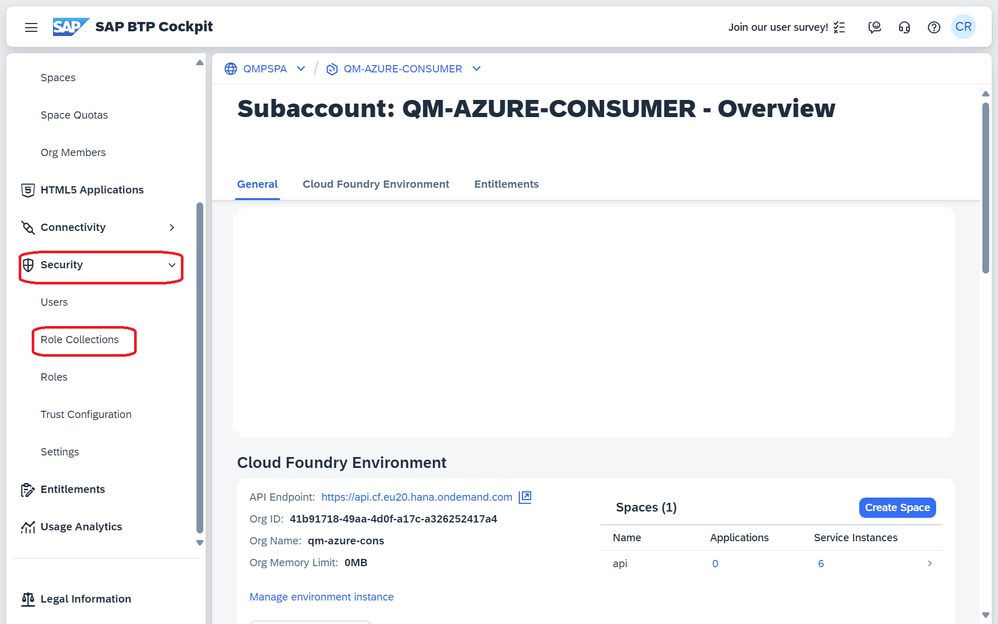
1. Log in to your SAP BTP account and go to Security > Role Collections.
2. Click on the Create button. Enter a name and description.
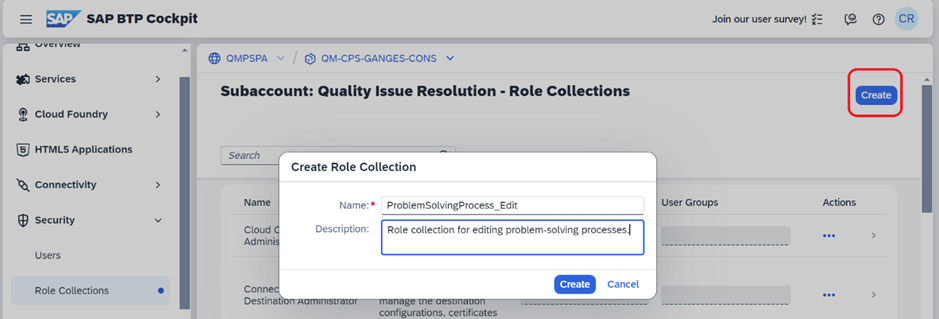
3. Click Create.
4. A role collection is created.
Creating a Role Using Role Template and Mapping of Role Collection
By creating and assigning roles, you can make sure that users have the appropriate level of access to perform tasks in SAP Quality Issue Resolution.
In BTP, we use role templates as a standardized way to define and manage roles within an organization. You can use the role templates to create roles to perform a specific task with required authorization.
Let’s see how to create roles in SAP BTP.
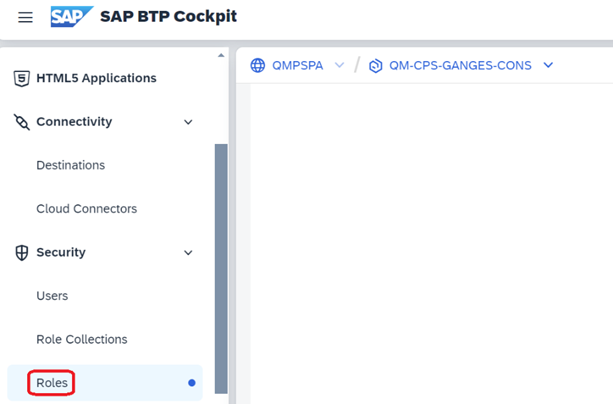
1. Log in to your BTP account and go to Security > Roles.
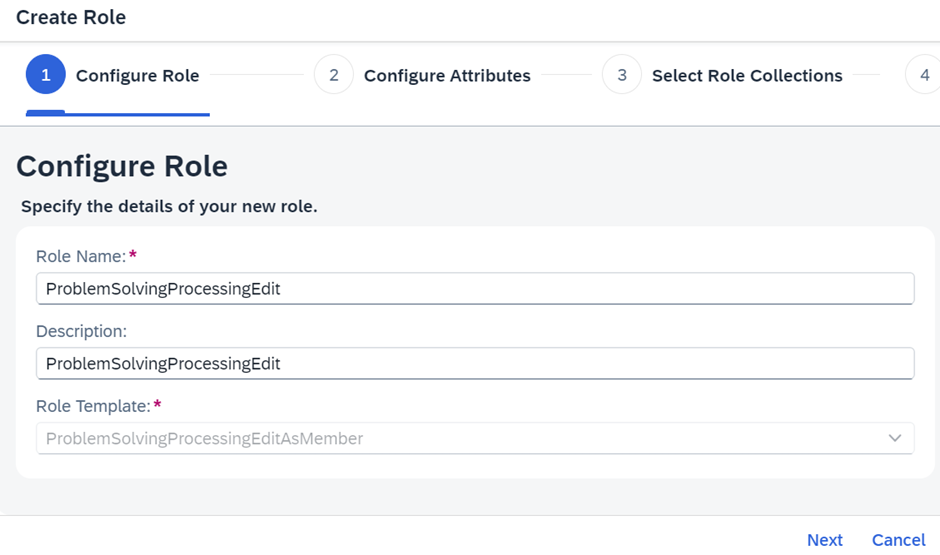
2. Search for the role template for which you want to create a new role and click on the Create Role button next to the role template.

3. Enter the Role Name and Description and click Next.
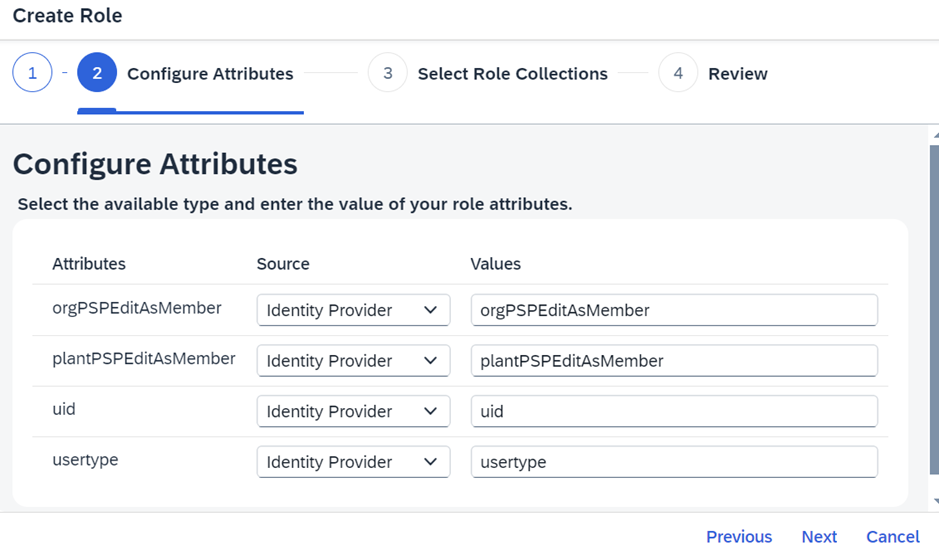
4. Maintain the following values in the Configure Attributes section. Select “Identity Provider” as the Source. Click Next.
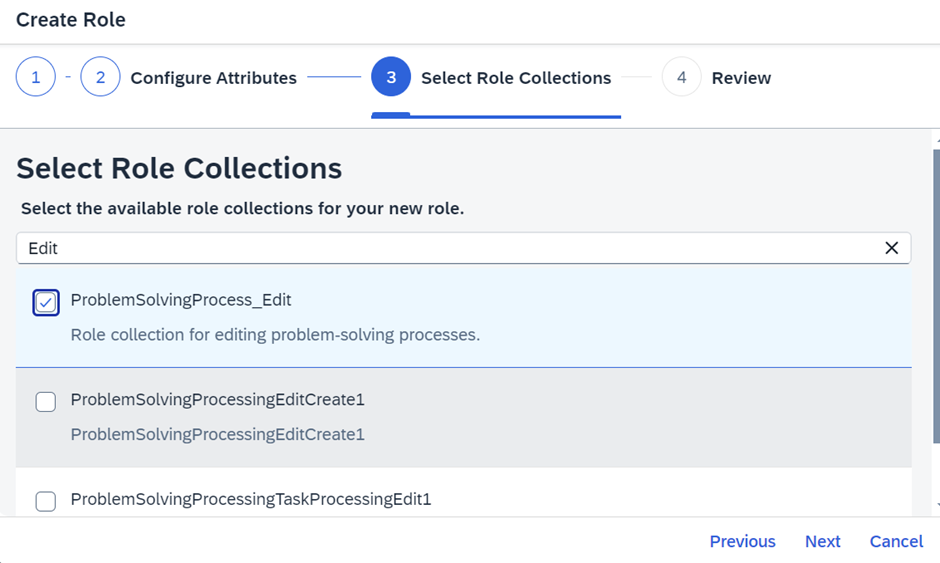
5. Search in the list for your role collection and select it.
6. Click Next to review your settings and Click Finish.
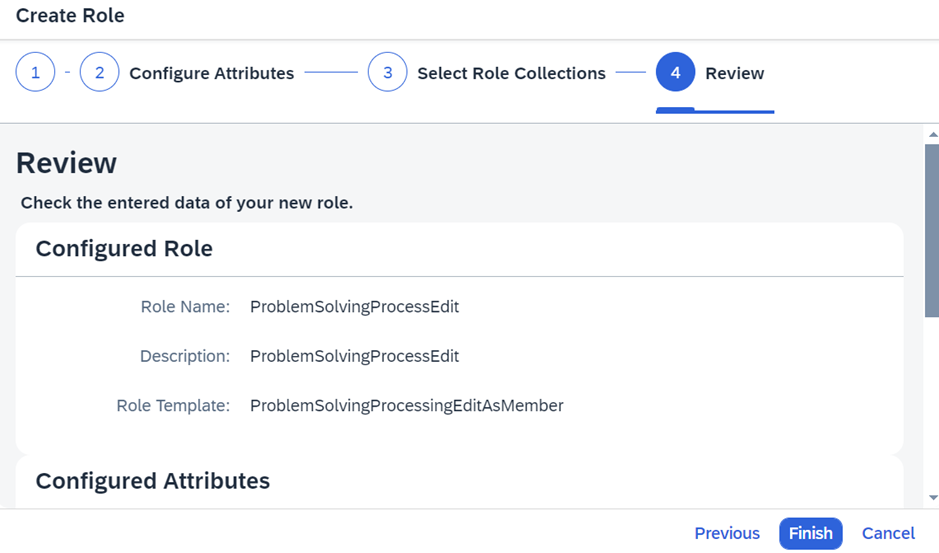
7. A new role has been created.
Note:
- It is important to set up all the role templates mentioned in the table in order to avoid any potential errors when using the application.
- Make sure you maintain separate roles for scenario host and scenario partners.
Creating Employee Users
In this blog, we have used two example users: Ravi Pandey representing a customer user from abcorg, and John Miller representing a supplier user from xyzorg. By using these examples, we aim to make it easier for you to understand the concepts discussed throughout the article.
First, make sure you have a user account in SAP IdP to start creating customer and supplier users for SAP Quality Issue Resolution.
Let’s now consider the case of a user named Ravi Pandey who needs to work on a problem-solving process as a customer. To onboard him, please follow the steps below in SAP IdP.
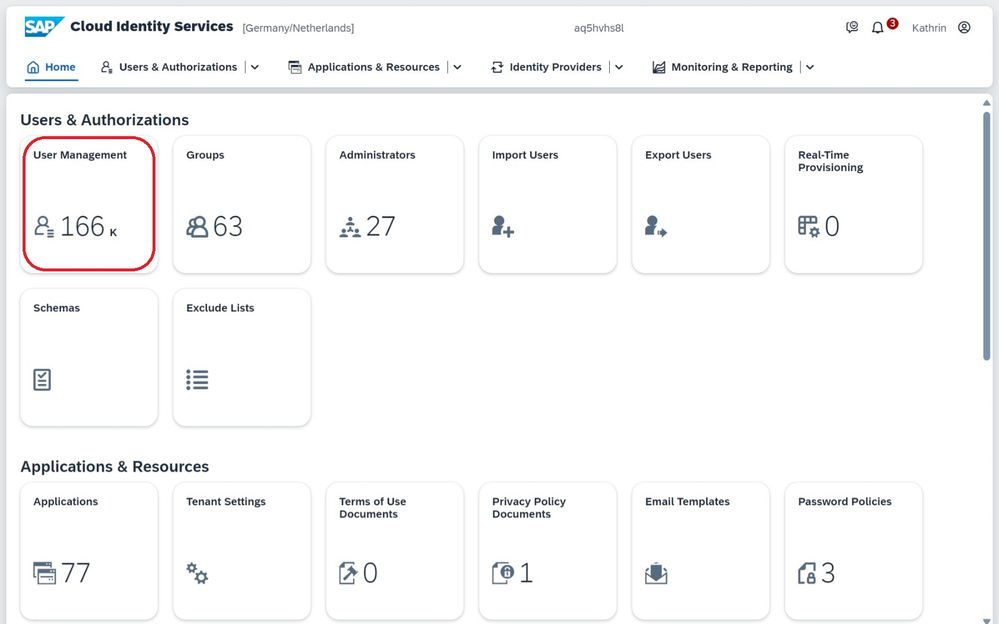
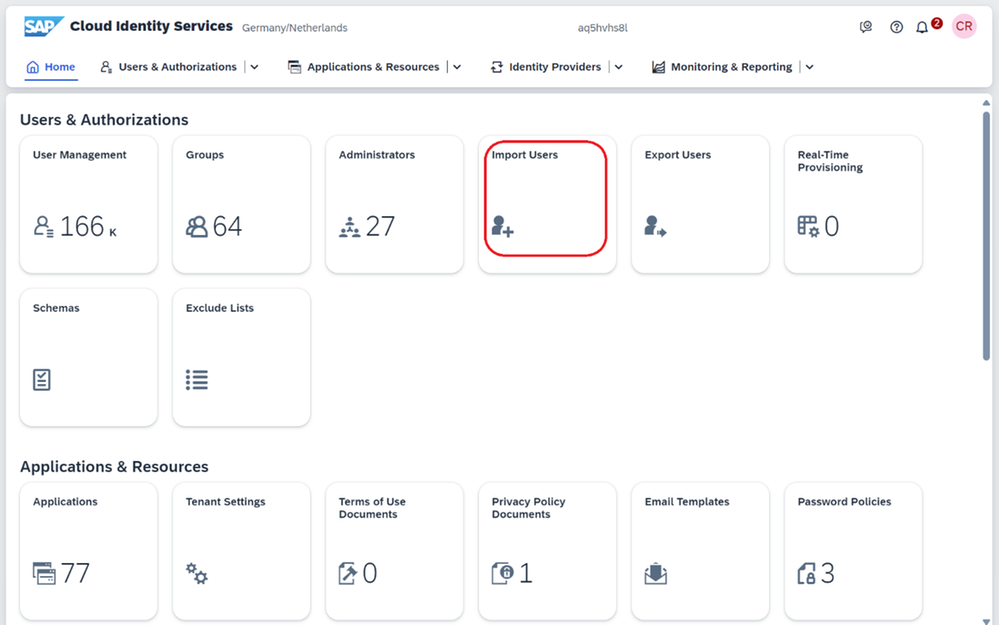
1. Log in to your SAP IdP account and click on the User Management tile.
2. Click on the Add button and enter the mandatory details. To set Ravi Pandey as a customer-side user, select "Employee" as the User Type.
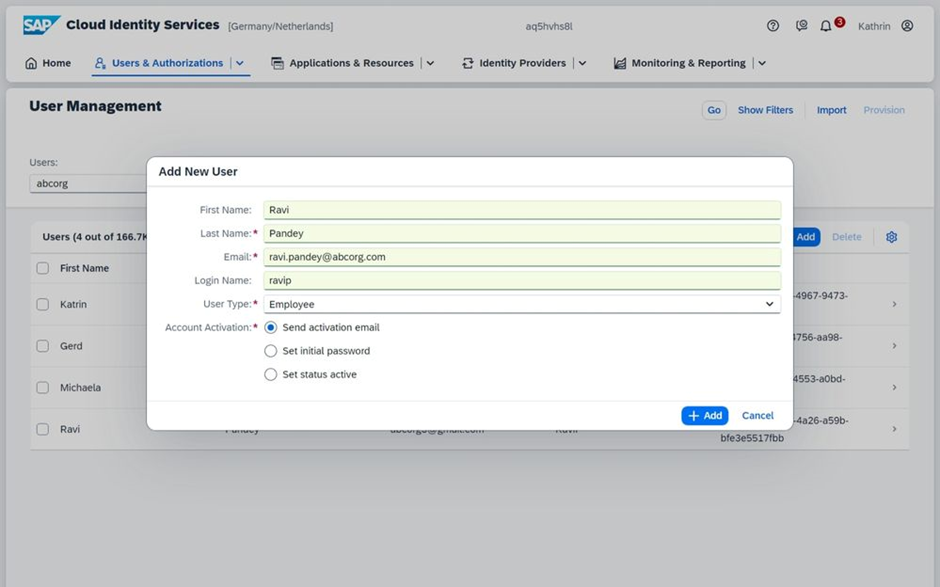
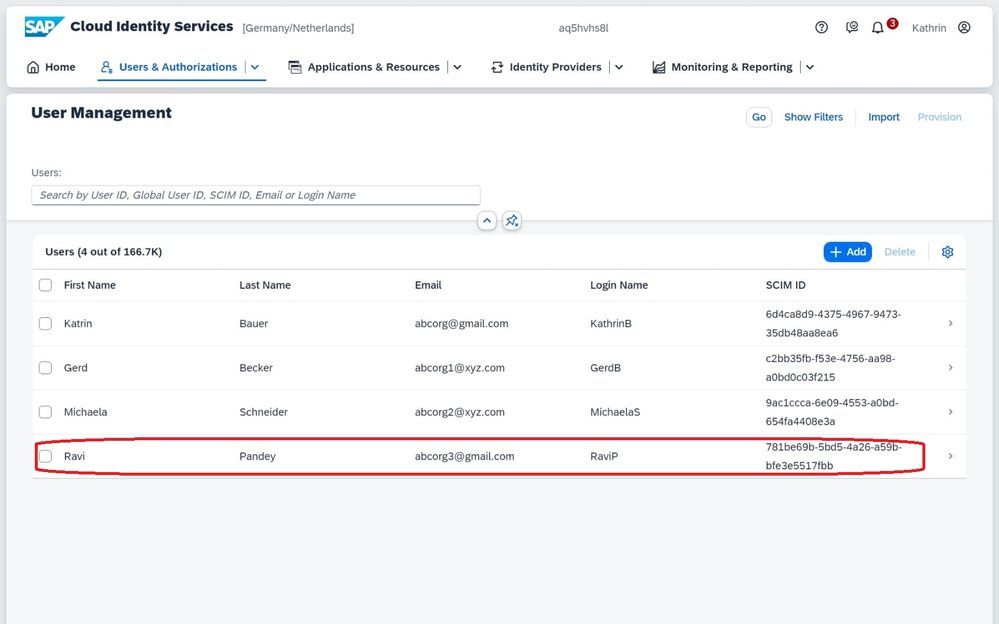
3. Click Add. You can now search for and view the newly added user in the list report page.
Note: Make sure you don’t change the User Type of the user after you have added them as a team member in the problem-solving process.
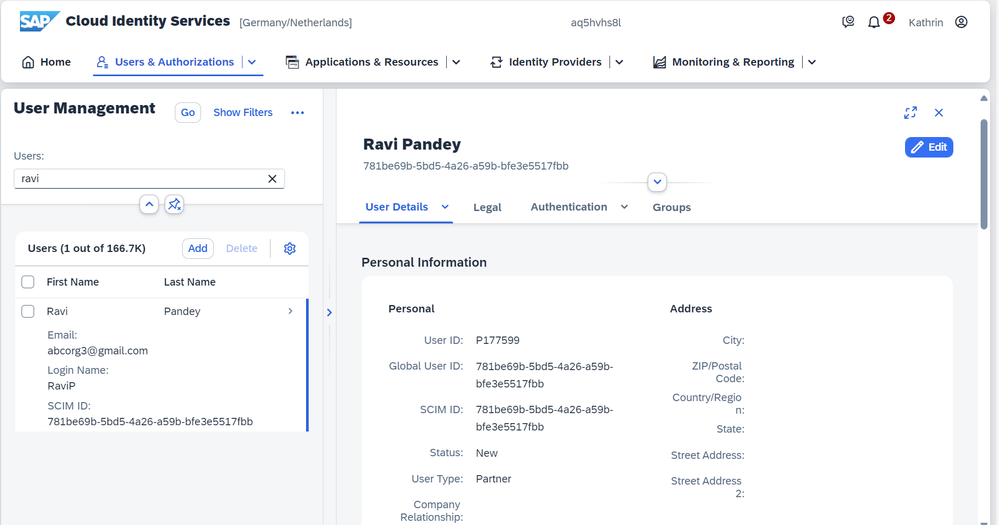
4. To add or edit user attributes for this user, you can click on the user and navigate to the user details page.
Let’s now consider a case where you want to add or update multiple users at once. To do so, you must first download a .CSV file template from SAP IdP, update the necessary user details, and upload it back to SAP IdP.
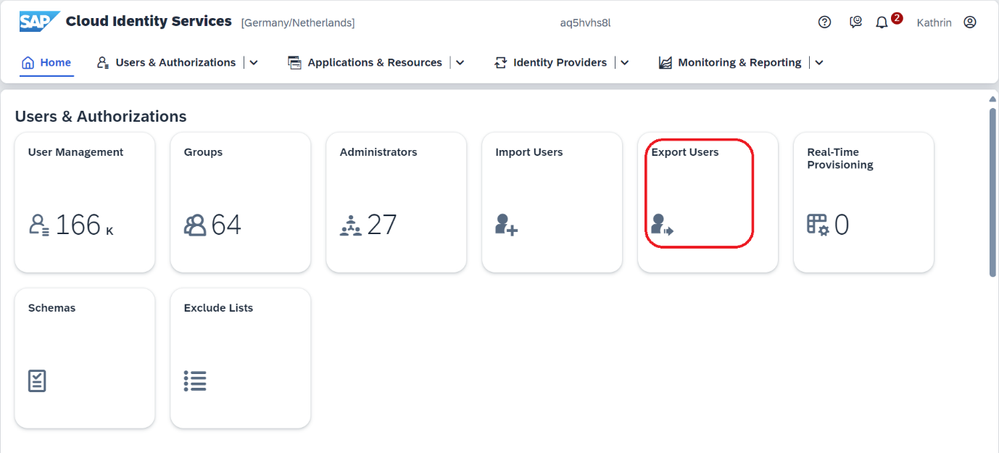
1. On SAP IdP, click on the Export Users tile.
2. Select the user details from the standard attributes and custom attributes list as mentioned in the screenshot below.
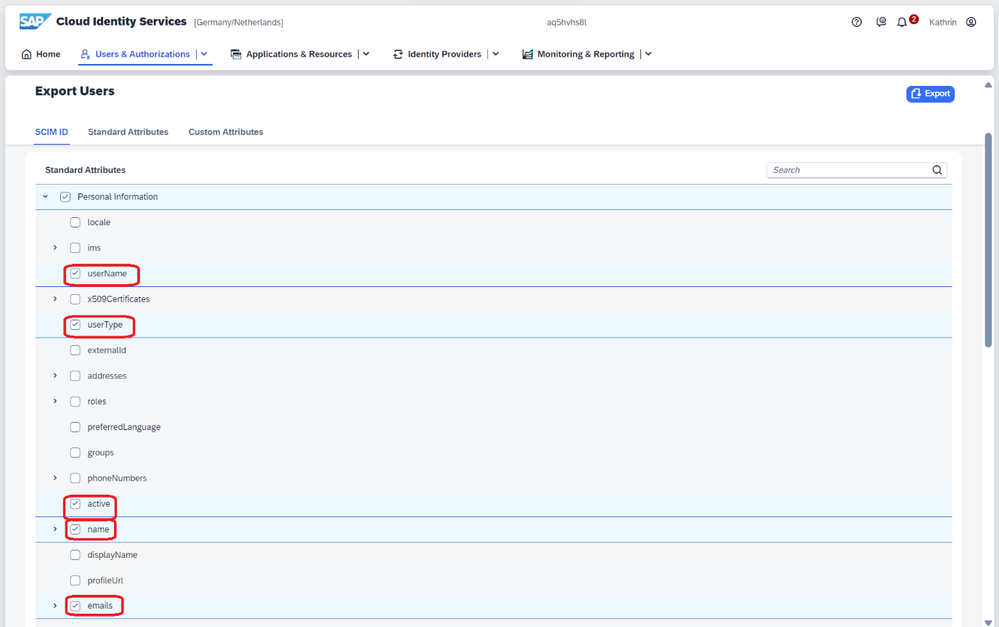

3. Click on the Export button. All the selected attributes are now downloaded to a CSV file.
4. Add or edit the values for attributes as mentioned in the screenshot below.
As you can see from the example below, we have added two new “Employee” users in the CSV file.

5. Save the file.
Maintaining User and Custom Attributes in CSV File
You must make sure that the following details are maintained in the CSV file:
- Profile data of users, such as status, first name, last name, login name, email address, group, and company details.
- User authorization for custom attributes for plants and organizations. This is based on the role templates on which the users’ roles are based and the problem-solving scenarios for which the users work.
For example, if a user has a role based on the role template ProblemSolvingProcessingEditDelete and will work on a supplier problem-solving process, you must enter values in the columns ending with plantPSPEditDelete and orgPSPEditDelete. See screenshots below.


Note: Excel often removes leading zeros. To keep them, you must convert the cell format to text before you enter the values. Please make sure you enter the correct number of zeros for any custom attribute.
The table below explains how authorization works for different custom attributes:
Value | Meaning | Example |
ID of a plant or organization | Grants authorization for this plant or organization. | |
Multiple IDs of plants or organizations, separated by commas | Grants authorization for these plants or organizations. Note: Don't enter a space after the comma. | 0001,0002 |
Asterisk (*) | Grants global authorization to all plants or organizations. Note: We don't recommend combining IDs with an asterisk in a list separated by commas (0001,0002,*). This does not grant global authorization but instead only authorization for the specified plants or organizations. | |
Empty | No authorization Note: In this case, users receive an error message when they open the SAP Quality Issue Resolution apps. |
Note:
- You can’t grant global authorization to scenario partner users. If you enter an asterisk for the relevant custom attribute, the users receive an error message when they open the SAP Quality Issue Resolution apps. You can only grant them authorization for specific organizations by entering the corresponding IDs.
- Customer and supplier numbers must be entered with the correct number of leading zeros (fill with leading zeros to 10 digits). To check if values have leading zeros, follow the steps in How to Find Supplier and Customer Numbers Including Leading Zeros.
After you have made changes to the CSV file, you must upload the file back to SAP IdP.
6. Click on the Import Users tile on SAP IdP.
7. Click on the Browse button and select the CSV file that you want to upload. Click Import.
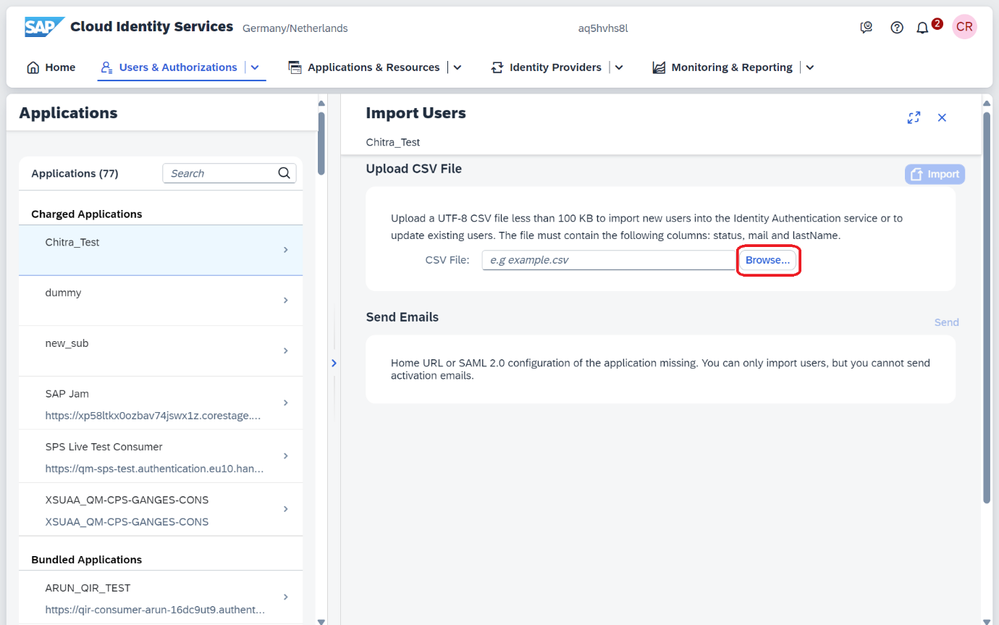
8. A confirmation pop-up appears. Click OK. The users are now uploaded to the IdP.
To activate newly imported users, click Send to activate users. This sends an activation email to all users who are not yet active.
Note: Please make sure that you’ve configured the home URL for your application. This enables the system to send email notifications to the onboarded users. For more information about how to configure the application home URL, see Configure an Application's Home URL.
For more information about importing users, see Import or Update Users for a Specific Application.
Creating Supplier Users
Now that we have created employee/customer users in SAP IdP, let’s understand how to onboard supplier users to SAP Quality Issue Resolution.
As stated earlier, we’ll consider the case of a supplier user, John Miller, who we want to onboard to SAP Quality Issue Resolution.
You perform the following steps as a Supplier Admin.
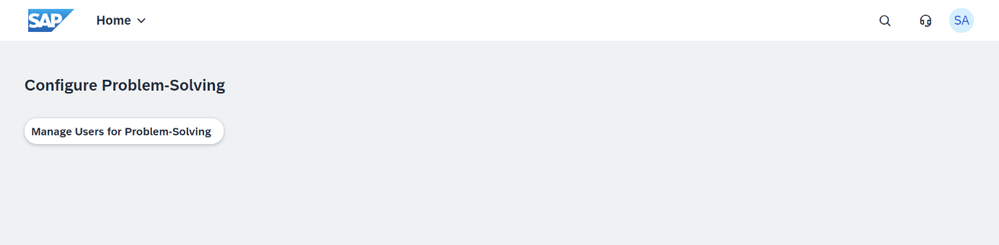
1. Log in to the Manage Users for Problem-Solving application.
2. Click on the Create button and enter all the mandatory details as shown below.
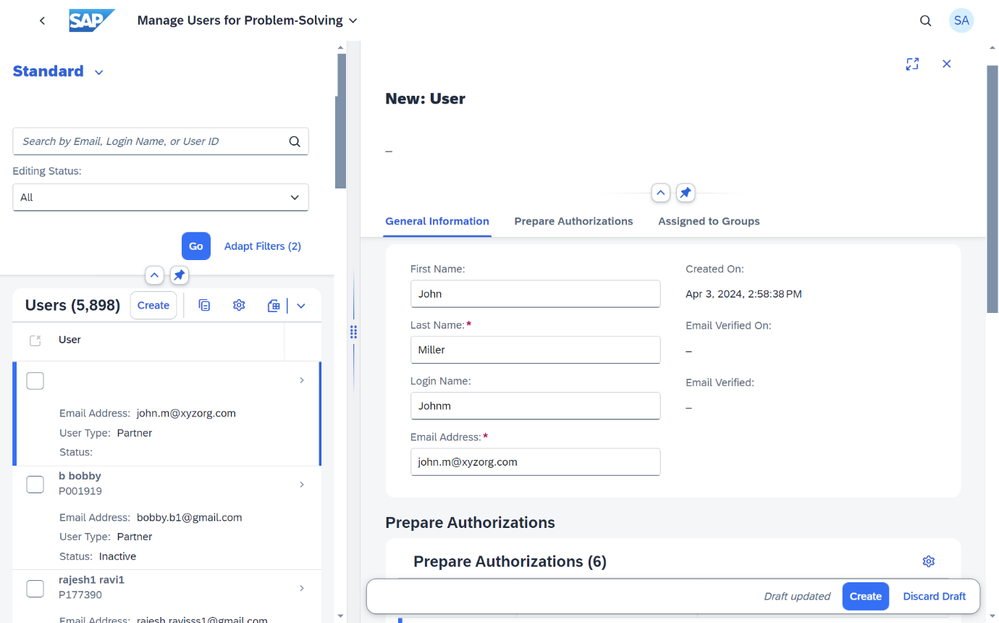
3. Scroll down to the User Groups section and add the user groups based on the required authorization level.
We’ll discuss the creation of user groups later in the blog.
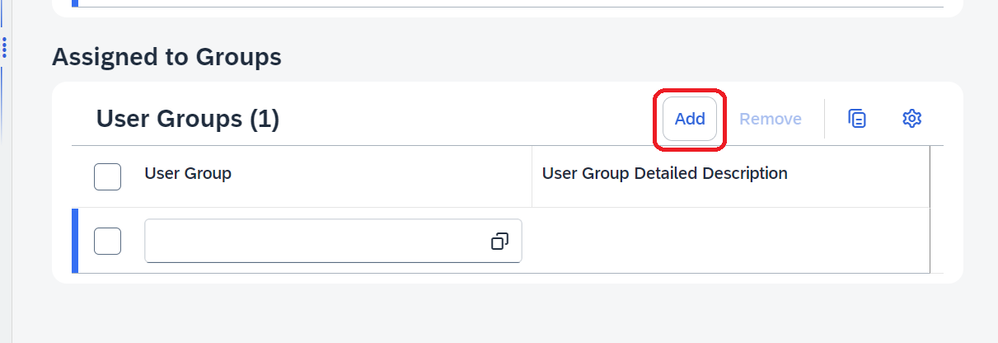
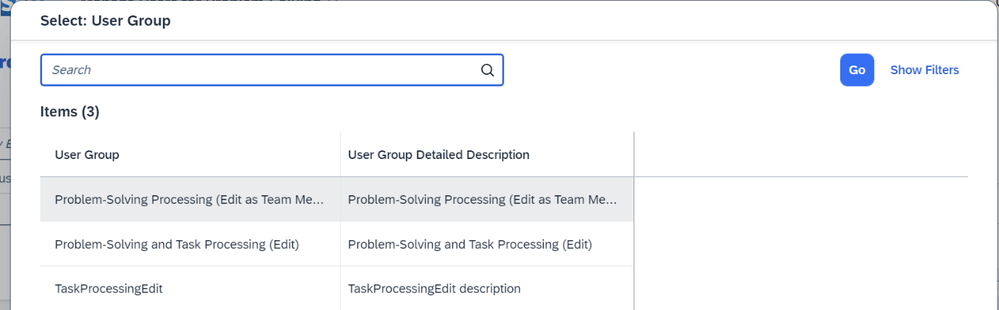
4. Select the required user groups from the list.
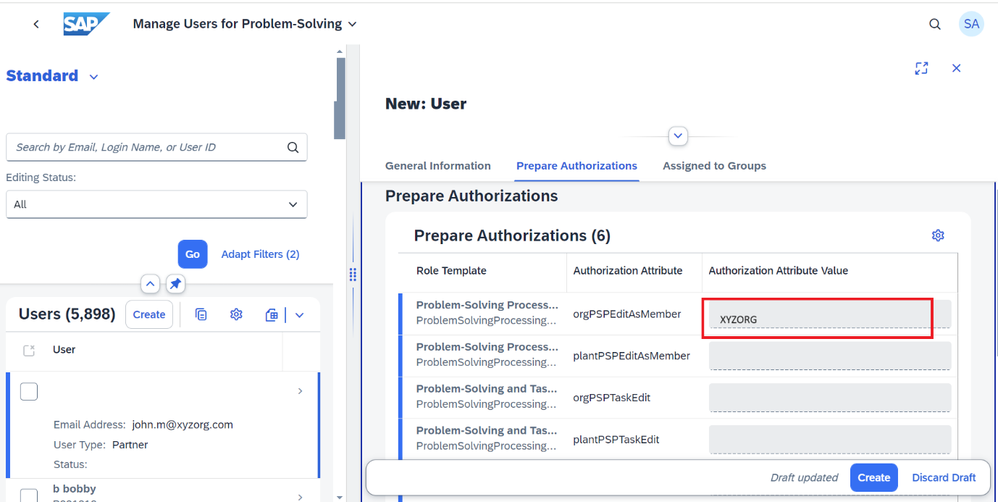
5. The user group has been assigned to the user. Additionally, the orgPSPEditAsMember authorization attribute has been set to the default value of xyzorg for John Miller, indicating that he can now be added as a team member for problem-solving processes within xyzorg.
6. Click Create.
A supplier user named John Miller has been created in the SAP Identity Provider (IdP).
Creating User Groups for Employees
SAP BTP allows you to create user groups to organize and manage user access and permissions within the platform. In SAP Quality Issue Resolution, the employee and supplier users are required to create different groups as follows.
Let’s start with creating a user group for “Employee” users. The scenario host from the employee side creates a user group for the employees/customers.
1. Log in to SAP IdP and click on the Groups tile.
2. Click on the Create button.
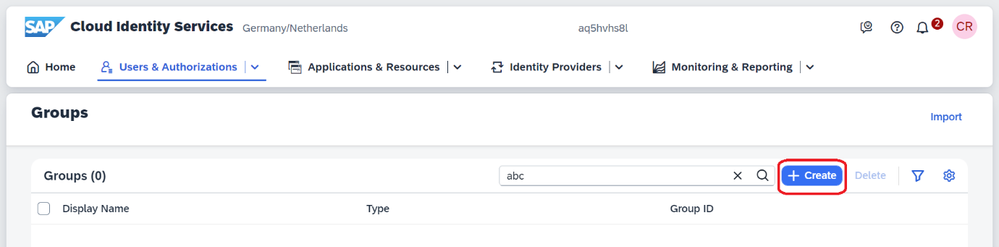
3. Enter a Name, Display Name, and a Description for the user group and click Create.
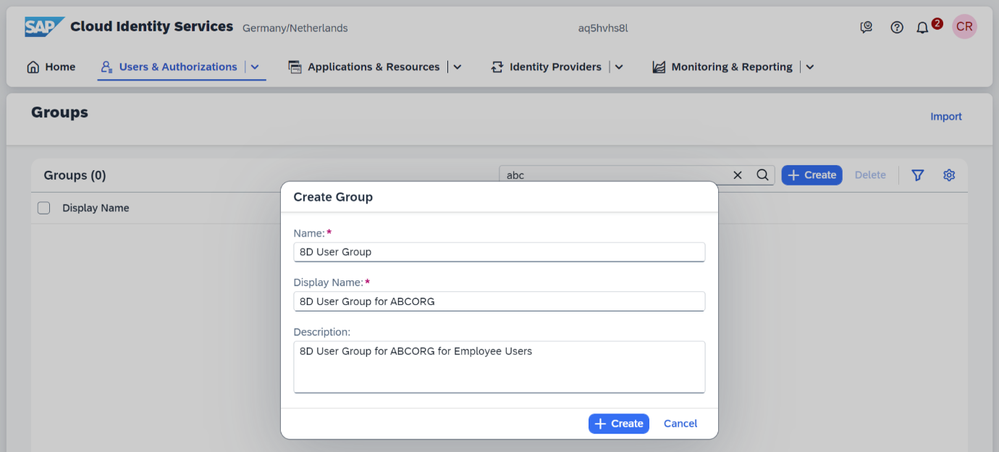
4. The user group is created. You can search for and display the “8D User group for ABCORG” user group in the list report page.
Creating User Groups for Scenario Partners
Similarly, as a Scenario Partner, you must create user groups for your partner users following the steps mentioned above.
However, creating your own user groups (like how it was done for employee users) is not allowed here. We recommend that you create the user groups for scenario partners with the following naming conventions:
Name | Display Name | Description |
Problem-Solving and Task Processing (Edit) | Problem-Solving and Task Processing (Edit) | All users in this user group can display and edit all problem-solving processes that are assigned to their organization. |
Problem-Solving Processing (Edit as Team Member) | Problem-Solving Processing (Edit as Team Member) | All users in this user group can display and edit all problem-solving processes where they are a team member and that are assigned to their organization. |
TaskProcessingEdit | TaskProcessingEdit | All users in this user group can display and edit all tasks where they are assigned as task processor. Note: They cannot delete tasks or change task processors. |
Assigning Users to User Groups
Let’s assign the employee user Ravi Pandey to the “8D User group for ABCORG” user group. To do so, you follow the steps below:
1. Go to the Groups tile in SAP IdP.
2. Search for and click on the newly created user group for employees - “8D User group for ABCORG”.
3. Click Add to add users.
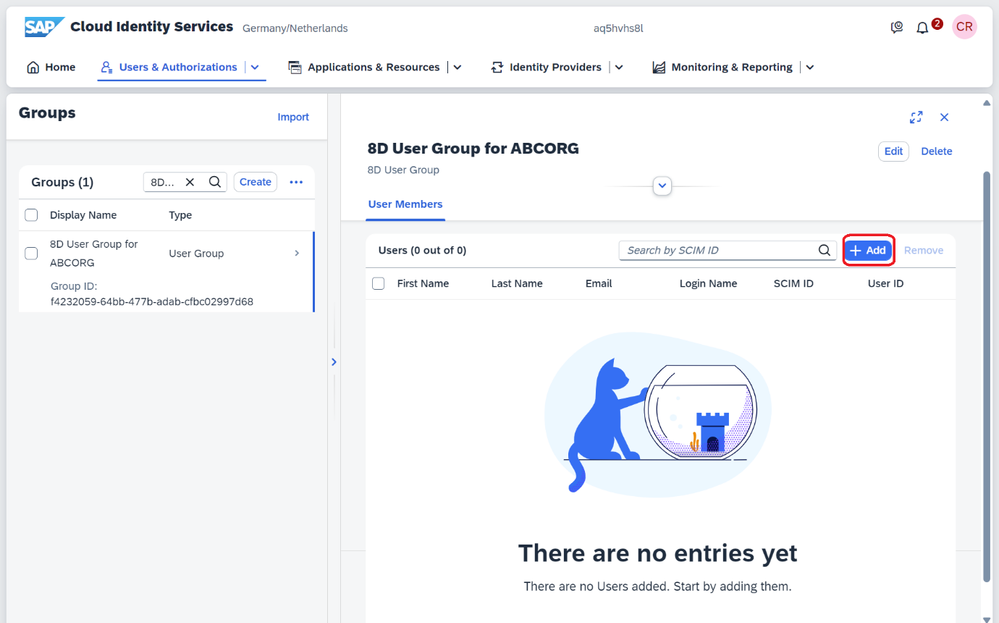
4. Search for and select the employee user Ravi Pandey and click Add.
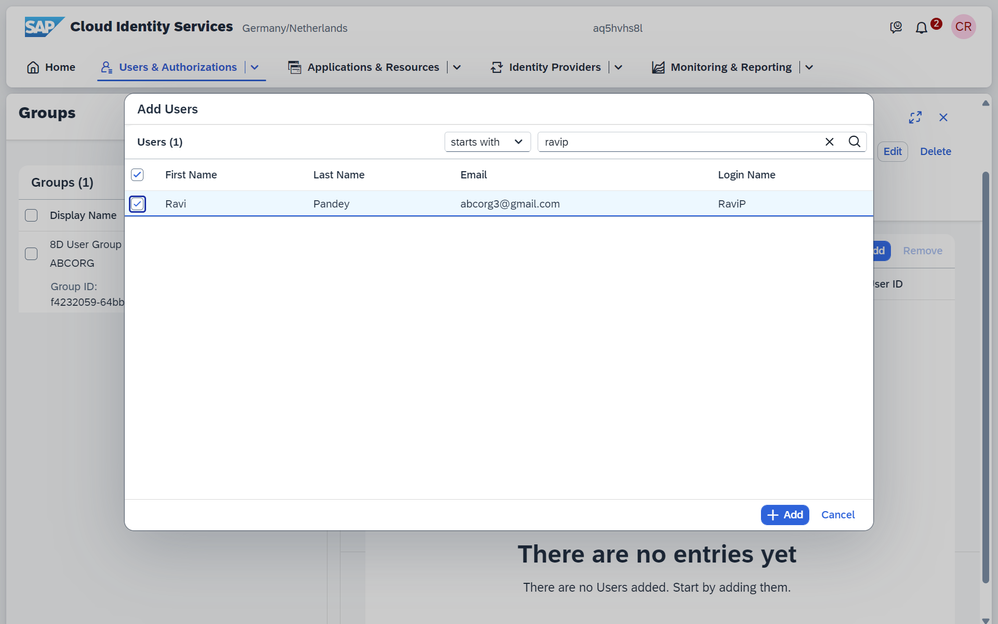
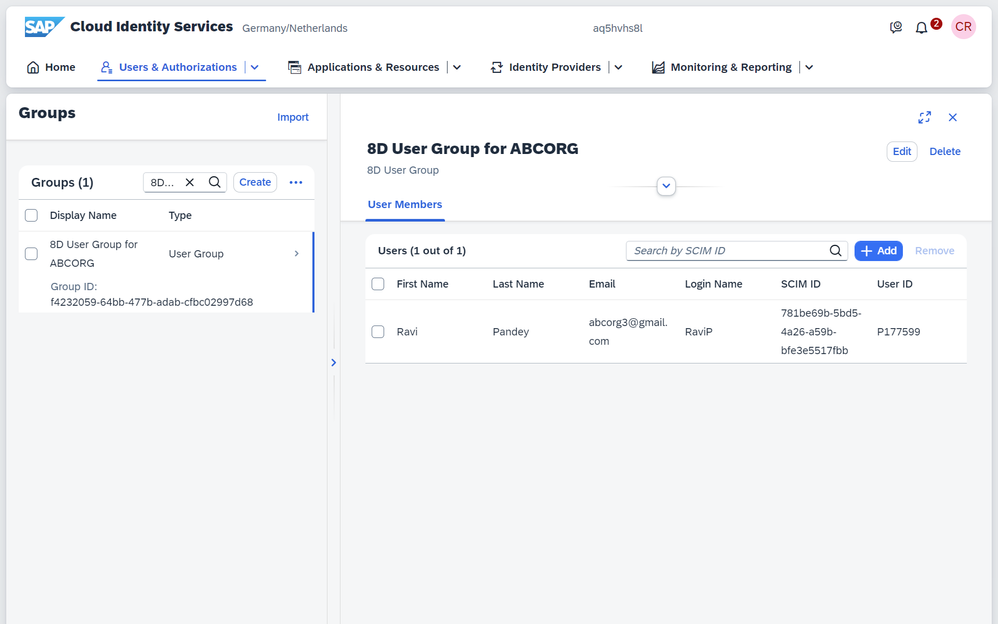
5. Ravi Pandey is added to “8D User Group for ABCORG”.
Similarly, we have already assigned John Miller to the user groups created for supplier users (please refer to the “Create Supplier Users” section of this blog for steps).
Note: You must configure the newly created user groups in your IAS destination to make them searchable. Please see Configuring the Identity Authentication Destination | SAP Help Portal.
Assigning IdP Groups to Role Collections
By assigning user groups to role collections, you can manage permissions and access control at group level rather than individually assigning roles to each user.
Follow the steps below to assign group to a role collection:
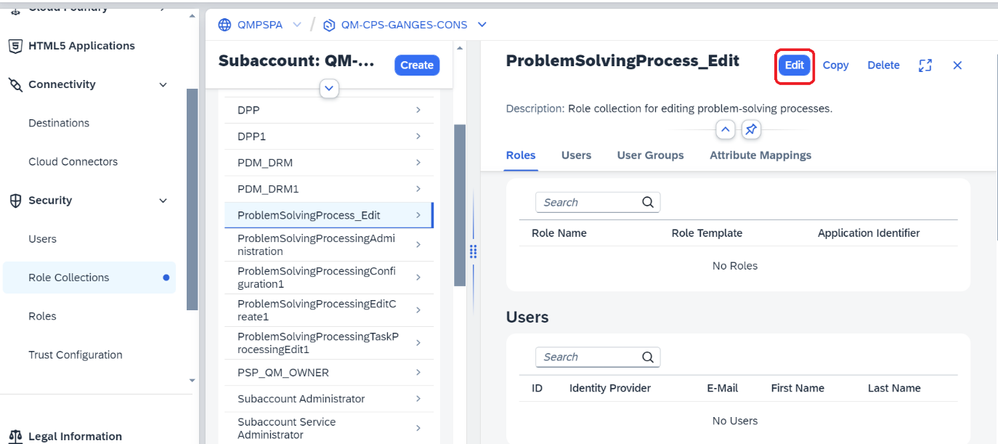
1. Go to the role collection for which you want to assign user groups.
2. Click on the Edit button.
3. Enter the user group and click Save.
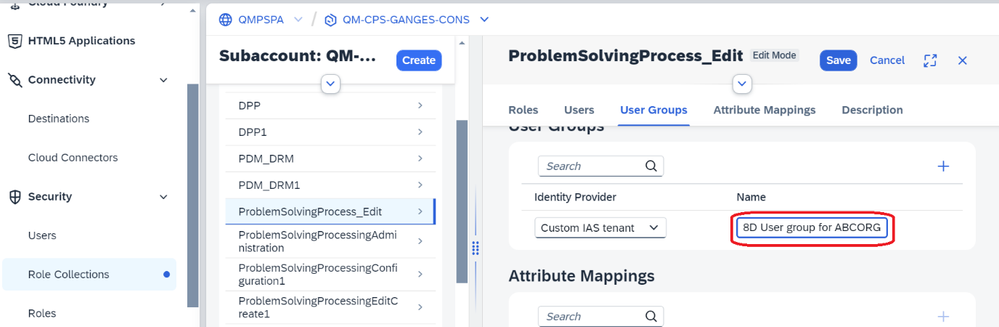
The user group “8D User Group for ABCORG” is now assigned to the role collection.
Recommend
About Joyk
Aggregate valuable and interesting links.
Joyk means Joy of geeK