

The same app in Jetpack Compose, SwiftUI, and Flutter - Part 1: Let's Compose -...
source link: https://blog.whidev.com/the-same-app-in-jetpack-compose-swiftui-and-flutter-compose/
Go to the source link to view the article. You can view the picture content, updated content and better typesetting reading experience. If the link is broken, please click the button below to view the snapshot at that time.

The same app in Jetpack Compose, SwiftUI, and Flutter – Part 1: Let’s Compose
This post is part of a series on my experience with creating the same mobile game app with three different UI toolkits: Jetpack Compose, SwiftUI, and Flutter. Here are links to the other parts:
- Introduction (read this first!).
- Part 1: Jetpack Compose (this post).
- Part 2: Flutter (coming up soon).
- Part 3: SwiftUI (coming up soon).
- Part 4: Final thoughts (coming up soon).
So, let’s now begin with the Jetpack Compose part!
As a reminder, this is my first time using Jetpack Compose and doing native Android apps in general. I remember doing some Android dev tutorials (with Java and XML views) years ago, but nothing to write home about.
My background is mainly web development, and building various apps with Flutter, for both desktop and mobile platforms, so I am coming at Compose from a pretty different way point than most developers, who might upgrade to it from XML and Java.

As I was working on the app, I jotted down some random notes and thoughts about the whole process. Please keep in mind that I may be wrong when describing the issues I faced; I am not an expert in Compose, so there might be a better way to do things. If so, let me know!
Finally, if you want to check the app in action, you can get it from the Play Store here. It now has over 10k downloads and its review score is around 4 stars, since launching on November 2023.
Learning Kotlin
Kotlin is a great, modern language. It is easy to learn and adapt to, especially coming from Dart or similar languages. The docs are great, with a playground and Koans (exercises) to help you experiment and learn Kotlin. There is also a special section for solving Advent of Code with Kotlin in the official docs!

Here are some random features I loved about Kotlin:
- It is null-safe from the get-go. This eliminates most null reference runtime errors, unless you explicitly cast a null variable (using the
!!operator). The compiler is strict and helpful enough to warn you when possibly null references are created. ifis not a statement, but an expression, similar to Python. This means Kotlin doesn’t have the ternary (?) operator, which, I think, can be overused in other languages. Here is a simple if expression:val max = if (a > b) a else b- Kotlin has data classes, which are so useful to reduce boilerplate code (like in Dart).
- It has a lot of syntactic sugar. Many people don’t like this in programming languages, but I feel it makes code more expressive and easy to understand for anyone. I guess you can immediately understand what the following snippet does:
fun main() {
    val numbers = listOf(-1, 2, 4, -3, 5)
    val positives = numbers.filter { it > 0 }
    println("Positive numbers: $positives")

    for (i in 1..5 step 2) println("Odd number in range 1 to 5: $i")

    val x = 2
    val numberType = when (x) {
        in 1..3 -> "x is between 1 and 3"
        !in 4..10 -> "x is not between 4 and 10"
        else -> "x is something else"
    }
    println(numberType)

    val y = if (x == 1) {
        "one"
    } else if (x == 2) {
        "two"
    } else {
        "other"
    }
    println("y is $y")

    (1..3).forEach { println("Number: $it") }
}
- It has a lot of functional programming features, like high-order functions, lambdas, and the whole set of collection-based operation (map, filter, reduce, etc.):
fun getDaysWon(): List<LocalDate> {
    val days = stats.games.filter { it.didWin }.map { it.date }
    return days.map {
        LocalDate.parse(it, DateTimeFormatter.ofPattern("dd/MM/yyyy"))
    }
}
- I also liked the closures/scoped functions syntax, as it makes code more concise and avoids repeating code:
val numbers = mutableListOf("one", "two", "three", "four", "five")
numbers.map { it.length }.filter { it > 3 }.let {
    println(it)
    // and more function calls if needed
}
context.findActivity()?.let { activity ->
    // activity is not-null, so we can continue
    Purchases.sharedInstance.purchaseWith(PurchaseParams.Builder(activity, noAdsProduct).build())
}
The only thing I found relatively foreign and difficult to get is asynchronous programming.
Kotlin uses coroutines, which is an entirely different approach than async/await or Promises, that I was used to from Javascript and Dart. It took a while to read the docs and get used to the concepts, but it ended up working fine on the few use cases I needed it for, mainly making HTTP requests or loading animations.
Finally, Kotlin’s tooling is great! The compiler is tightly integrated with Android Studio, performs well, and gives meaningful error messages. I mostly prefer using VS Code for most of my projects, but Android Studio is indeed the only real solution for Kotlin and Android dev.
Learning Jetpack Compose
After getting familiar with Kotlin, I went on to learning Jetpack Compose as a framework.
For that, I relied mostly on the official tutorials and docs from Google. I completed some of them, but for the most part, I skimmed through the tutorials to get a general picture of what there is to know.
I am a firm believer that you learn faster and better when getting your hands dirty, in action, instead of completing every tutorial available.
Thus, I decided to start developing the app, while keeping the official documentation at reach, and, of course, a ChatGPT session open to help.
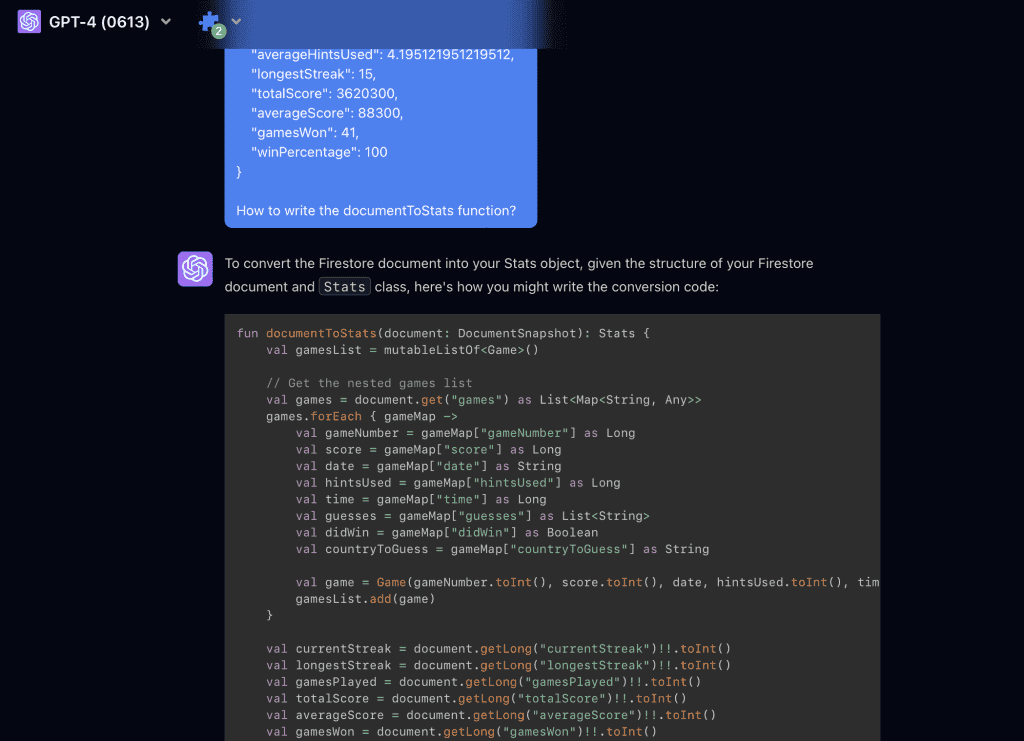
LLMs excel at acting like a mentor/expert and guiding you when learning a new framework. If I hadn’t utilized ChatGPT, I believe the time needed to finish the app would have more than doubled.
Developing an app with Jetpack Compose
So, here is a collection of completely random thoughts I had while building a full-fledged app with Jetpack Compose, coming from Flutter:
I miss Hot Reload
Flutter’s Hot Reload, where modifying your code immediately updates the running app’s source code without the need to restart, is a marvelous feature. Jetpack Compose (and other frameworks, I guess) is nowhere near this experience.
There is Live Edit, which tries to offer a similar dev experience, but I found it limited and unreliable. It works only on certain occasions, mostly when updating modifiers or animations, which makes you always guess if it worked at all. Just check the notes on LiveEdit’s documentation to see its multiple limitations.
There is also Preview (using the @Preview annotation), embedded in Android Studio, which helps with previewing the UI, but again, nowhere near close to the Flutter experience.
In the end, I resorted to the classic way of stopping and restarting the app, to make sure my code modifications were always reflected in the app. This was cumbersome, of course, since I sometimes needed to tap 3–4 screens into the app to test even simple modifications, like changing a widget’s layout. I sincerely hope that Live Edit improves and resembles more Flutter’s Hot Reload in the future.
Cleaner syntax
Working with Jetpack Compose (and Kotlin) demonstrated to me how verbose Flutter can be every so often. Building UIs with Compose is far cleaner and more succinct, in a way that feels natural.
Here is, for example, how a card component with a simple dismiss button can be created in Compose and then in Flutter:
@Composable
fun MessageCard(message: String) {
    var isVisible by remember { mutableStateOf(true) }
    if (isVisible) {
        Card(
            modifier = Modifier.padding(8.dp),
            elevation = 4.dp
        ) {
            Column(
                modifier = Modifier.padding(16.dp),
                horizontalAlignment = Alignment.CenterHorizontally
            ) {
                Text(text = message)
                Spacer(modifier = Modifier.height(8.dp))
                Button(onClick = { isVisible = false }) {
                    Text("Dismiss")
                }
            }
        }
    }
}
class MessageCard extends StatefulWidget {
  final String message;
  const MessageCard({Key? key, required this.message}) : super(key: key);
  @override
  _MessageCardState createState() => _MessageCardState();
}
class _MessageCardState extends State<MessageCard> {
  bool isVisible = true;
  @override
  Widget build(BuildContext context) {
    return Visibility(
      visible: isVisible,
      child: Padding(
        padding: const EdgeInsets.all(8.0),
        child: Card(
          elevation: 4.0,
          child: Padding(
            padding: const EdgeInsets.all(16.0),
            child: Column(
              mainAxisSize: MainAxisSize.min,
              children:[
                Text(widget.message),
                SizedBox(height: 8.0),
                ElevatedButton(
                  onPressed: () => setState(() {
                    isVisible = false;
                  }),
                  child: Text('Dismiss'),
                ),
              ],
            ),
          ),
        ),
      ),
    );
  }
}
The Flutter snippet appears more convoluted:
- It uses a lot more nesting and widget arguments, like
child:repeatedly. - Compose uses
var isVisible by remember { mutableStateOf(true) }for state management, which is more concise than Flutter’ssetStatemethod inside aStatefulWidgetand its extra class. - The Compose snippet reads directly as a collection of UI components: you have a Card > Column > [Text, Button]. It’s harder to immediately see the same structure with Flutter.
I also liked the modifier syntax a lot more. It can be a bit confusing, in advanced cases where the order of modifiers matters, but again, it’s more concise and readable than the widget composition approach of Flutter.
Build.gradle: the pain
Managing dependencies is surely not as simple as the experience Flutter offers with pub.dev and pubspec.yaml configurations.
Android doesn’t have a dedicated package manager or a web interface for it: you find the dependency you require hosted on repositories like Maven Central, and add it to your Gradle file, with its version number.
dependencies {
    val navVersion = "2.7.7"
    implementation("androidx.core:core-ktx:1.12.0")
    implementation("androidx.lifecycle:lifecycle-runtime-ktx:2.7.0")
    implementation("androidx.lifecycle:lifecycle-runtime-compose:2.8.0-alpha02")
    implementation("androidx.activity:activity-compose:1.8.2")
    implementation("androidx.lifecycle:lifecycle-viewmodel-compose:2.7.0")
    implementation(platform("androidx.compose:compose-bom:2024.02.02"))
    implementation("org.jetbrains.kotlinx:kotlinx-serialization-json:1.4.1")
    implementation("androidx.compose.ui:ui")
    implementation("androidx.compose.ui:ui-graphics")
    implementation("androidx.compose.ui:ui-tooling-preview")
    implementation("androidx.compose.material3:material3")
    debugImplementation("androidx.compose.ui:ui-tooling")
    debugImplementation("androidx.compose.ui:ui-test-manifest")
    implementation("androidx.navigation:navigation-compose:$navVersion")
    implementation("nl.dionsegijn:konfetti-compose:2.0.3")
    implementation(platform("com.google.firebase:firebase-bom:32.3.1"))
}
I distinctly recall spending roughly two hours trying to correctly add the Kotlin serialization dependency, during which I encountered various unexpected Gradle errors.
Gradle sync is also on the slow side, taking 2–3 minutes to complete resolving all dependencies, and even more to update itself. Thankfully, Android Studio has an update wizard that streamlines the process, but, again, if you need a special wizard for that, it tells a lot.
Furthermore, navigating Kotlin/Compose libraries on GitHub can be challenging, as some lack clear installation instructions or haven’t been updated recently, needing additional research for the proper setup.
In contrast, Flutter’s pub.dev package manager is miles ahead. Its standardized and robust support simplifies the process of finding and using packages and streamlines the publication process. Despite my limited experience, I even successfully published two packages on pub.dev with ease.
Finally, why are there two separate build.gradle files, one for the app and one for the module? I am sure there are historical reasons for this, but again, it must have led to so much confusion over time.
I love ViewModel
So, here is a solved problem in Compose: state management.
It appears that using ViewModel and Flow is the recommended and most popular way to separate your logic from the UI and implement a unidirectional data flow for all your Composables.
The remember API for handling state in Composables is simple enough:
@Composable
fun GameSwitch(
    checked: Boolean,
    onCheckedChange: (Boolean) -> Unit = {},
) {
    var checked by remember { mutableStateOf(checked) }
    Switch(
        checked = checked,
        onCheckedChange = {
            checked = it
            onCheckedChange.invoke(it)
        },
    )
}
However, I found the distinction between remember and rememberSaveable a bit confusing. Even after reading the documentation multiple times, I still wasn’t sure when to prefer one over another. In the end, I used rememberSaveable for most cases, to be on the safe side.
Import hell
OK, so here is the list of imports for the GameSwitch component from right above:
package com.whidev.mapgame.ui.widgets
import androidx.compose.material3.MaterialTheme
import androidx.compose.material3.Switch
import androidx.compose.material3.SwitchDefaults
import androidx.compose.runtime.Composable
import androidx.compose.runtime.getValue
import androidx.compose.runtime.mutableStateOf
import androidx.compose.runtime.remember
import androidx.compose.runtime.setValue
@Composable
fun GameSwitch(
    checked: Boolean,
    onCheckedChange: (Boolean) -> Unit = {},
) {
...
Isn’t that too much?
In Compose, you have to bring in every class and function by itself. Android Studio can do a lot of this for you, but sometimes you get problems you need to fix on your own, which takes up your time. When using remember, for example, I need to hit Command - . (import shortcut) twice to add the required imports to the file. Also, when you move code from one file to another, you have to re-import everything you need all over again, which means more time lost.
Again, I am sure this is by design, and helps with modularity and namespace clarity, but I miss that in Flutter, you mostly imported the Material library and that was that.
Moving on now to briefly talk about some of the main features that the app supports.
Drawing on Canvas
This is the main and most important feature of the app. Essentially, we draw a world map (parsed from an SVG file) on a Canvas composable. The user can then zoom in/out, move it around, and tap to select a country, so it needs to be fast, responsive, and able to handle gestures perfectly.
It took a while to get this right, but I am now happy with the result. Android Canvas is well optimized, so it offers a better performance than the CustomPaint approach I have worked with in Flutter. Even in older devices, the map is snappy and crisp, making the game experience smoother.
There is one issue, though, that has been the source of most 1-star reviews, where some users are unable to tap on countries like Japan, New Zealand, the Philippines, and similar. It could be that these countries offer smaller tap areas on the map, so it is harder to tap them reliably, especially when rushing. However, I haven’t been able to reproduce this on any of my Android devices or on the Emulator, which is frustrating, to say the least.
Navigation ergonomics
Routing, or moving around screens, is an important part of every app. I found navigation in Compose to be relatively unintuitive and complex:
You set up the navigation via a NavHost, which works with a NavGraph, which is controlled by a NavController. This is not as confusing as it sounds, but the official documentation makes it so.
What I found really cumbersome, though, is this guideline:
When a composable function needs to navigate to a new screen, you shouldn’t pass it a reference to the
NavControllerso that it can callnavigate()directly.More directly put, your composable should have a parameter of type
() -> Unit. When you add destinations to yourNavHostwith thecomposable()function, pass your composable a call toNavController.navigate().
This means that I have to pass callback functions to every screen Composable, increasing boilerplate like this:
 NavHost(
    navController = navController,
    startDestination = "menu",
) {
    composable("menu") {
        MenuScreen(
            onNavigateToTodayGame = { navController.navigate("today") },
            onNavigateToPractice = { navController.navigate("practice") },
            onNavigateToSettings = { navController.navigate("settings") },
            onNavigateToStats = { navController.navigate("stats") },
            onNavigateToTutorial = { navController.navigate("tutorial") },
            onNavigateToAbout = { navController.navigate("about") },
            gameViewModel = gameViewModel!!,
        )
    }
    composable("settings") {
        SettingsScreen(
            settingsManagerRef = settingsManager,
            onNavigateToIap = { navController.navigate("iap") },
        )
    }
    composable("about") {
        AboutScreen(
            onNavigateToWhatsNew = {
                navController.navigate("whats_new")
            }
        )
    }
    composable("whats_new") {
        WhatsNewScreen()
    }
}
Every screen that links to another screen needs to have a void callback argument that will make the call to the NavController‘s navigate method.
According to the official docs, this avoids calling navigate on every recomposition, which is the optimal way, but I still wonder if it could be done in any other, simpler way.
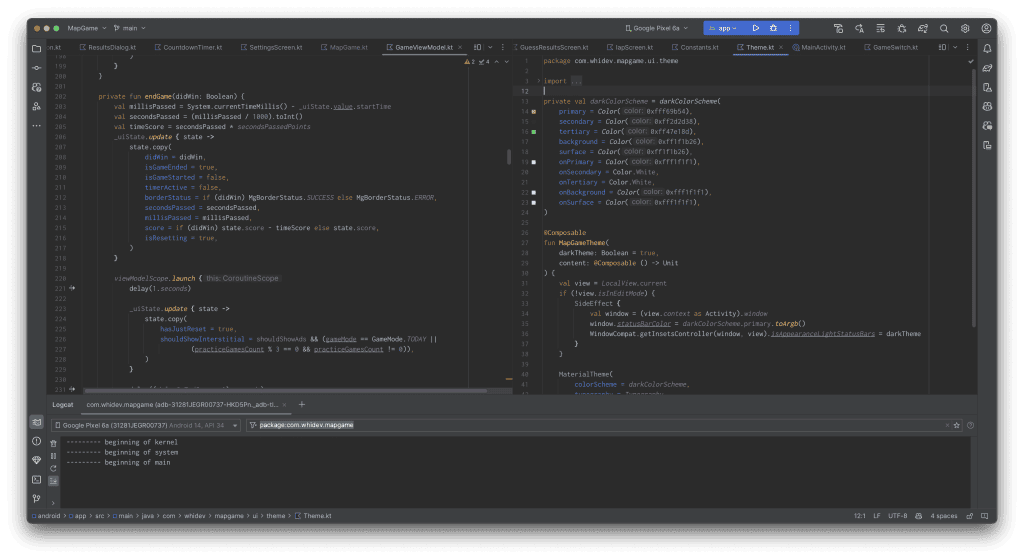
Theming/styling
Setting up a color scheme (or theme) for the whole app was a breeze in Compose (docs). I selected my colors and created a MaterialTheme from them, which then wraps the whole app:
private val darkColorScheme = darkColorScheme(
    primary = Color(0xfff69b54),
    secondary = Color(0xff2d2d38),
    tertiary = Color(0xff47e18d),
    background = Color(0xff1f1b26),
    surface = Color(0xff1f1b26),
    onPrimary = Color(0xfff1f1f1),
    onSecondary = Color.White,
    onTertiary = Color.White,
    onBackground = Color(0xfff1f1f1),
    onSurface = Color(0xfff1f1f1),
)
MaterialTheme(
    colorScheme = darkColorScheme,
    typography = Typography,
    content = content
)
I was then able to override colors on individual components by calling the MaterialTheme.colorScheme properties:
@Composable
fun GameSwitch(
    checked: Boolean,
    onCheckedChange: (Boolean) -> Unit = {},
) {
    var checked by remember { mutableStateOf(checked) }
    Switch(
        checked = checked,
        onCheckedChange = {
            checked = it
            onCheckedChange.invoke(it)
        },
        colors = SwitchDefaults.colors(
            checkedThumbColor = MaterialTheme.colorScheme.primary,
            checkedTrackColor = MaterialTheme.colorScheme.secondaryContainer,
        )
    )
}
In my experience, making an app with just one theme and not many styles to change, I found it easier to work with Jetpack Compose than with Flutter.
In Compose, it’s straightforward to use colors directly where you need them. For example, to set a background color, I can simply write Modifier.background(color = Color.Red). This feels more direct compared to Flutter, where I’d have to use a Container and a BoxDecoration like BoxDecoration(color: Colors.red), or even BoxDecoration(color: Theme.of(context).primaryColor) to use the theme’s color.
Overall, Compose lets me apply colors and styles right where I’m building the UI, which seems simpler and cleaner than the steps Flutter requires.
Testing
I don’t use tests for apps like this.

Accessing native APIs
Of course, this is an area where Compose has a direct advantage, as I didn’t need to write my own plugin (native Android code in Flutter) or rely on a third-party package.
There are Compose equivalents for most of the native Android API libraries. For MapGame’s features I needed to:
- Check the device’s network status (online/offline),
- Read some device diagnostics like RAM, Android version, and similar, and
- Create a Share intent (the share bottom sheet you see on most apps).
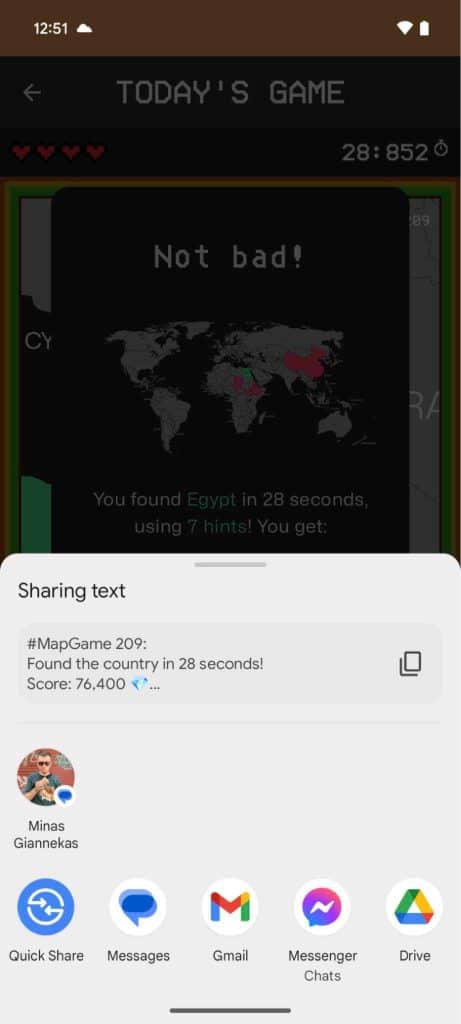
These were all a breeze to implement.
Firebase integration
The game quizzes for each day are stored on a Firestore database, so I needed to add Firebase services to the app.
This was something I was dreading to work on, haunted by my experience with Flutter’s Firebase libraries for iOS (if you know you know, and you have used pod install --repo-update too many times).
However, I didn’t encounter any issue when adding Firebase to my Compose project, so thumbs up for a job well done.
Ads and in-app purchases
Not much to say here. I used RevenueCat‘s excellent APIs to add a one-time purchase that removes the ads to my app. Easy to set up and works fine.
For ads, I used Google’s mobile ads APIs, to load one interstitial ad every 5 practice games. It took a while to integrate, but it works fine until now.
Final thoughts
I have to say I was impressed by the current state of Jetpack Compose for production apps.
Kotlin is a wonderful, full-fledged, well-supported language, and Compose is intuitive and succinct as a declarative framework. Developer experience is not on par with Flutter though, which has far better dependency management and stellar tooling like Hot Reload.
One downside is that Compose feels a bit like how Flutter did back in 2018-2019. It’s still growing and changing quickly. This means a lot of the tools and codes you use might be labeled as ‘experimental’ and could change. Plus, when you run into problems, you might find a lot of outdated or no-longer-used code that hasn’t been cleaned up yet.
But it seems like Google is really focusing on Compose for creating new Android apps. So, I think it’s going to become more reliable and stable pretty soon.
I’m confident that with some patience and support from language models, any developer who has some experience can switch to using Kotlin and Jetpack Compose for apps that are ready for real users.
Keep an eye out for my next post in this series, where I’ll share my experience trying to build the same app on Apple platforms using Swift and SwiftUI!
Recommend
About Joyk
Aggregate valuable and interesting links.
Joyk means Joy of geeK