

Create a Map with Google Map Api using React-Native
source link: https://www.geeksforgeeks.org/create-a-map-with-google-map-api-using-react-native/
Go to the source link to view the article. You can view the picture content, updated content and better typesetting reading experience. If the link is broken, please click the button below to view the snapshot at that time.
In this project, we’ll explore how to integrate Google Maps into a React Native application. We’ll create a dynamic map that allows users to view their current location and interact with markers on the map. This project aims to provide a practical guide for developers looking to incorporate maps into their mobile applications using React Native.
Output Preview: Let us have a look at how the final output will look like

Prerequisites / Technologies used:
- Node JS and NPM
- React Native
- JavaScript
- A Google Cloud Platform account to obtain an API key for Google Maps.
Approach to create Map Application:
- Our approach involves using the react-native-maps library, which provides components for integrating Google Maps into React Native applications. Key functionalities of our map include:
- Displaying the user’s current location on the map.
- Adding custom markers to specific locations on the map.
- Dynamically updating the map based on user interactions.
Project Structure:
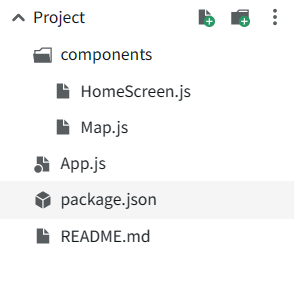
package.json:
"dependencies": {
    "react-native-maps": "1.10.0",
    "@expo/vector-icons": "^14.0.0",
    "react-native-paper": "4.9.2"
}
Steps to Create the React-Native App:
Step 1. Set up a new React Native project:
Use Expo CLI or React Native CLI to create a new project. For Expo CLI, you can use the following command:
expo init MyMapProject
For React Native CLI, you can use:
npx react-native init MyMapProject
Step 2. Navigate to the project directory:
Once the project is created, navigate to the project directory in your terminal:
cd MyMapProject
Step 3. Install the required dependencies:
Install the necessary dependencies for integrating Google Maps into your React Native project:
npm install react-native-maps @react-native-community/geolocation
Step 4. Write the HomeScreen component:
Create another component file, HomeScreen.js, where you’ll use the Map component and define the initial region for the map.
Javascript
import React from 'react';
import { SafeAreaView } from 'react-native';
import Map from './Map';

const HomeScreen = () => {
    const initialRegion = {
        latitude: 37.78825, // Initial latitude
        longitude: -122.4324, // Initial longitude
        latitudeDelta: 0.0922,
        longitudeDelta: 0.0421,
    };

    return (
        <SafeAreaView style={{ flex: 1 }}>
            <Map initialRegion={initialRegion} />
        </SafeAreaView>
    );
};

export default HomeScreen;
JavaScriptJavaScript
Step 5. Run the application:
Ensure that you have either an Android emulator or iOS simulator set up on your machine. Then, run the following command to start the application:
npx react-native run-android
or
npx react-native run-ios
Output:
“This course was packed with amazing and well-organized content! The project-based approach of this course made it even better to understand concepts faster. Also the instructor in the live classes is really good and knowledgeable.”- Tejas | Deutsche Bank
With our revamped Full Stack Development Program: master Node.js and React that enables you to create dynamic web applications.
So get ready for salary hike only with our Full Stack Development Course.
Recommend
About Joyk
Aggregate valuable and interesting links.
Joyk means Joy of geeK