

Amplify Flutter announces general availability for web and desktop support
source link: https://aws.amazon.com/blogs/mobile/amplify-flutter-announces-general-availability-for-web-and-desktop-support/
Go to the source link to view the article. You can view the picture content, updated content and better typesetting reading experience. If the link is broken, please click the button below to view the snapshot at that time.
Amplify Flutter announces general availability for web and desktop support
by Abdallah Shaban and Ashish Nanda | on 20 APR 2023 | in Front-End Web & Mobile | Permalink | Comments | Share
The AWS Amplify Flutter team is absolutely thrilled to unveil the groundbreaking version 1.0.0, which revolutionizes app development by adding support for both web and desktop platforms. You can now with a single codebase target 6 platforms, including iOS, Android, Web, Linux, MacOS, and Windows. This update not only encompasses the Amplify libraries but also the Flutter Authenticator UI library, which has been entirely reimagined and rewritten in Dart. As a result, you can now deliver a truly consistent and immersive experience across all targeted platforms, taking your apps to unprecedented heights. Get ready to redefine the boundaries of app development with this game-changing release!
In this blog post, you will learn how to build a budget tracking app by following these steps:
- Create a new Flutter application, and configure it to run on iOS, Android, and Web.
- Add user sign up and sign in using the Authenticator UI library in minutes.
- Create new budget entries.
- Update budget entries.
- Attach an image to your budget entries.
Pre-requisites
- Flutter SDK version 3.3.0 or higher
- An AWS Account with AWS Amplify CLI setup. You can follow this documentation to setup the Amplify CLI.
Create your App and add the Amplify libraries
You can get started with creating a new Flutter app and then adding the Amplify Flutter libraries.
Go to your terminal, and run this command in your terminal
flutter create budgetapp
Navigate to your new app directory by running cd budgetapp in your terminal.
Initialize your Amplify app by running this command in your terminal
amplify initEnter a name for your Amplify project, accept the default configuration, select your AWS profile, and let the Amplify CLI do the rest for you. Once it is done, you will see the following message:
... Deployment bucket fetched.
✔ Initialized provider successfully.
✅ Initialized your environment successfully.
Your project has been successfully initialized and connected to the cloud!
...
Now, you can start adding the backend resources you need for your app starting with Auth and API by running the amplify add api command in your terminal. You can follow these prompts then in the CLI, which sets up the GraphQL API endpoint and your Authentication resources. Make sure to change the authorization mode to use “Cognito user pools”, which will set up and use Amazon Cognito to authorize data access for your users.
% amplify add api

? Select from one of the below mentioned services: GraphQL
? Here is the GraphQL API that we will create. Select a setting to edit or continue Authorization modes: API key (default, expiration time: 7 days
 from now)
? Choose the default authorization type for the API Amazon Cognito User Pool
Using service: Cognito, provided by: awscloudformation

 The current configured provider is Amazon Cognito.

 Do you want to use the default authentication and security configuration? Default configuration
 Warning: you will not be able to edit these selections.
 How do you want users to be able to sign in? Username
 Do you want to configure advanced settings? No, I am done.
✅ Successfully added auth resource dartgapost9bfba83e locally

? Configure additional auth types? No
? Here is the GraphQL API that we will create. Select a setting to edit or continue Continue
? Choose a schema template: Single object with fields (e.g., “Todo” with ID, name, description)
If you followed these prompts and selected to edit your data schema, your IDE will open the file under amplify/backend/api/<yourappname>. Replace the contents of your data schema file with the below data schema:
This data schema uses an auth rule (allow: owner) that ensures logged in users that try to run any operations can only do that to budget entries they own.
type BudgetEntry @model @auth(rules: [{allow: owner}]) {
  id: ID!
  title: String
  description: String
  attachmentKey: String
  amount: Float
}
You can now add the Storage resources you need which include creating an S3 bucket you can use for saving and retrieving files.
% amplify add storage

? Select from one of the below mentioned services: Content (Images, audio, video, etc.)
✔ Provide a friendly name for your resource that will be used to label this category in the project: · s3c2e884f3
✔ Provide bucket name: · dartgapostfc30c8a175a6493dbe963558b160c1fe
✔ Who should have access: · Auth and guest users
✔ What kind of access do you want for Authenticated users? · create/update, read, delete
✔ What kind of access do you want for Guest users? · read
✔ Do you want to add a Lambda Trigger for your S3 Bucket? (y/N) · no
You can now push all of the Amplify resources you have added locally to your backend by running this command in your terminal, you will be asked to confirm if the resources added are correct in your terminal. At the end of deploying your resources, you will see a message saying “Deployment state saved successfully”.
amplify push
Note: After the amplify push command runs, you will get access to models that are generated to help interact with your data. If you need to regenerate your models because of changes you have made to the data schema, you can run the below command:
amplify codegen models
Open up your Flutter app in your favorite IDE, and then go to the pubspec.yaml file and add the following dependencies.
dependencies:
  flutter:
    sdk: flutter
  # flutter libraries
  amplify_flutter: ^1.0.0
  amplify_auth_cognito: ^1.0.0
  amplify_authenticator: ^1.0.0
  amplify_api: ^1.0.0
  amplify_storage_s3: ^1.0.0
  # file picker library to select files from the device
  file_picker: ^5.2.7
  # navigating between different screens
  go_router: ^6.5.5
You now have all your initial setup done, so you can start writing the code in your app to handle creating new budget entries, and attaching receipt images.
Install the Amplify libraries and add Authentication
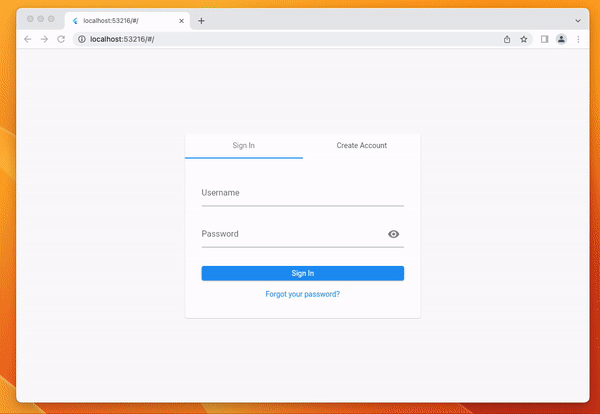
Amplify Flutter provides you with a connected UI component that provides you with a registration and login experience that works out of the box. Once your users have authenticated with the Authenticator, they are automatically re-directed to the widget you set as the child of the Authenticator widget. We will also setup the Amplify libraries in this section, to allow them to be accessed and used across your Flutter app in future screens.
Go to your lib/main.dart file, and replace it with the following code.
import 'package:amplify_api/amplify_api.dart';
import 'package:amplify_auth_cognito/amplify_auth_cognito.dart';
import 'package:amplify_authenticator/amplify_authenticator.dart';
import 'package:amplify_flutter/amplify_flutter.dart';
import 'package:amplify_storage_s3/amplify_storage_s3.dart';
import 'package:dartgapost/manage_budget_entry.dart';
import 'package:flutter/material.dart';
import 'package:go_router/go_router.dart';

import 'amplifyconfiguration.dart';
import 'homepage.dart';
import 'models/ModelProvider.dart';

void main() {
  runApp(const MyApp());
}

class MyApp extends StatefulWidget {
  const MyApp({super.key});

  @override
  State<MyApp> createState() => _MyAppState();
}

class _MyAppState extends State<MyApp> {
  @override
  void initState() {
    super.initState();
    _configureAmplify();
  }

  // GoRouter configuration
  final _router = GoRouter(
    routes: [
      GoRoute(
        path: '/',
        name: 'homepage',
        builder: (context, state) => const Homepage(),
      ),
      GoRoute(
        path: '/managebudgetentry',
        name: 'managebudgetentry',
        builder: (context, state) => ManageBudgetEntry(
          budgetEntry: state.extra as BudgetEntry?,
        ),
      ),
    ],
  );

  Future<void> _configureAmplify() async {
    try {
      // Authentication
      final auth = AmplifyAuthCognito();

      // API
      final api = AmplifyAPI(modelProvider: ModelProvider.instance);

      // Storage
      final storage = AmplifyStorageS3();

      await Amplify.addPlugins([api, auth, storage]);
      await Amplify.configure(amplifyconfig);

      safePrint('Successfully configured');
    } on Exception catch (e) {
      safePrint('Error configuring Amplify: $e');
    }
  }

  @override
  Widget build(BuildContext context) {
    return Authenticator(
      child: MaterialApp.router(
        routerConfig: _router,
        debugShowCheckedModeBanner: false,
        builder: Authenticator.builder(),
      ),
    );
  }
}
To set up iOS as a target platform to work with AWS Amplify Flutter, navigate to the ios/Podfile , uncomment the platform and change the version number to 13.
platform :ios, '13.0'
To setup Android as a target platform, navigate to Android/app/build.gradle , and replace the minSdkVersion with version 24.
You can now try running your app, and you will see that the Authenticator UI component will be shown by default. If you try to create a new user, you will receive an email with a code to verify the user. Once you submit the code, you will be redirected to the child widget that you configure in the Authenticator widget.
You have now setup all of the necessary configurations for your Flutter app to run with Authentication for iOS, Android, and Web. In the next section, we will implement the Homepage widget, and start setting up the screens to manage the addition and editing of budgetEntries.
Add API features to list budget entries
You can now add the API features to allow you to list budget entries.
In the ./lib/ directory, create a new file and call it homepage.dart . Add the following code snippet to the file. The following is a description of what the different parts of those code base are doing:
_queryListItems(): Retrieve a list of all budget entries for your signed in user.
_calculateTotalBudget(): Calculates the total amount for all of the budget entries for the logged in user.
_deleteBudgetEntry(): Deletes the budgetEntry if a user long presses on the budget entry in the list tile
_deleteFile(): Deletes the S3 attachment for a budget entry if it exists.
import 'package:amplify_api/amplify_api.dart';
import 'package:amplify_flutter/amplify_flutter.dart';
import 'package:dartgapost/models/BudgetEntry.dart';
import 'package:flutter/material.dart';
import 'package:go_router/go_router.dart';

class Homepage extends StatefulWidget {
  const Homepage({super.key});

  @override
  State<Homepage> createState() => _HomepageState();
}

class _HomepageState extends State<Homepage> {
  var _budgetEntries = <BudgetEntry>[];

  @override
  void initState() {
    super.initState();
    _refreshBudgetEntries();
  }

  Future<void> _refreshBudgetEntries() async {
    try {
      final request = ModelQueries.list(BudgetEntry.classType);
      final response = await Amplify.API.query(request: request).response;

      final todos = response.data?.items;
      if (response.hasErrors) {
        safePrint('errors: ${response.errors}');
        return;
      }
      setState(() {
        _budgetEntries = todos!.whereType<BudgetEntry>().toList();
      });
    } on ApiException catch (e) {
      safePrint('Query failed: $e');
    }
  }

  double _calculateTotalBudget(List<BudgetEntry?> items) {
    var totalAmount = 0.0;
    for (final item in items) {
      totalAmount += item?.amount ?? 0;
    }
    return totalAmount;
  }

  Future<void> _deleteFile(String key) async {
    //delete the S3 file
    try {
      final result = await Amplify.Storage.remove(
        key: key,
      ).result;
      safePrint('Removed file ${result.removedItem}');
    } on StorageException catch (e) {
      safePrint('Error deleting file: $e');
    }
  }

  //delete budget entries
  Future<void> _deleteBudgetEntry(BudgetEntry budgetEntry) async {
    final attachmentKey = budgetEntry.attachmentKey;
    if (attachmentKey != null) {
      await _deleteFile(attachmentKey);
    }
    final request = ModelMutations.delete<BudgetEntry>(budgetEntry);
    final response = await Amplify.API.mutate(request: request).response;
    safePrint('Response: $response');
    await _refreshBudgetEntries();
  }

  Future<void> _navigateToBudgetEntry({BudgetEntry? budgetEntry}) async {
    await context.pushNamed(
      'managebudgetentry',
      extra: budgetEntry,
    );
    // Refresh the entries when returning from the
    // budget management screen.
    await _refreshBudgetEntries();
  }

  Widget _buildRow({
    required String title,
    required String description,
    required String amount,
    TextStyle? style,
  }) {
    return Row(
      children: [
        Expanded(
          child: Text(
            title,
            textAlign: TextAlign.center,
            style: style,
          ),
        ),
        Expanded(
          child: Text(
            description,
            textAlign: TextAlign.center,
            style: style,
          ),
        ),
        Expanded(
          child: Text(
            amount,
            textAlign: TextAlign.center,
            style: style,
          ),
        ),
      ],
    );
  }

  @override
  Widget build(BuildContext context) {
    return Scaffold(
      floatingActionButton: FloatingActionButton(
        // Navigate to the page to create new budget entries
        onPressed: _navigateToBudgetEntry,
        child: const Icon(Icons.add),
      ),
      appBar: AppBar(
        title: const Text('Budget Tracker'),
        actions: <Widget>[
          IconButton(
            icon: const Icon(Icons.logout),
            tooltip: 'Logout',
            onPressed: () async {
              // Sign out - the Authenticator will route you to the login form
              await Amplify.Auth.signOut();
            },
          ),
        ],
      ),
      body: Center(
        child: Padding(
          padding: const EdgeInsets.only(top: 25),
          child: RefreshIndicator(
            onRefresh: _refreshBudgetEntries,
            child: Column(
              children: [
                if (_budgetEntries.isEmpty)
                  const Text('Use the \u002b sign to add new budget entries')
                else
                  Row(
                    mainAxisAlignment: MainAxisAlignment.center,
                    children: [
                      // Show total budget from the list of all BudgetEntries
                      Text(
                        'Total Budget: \$ ${_calculateTotalBudget(_budgetEntries).toStringAsFixed(2)}',
                        style: const TextStyle(fontSize: 24),
                      )
                    ],
                  ),
                const SizedBox(height: 30),
                _buildRow(
                  title: 'Title',
                  description: 'Description',
                  amount: 'Amount',
                  style: Theme.of(context).textTheme.titleMedium,
                ),
                const Divider(),
                Expanded(
                  child: ListView.builder(
                    itemCount: _budgetEntries.length,
                    itemBuilder: (context, index) {
                      final budgetEntry = _budgetEntries[index];
                      return Dismissible(
                        key: ValueKey(budgetEntry),
                        background: const ColoredBox(
                          color: Colors.red,
                          child: Padding(
                            padding: EdgeInsets.only(right: 10),
                            child: Align(
                              alignment: Alignment.centerRight,
                              child: Icon(Icons.delete, color: Colors.white),
                            ),
                          ),
                        ),
                        onDismissed: (_) => _deleteBudgetEntry(budgetEntry),
                        child: ListTile(
                          onTap: () => _navigateToBudgetEntry(
                            budgetEntry: budgetEntry,
                          ),
                          title: _buildRow(
                            title: budgetEntry.title,
                            description: budgetEntry.description ?? '',
                            amount:
                                '\$ ${budgetEntry.amount.toStringAsFixed(2)}',
                          ),
                        ),
                      );
                    },
                  ),
                ),
              ],
            ),
          ),
        ),
      ),
    );
  }
}
Add and update budget entries
In this section, we will create the ManageBudgetEntry screen, which will allow us to create or update budget entries, in addition to adding an attachment image.
In the ./lib/ directory, create a new file and call it managebudgetentry.dart . Add the following code snippet to the file. The following is a description of what the different parts of those code base are doing:
_uploadToS3(): Upload the attachment to S3 if a new file was selected with the file_picker.
_pickImage(): Select images from the device using the file_picker library to attach to the budget entry.
_submitForm(): submit the form which handles either updating or creating a new budget entry.
_deleteFile(): Deletes old attachments from S3 if a new one was uploaded and then the update button was pressed.
_downloadFileData(): Download the URL to display the image of the receipt in the budget entry form, if it exists.
import 'package:amplify_api/amplify_api.dart';
import 'package:amplify_flutter/amplify_flutter.dart';
import 'package:amplify_storage_s3/amplify_storage_s3.dart';
import 'package:file_picker/file_picker.dart';
import 'package:flutter/material.dart';
import 'package:go_router/go_router.dart';
import 'models/ModelProvider.dart';

class ManageBudgetEntry extends StatefulWidget {
  const ManageBudgetEntry({
    required this.budgetEntry,
    super.key,
  });

  final BudgetEntry? budgetEntry;

  @override
  State<ManageBudgetEntry> createState() => _ManageBudgetEntryState();
}

class _ManageBudgetEntryState extends State<ManageBudgetEntry> {
  final _formKey = GlobalKey<FormState>();
  final TextEditingController _titleController = TextEditingController();
  final TextEditingController _descriptionController = TextEditingController();
  final TextEditingController _amountController = TextEditingController();

  var _isCreateFlag = false;
  late String _titleText;

  PlatformFile? _platformFile;
  BudgetEntry? _budgetEntry;

  @override
  void initState() {
    super.initState();

    final budgetEntry = widget.budgetEntry;
    if (budgetEntry != null) {
      _budgetEntry = budgetEntry;
      _titleController.text = budgetEntry.title;
      _descriptionController.text = budgetEntry.description ?? '';
      _amountController.text = budgetEntry.amount.toStringAsFixed(2);
      _isCreateFlag = false;
      _titleText = 'Update budget entry';
    } else {
      _titleText = 'Create budget entry';
      _isCreateFlag = true;
    }
  }

  @override
  void dispose() {
    _titleController.dispose();
    _descriptionController.dispose();
    _amountController.dispose();
    super.dispose();
  }

  Future<String> _uploadToS3() async {
    try {
      // Upload to S3
      final result = await Amplify.Storage.uploadFile(
        localFile: AWSFile.fromData(_platformFile!.bytes!),
        key: _platformFile!.name,
        options: const StorageUploadFileOptions(
          accessLevel: StorageAccessLevel.private,
        ),
        onProgress: (progress) {
          safePrint('Fraction completed: ${progress.fractionCompleted}');
        },
      ).result;
      safePrint('Successfully uploaded file: ${result.uploadedItem.key}');
      return result.uploadedItem.key;
    } on StorageException catch (e) {
      safePrint('Error uploading file: $e');
    }
    return '';
  }

  Future<void> _pickImage() async {
    // Show the file picker to select the images
    final result = await FilePicker.platform.pickFiles(
      type: FileType.image,
      withData: true,
    );
    if (result != null && result.files.isNotEmpty) {
      setState(() {
        _platformFile = result.files.single;
      });
    }
  }

  Future<void> submitForm() async {
    if (!_formKey.currentState!.validate()) {
      return;
    }

    // If the form is valid, submit the data
    final title = _titleController.text;
    final description = _descriptionController.text;
    final amount = double.parse(_amountController.text);

    // Upload file to S3 if a file was selected
    String? key;
    if (_platformFile != null) {
      final existingImage = _budgetEntry?.attachmentKey;
      if (existingImage != null) {
        await _deleteFile(existingImage);
      }
      key = await _uploadToS3();
    }

    if (_isCreateFlag) {
      // Create a new budget entry
      final newEntry = BudgetEntry(
        title: title,
        description: description.isNotEmpty ? description : null,
        amount: amount,
        attachmentKey: key,
      );
      final request = ModelMutations.create(newEntry);
      final response = await Amplify.API.mutate(request: request).response;
      safePrint('Create result: $response');
    } else {
      // Update budgetEntry instead
      final updateBudgetEntry = _budgetEntry!.copyWith(
        title: title,
        description: description.isNotEmpty ? description : null,
        amount: amount,
        attachmentKey: key,
      );
      final request = ModelMutations.update(updateBudgetEntry);
      final response = await Amplify.API.mutate(request: request).response;
      safePrint('Update ersult: $response');
    }

    // Navigate back to homepage after create/update executes
    if (mounted) {
      context.pop();
    }
  }

  Future<String> _downloadFileData(String key) async {
    // Get download URL to display the budgetEntry image
    try {
      final result = await Amplify.Storage.getUrl(
        key: key,
        options: const StorageGetUrlOptions(
          accessLevel: StorageAccessLevel.private,
          pluginOptions: S3GetUrlPluginOptions(
            validateObjectExistence: true,
            expiresIn: Duration(days: 1),
          ),
        ),
      ).result;
      return result.url.toString();
    } on StorageException catch (e) {
      safePrint('Error downloading image: ${e.message}');
      rethrow;
    }
  }

  Future<void> _deleteFile(String key) async {
    try {
      final result = await Amplify.Storage.remove(
        key: key,
      ).result;
      safePrint('Removed file ${result.removedItem}');
    } on StorageException catch (e) {
      safePrint('Error deleting file: $e');
    }
  }

  Widget get _attachmentImage {
    // When creating a new entry, show an image if it was uploaded.
    final localAttachment = _platformFile;
    if (localAttachment != null) {
      return Image.memory(
        localAttachment.bytes!,
        height: 200,
      );
    }
    // Retrieve Image URL and try to display it.
    // Show loading spinner if still loading.
    final remoteAttachment = _budgetEntry?.attachmentKey;
    if (remoteAttachment == null) {
      return const SizedBox.shrink();
    }
    return FutureBuilder<String>(
      future: _downloadFileData(
        _budgetEntry!.attachmentKey!,
      ),
      builder: (context, snapshot) {
        if (snapshot.hasData) {
          return Image.network(
            snapshot.data!,
            height: 200,
          );
        } else if (snapshot.hasError) {
          return const SizedBox.shrink();
        } else {
          return const CircularProgressIndicator();
        }
      },
    );
  }

  @override
  Widget build(BuildContext context) {
    return Scaffold(
      appBar: AppBar(
        title: Text(_titleText),
      ),
      body: Align(
        alignment: Alignment.topCenter,
        child: ConstrainedBox(
          constraints: const BoxConstraints(maxWidth: 800),
          child: Padding(
            padding: const EdgeInsets.all(16),
            child: SingleChildScrollView(
              child: Form(
                key: _formKey,
                child: Column(
                  crossAxisAlignment: CrossAxisAlignment.start,
                  children: [
                    TextFormField(
                      controller: _titleController,
                      decoration: const InputDecoration(
                        labelText: 'Title (required)',
                      ),
                      validator: (value) {
                        if (value == null || value.isEmpty) {
                          return 'Please enter a title';
                        }
                        return null;
                      },
                    ),
                    TextFormField(
                      controller: _descriptionController,
                      decoration: const InputDecoration(
                        labelText: 'Description',
                      ),
                    ),
                    TextFormField(
                      controller: _amountController,
                      keyboardType: const TextInputType.numberWithOptions(
                        signed: false,
                        decimal: true,
                      ),
                      decoration: const InputDecoration(
                        labelText: 'Amount (required)',
                      ),
                      validator: (value) {
                        if (value == null || value.isEmpty) {
                          return 'Please enter an amount';
                        }
                        final amount = double.tryParse(value);
                        if (amount == null || amount <= 0) {
                          return 'Please enter a valid amount';
                        }
                        return null;
                      },
                    ),
                    const SizedBox(height: 16),
                    ElevatedButton(
                      onPressed: _pickImage,
                      child: const Text('Attach a file'),
                    ),
                    const SizedBox(height: 20),
                    _attachmentImage,
                    const SizedBox(height: 20),
                    ElevatedButton(
                      onPressed: submitForm,
                      child: Text(_titleText),
                    ),
                  ],
                ),
              ),
            ),
          ),
        ),
      ),
    );
  }
}
Conclusion
This monumental release of Amplify Flutter marks a game-changing milestone for developers. With the power to create FullStack applications on AWS, you can now seamlessly expand your Flutter application’s reach to mobile, web, and desktop, unlocking unlimited potential for your projects. As you embark on this exciting journey, we wholeheartedly encourage you to share your experiences, insights, and suggestions through GitHub or Discord. Your valuable feedback will help shape the future of Amplify Flutter and contribute to an even stronger developer community.
Don’t hesitate to dive into our comprehensive documentation to begin harnessing the power of AWS Amplify for building cross-platform and cloud-connected Flutter applications.
Cleanup
To ensure that you don’t have any unused resources in you AWS account, run the following command to delete all the resources that were created in this project if you don’t intend to keep them.
amplify delete
Abdallah Shaban
Abdallah Shaban is a Senior Product Manager at AWS Amplify, helping Javascript and Flutter developers create apps that delight their users. When not working, Abdallah tries to keep himself updated on the newest innovations in tech, playing his guitar, and traveling.
Ashish Nanda
Ashish Nanda is a Senior Software Engineer and Tech Lead at AWS Amplify. He leads design and engineering on the JavaScript and Flutter open source SDK teams with the goal of helping developers build full-stack web and mobile applications quickly & seamlessly using cloud services.
Recommend
About Joyk
Aggregate valuable and interesting links.
Joyk means Joy of geeK