

Building a Realtime Messaging app with React Native and Firebase
source link: https://soshace.com/building-a-realtime-messaging-app-with-react-native-and-firebase/
Go to the source link to view the article. You can view the picture content, updated content and better typesetting reading experience. If the link is broken, please click the button below to view the snapshot at that time.
Building a Realtime Messaging app with React Native and Firebase
Building a Realtime Messaging app with React Native and firebase
In today’s world, it’s essential for web and mobile apps to have real-time functionality. This guide shows you how to add real-time messaging functionality a React Native mobile apps using Firebase SDK.
Setting up a Firebase real-time database
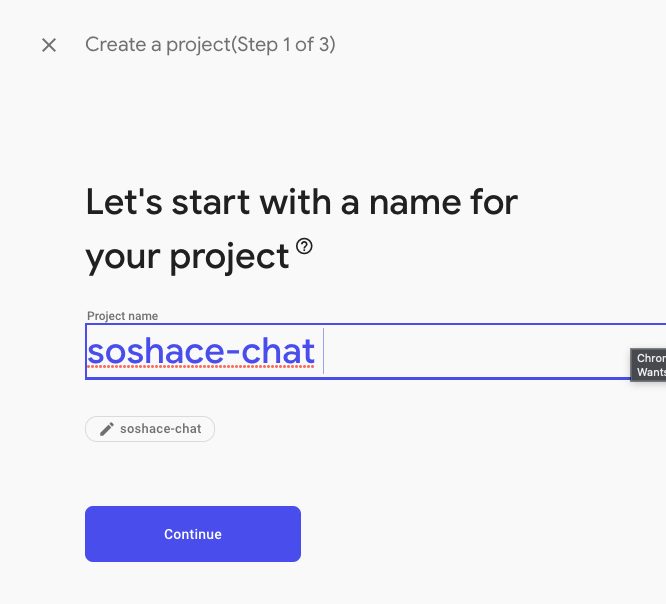
Create a new project with a name of your choosing
To set up a Realtime database, head over to the firebase console and create a new project with a name of your choosing.
Once your project is set up, add a web app to your project and give it a name you like. In this guide, we use a web app and not android or ios, as the functionality we need is supported by the firebase web SDK.
React Native Setup
To set up our React native project, we use the expo CLI – an amazing tool that helps you get started with react native quickly.
npx expo init soshace-chat |
Adding Firebase
Once your project is scaffolded, open it up with your favorite code editor, and install the firebase Javascript SDK in a new terminal.
npx expo install firebase |
In the root of your expo project, i.e., the same folder as your package.json file, create a firebaseConfig.js file and add your firebase project configuration in the format below
import { initializeApp } from 'firebase/app'; import { getAuth } from "firebase/auth"; // Initialize Firebase const firebaseConfig = { apiKey: 'api-key', authDomain: 'project-id.firebaseapp.com', databaseURL: 'https://project-id.firebaseio.com', projectId: 'project-id', storageBucket: 'project-id.appspot.com', messagingSenderId: 'sender-id', appId: 'app-id', const app = initializeApp(firebaseConfig); export const auth = getAuth(app); // For more information on how to access Firebase in your project, // see the Firebase documentation: https://firebase.google.com/docs/web/setup#access-firebase |
Next, scaffold a custom metro.config.js file by running the following command.
npx expo customize metro.config.js |
Once your metro config file is generated, replace the content with the following piece of code to enable metro to recognize firebase files with the .cjs extension.
const { getDefaultConfig } = require('@expo/metro-config'); const defaultConfig = getDefaultConfig(__dirname); defaultConfig.resolver.assetExts.push('cjs'); module.exports = defaultConfig; |
Adding Navigation
Now that we have firebase set up, let’s proceed to add navigation to our app using the react-navigation library and its required dependencies.
npx expo install @react-navigation/native react-native-screens react-native-safe-area-context |
In our project folder, set up a src/screens folder and create two files, namely, WelcomeScreen.js and ChatScreen.js and scaffold a basic react native component in each file.
//WelcomeScreen.js import React from 'react' import {Text} from 'react-native' export default function WelcomeScreen(){ return (<Text> Welcome Screen </Text/>) //ChatScreen.js import React from 'react' import {Text} from 'react-native' export default function ChatScreen(){ return (<Text> Chat Screen </Text/>) |
Next, in the src folder, add a router file named router.js and then set up our screens to show different screens based on the authentication state of the user passed by a hook that we’ll create next.
import React from "react"; import { NavigationContainer } from "@react-navigation/native"; import { createStackNavigator } from "@react-navigation/stack"; import WelcomeScreen from "./screens/WelcomeScreen"; import ChatScreen from "./screens/ChatScreen"; import { useAuthentication } from "./useAuth"; const Stack = createStackNavigator(); function AuthStack() { return ( <NavigationContainer> <Stack.Navigator> <Stack.Screen name="Welcome" component={WelcomeScreen} /> </Stack.Navigator> </NavigationContainer> function UserStack() { return ( <NavigationContainer> <Stack.Navigator> <Stack.Screen name="Chat" component={ChatScreen} /> </Stack.Navigator> </NavigationContainer> export default function Router() { const { user } = useAuthentication(); return user ? <UserStack /> : <AuthStack />; |
Next, create the corresponding useAuthentication() hook that listens to firebase auth change events.
import React, { useState } from "react"; import { onAuthStateChanged } from "firebase/auth"; import { auth } from "../firebaseConfig"; export function useAuthentication() { const [user, setUser] = useState(); React.useEffect(() => { const unsubscribeFromAuthStatuChanged = onAuthStateChanged(auth, (user) => { if (user) { // User is signed in, see docs for a list of available properties // https://firebase.google.com/docs/reference/js/firebase.User setUser(user); } else { // User is signed out setUser(undefined); return unsubscribeFromAuthStatuChanged; }, []); return { user, |
Adding Login Functionality using firebase
Firebase provides a host of authentication mechanisms we could easily use to authenticate users in minutes; in this tutorial, we will use the Anonymous auth feature as we don’t need a more complex system.
To enable users login anonymously into our app, replace the content of the WelcomeScreen.js file we set up earlier with the code below to add a Login button and a handleLogin() method that signs users anonymously into our app while displaying a nice little spinner.
import { ActivityIndicator, Button, Text, View, } from "react-native"; import React, { useState } from "react"; import { signInAnonymously } from "firebase/auth"; import { auth } from "../../firebaseConfig"; export default function WelcomeScreen() { const [loading, setLoading] = useState(false); const handleLogin = async () => { setLoading(true); await signInAnonymously(auth); } catch (error) { console.log(error.message); } finally { setLoading(false); return ( <View style={{ justifyContent: "center", alignItems: "center", marginVertical: 100, <Text>Welcome to Anonymous Chat App</Text> <Button title="Login to Room" onPress={handleLogin} /> // show a loading spinner to the user while our handleLogin() function is in progress {loading && <ActivityIndicator size="large" color="green" />} </View> |
Our WelcomeScreen should look like this afterward.
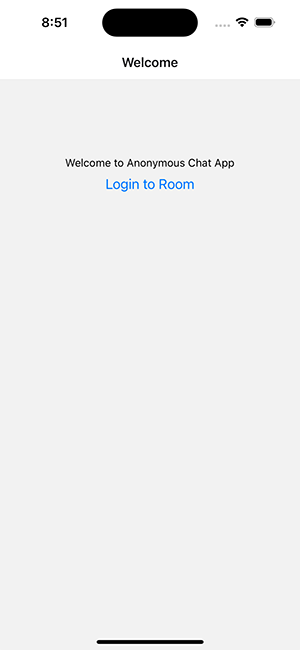
WelcomeScreen
Building Chat UI with Gifted-chat
Next, let’s set up our Chat screen, and it’s corresponding functionality using react-native-gifted-chat and firebase real-time database.
npx expo install react-native-gifted-chat |
In our src/screens/ChatScreen.js , add the following to see the Giftedchat library in action
import React, { useCallback, useState, useEffect } from "react"; import { GiftedChat } from "react-native-gifted-chat"; export default function ChatScreen() { const [messages, setMessages] = useState([]); useEffect(() => { setMessages([ _id: 1, text: 'Hello developer', createdAt: new Date(), user: { _id: 2, name: 'React Native', avatar: 'https://placeimg.com/140/140/any', }, []) const onSend = useCallback((messages = []) => { setMessages(previousMessages => GiftedChat.append(previousMessages, messages)) }, []) return ( <GiftedChat messages={messages} onSend={messages => onSend(messages)} user={{ _id: 1, /> |
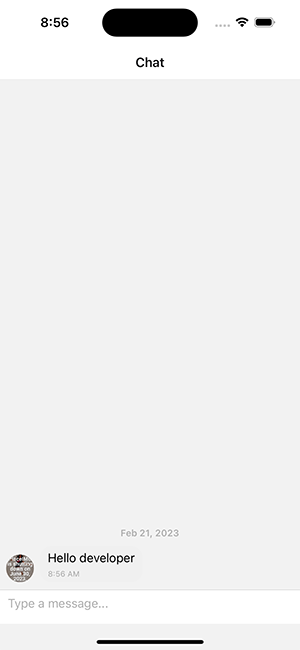
GftedChat UI
On running the project and clicking on the Login to room button, we see the GftedChat UI in action
GftedChat UIThe above code snippet saves our messages in the messages state, but we intend to save the message in the firebase real-time database we set up earlier.
Adding Realtime Functionality
To add real-time messaging functionality to our react native chat app using firebase, we first need to import the getDatabase method from firebase/database and make a reference to in ChatScreen.js
import {getDatabase} from 'firebase/database' export default function ChatScreen(){ const database = getDatabase(); |
Sending Messages to the room
To send an actual message, it’s important to distinguish the message sender before anything else. We do this by modifying the user prop passed to GiftedChat to be the actual authenticated firebase user.
import { auth } from "../../firebaseConfig"; return ( <GiftedChat messages={messages} onSend={(messages) => onSend(messages)} user={{ _id: auth.currentUser.uid, name: "Anonymous", /> |
Now that our message sender is authenticated, we send messages to our database by modifying the OnSend method passed to GiftedChat to be as below.
const onSend = useCallback((messages = []) => { setMessages((previousMessages) => GiftedChat.append(previousMessages, messages) const { _id, text, user } = messages[0]; const newChatRef = push(chatRef); const date = new Date(); set(newChatRef, { createdAt: date.toDateString(), text, user: { name: user.name, _id: user._id, }, []); |
On running the app and sending a message, you should see it reflected in your firebase dashboard’s real-time database section.
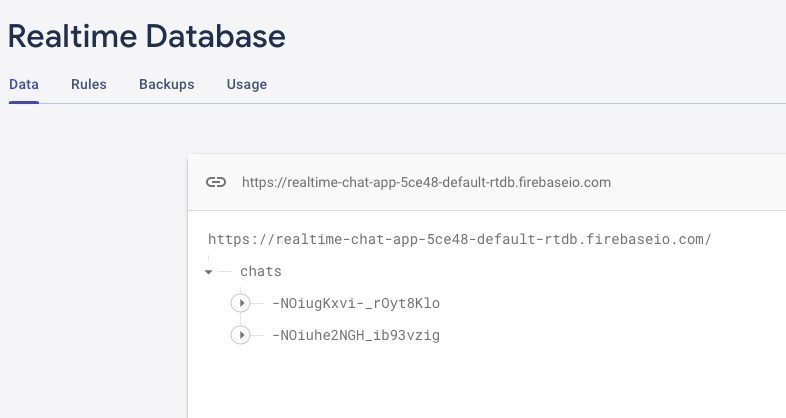
Real-time database section
Should you attempt to reload or refresh the app at this point, your messages will be lost as we’re not syncing the chats yet from the database. Let’s fix that by modifying our useEffect() method to automatically sync messages from the database while our ChatScreen component is mounted.
useEffect(() => { const listen = onValue(chatRef, (querySnapshot) => { const unserialized = JSON.stringify(querySnapshot); const serialized = JSON.parse(unserialized); if (serialized) { const data = Object.values(serialized); setMessages( .map((item) => ({ _id: item._id, user: item.user, text: item.text, createdAt: item.createdAt, .reverse() return () => listen(); |
Listening for Messages
Conclusion
We sure have covered a lot in this real-time firebase walkthrough. We started by setting up a real-time database using the firebase console. Then we set up a react native project using the Expo CLI and added navigation and an authentication system using the react-navigation library and firebase, respectively. Next, we built our chat UI using react native gifted-chat library. Finally, we added real-time functionality by connecting our chat UI with the firebase real-time database we set up earlier.
While this tutorial has covered the basics of adding real-time functionality to a react-native app using the firebase SDK, you may want to add extra features to this project to strengthen your knowledge of firebase and react native further. Should you intend to do so, here’s a list of extra features you could consider adding to the project.
- Advanced authentication using email auth, Facebook, or google social authentication.
- Custom Rooms
- Invite only rooms
- One-on-one (Two person chat rooms)
If you found this guide helpful or want to show me the cool projects you build based on this guide, do give me a Twitter shoutout @theafolayan
About the author
Recommend
About Joyk
Aggregate valuable and interesting links.
Joyk means Joy of geeK