

C# Advent 2022 - Utilize Secrets in your C# MVC Projects
source link: https://training.majorguidancesolutions.com/blog/c-advent-2022-utilize-secrets-in-your-c-mvc-projects
Go to the source link to view the article. You can view the picture content, updated content and better typesetting reading experience. If the link is broken, please click the button below to view the snapshot at that time.
- Blog
- C# Advent 2022 - Utilize Secrets in your C# MVC Projects
C# Advent 2022 - Utilize Secrets in your C# MVC Projects

From local secrets to the cloud, you must keep your secrets safe. Learn how to get started with local secrets and Azure Key Vault in this post.
UtilizeKeyVaultSecrets.md
Utilize Secrets in your C# MVC projects
This blog post is created for the 2022 C# Advent Calendar Christmas 2022 event. I'd like to thank Matthew Groves for the opportunity to contribute to this year's event.
The focus of this post will be a demonstration on how to keep your secrets safe, whether it's locally on your machine or if you are reading the value from a secret store such as Azure Key Vault. The application is a simple .NET 7 MVC project. The project starts with a simple value from appsettings.json and then quickly moves to the usersecrets.json file.
The app is then deployed via CI/CD from GitHub into an Azure App service. From there, the App Service configuration is leveraged. Once everything is proven out, a vault is created and a secret is added. The secret is then leveraged from the App Service.
If you want to work along, you'll need an Azure subscription for deployment of the App Service and storing and retrieving the key at Azure Key Vault. The code for the final solution will be included in this repository. Alternatively, creation of the code is trivial and all instructions are given to create the code and services at Azure as you go.
Getting Started
To get started, let's first just build a simple project that will be able to leverage a secret. Before building in the Azure Key Vault, we can just make the project read from the appsettings.json file and have that get a value that will ultimately be replaced with a secret from Key
Create a simple MVC Web Project
For this demonstration, I'm using a default MVC application. Code in other projects would be similar other than establishing injection and other trivial changes that happen in non-MVC projects.
-
Create the project.
To create the project, run the following command:
dotnet new mvc
-
Add a secret value to the
appsettings.jsonfile.Add the secret to the
appsettings.jsonfile"ImportantSecrets": { "API_KEY": "27dbd518-9f2b-493a-b814-f3b066facea1" } -
Get the configuration injected into the Home Controller
Add the injection of the configuration into the Home Controller
private readonly IConfiguration _configuration; public HomeController(ILogger<HomeController> logger, IConfiguration configuration) { _logger = logger; _configuration = configuration; } -
Retrieve the secret from
appsettings.json.Add the following code to the
HomeController.csfile:public IActionResult Index() { var apiKey = _configuration["ImportantSecrets:API_KEY"]; ViewData["API_KEY"] = apiKey; return View(); } -
Display the secret on the
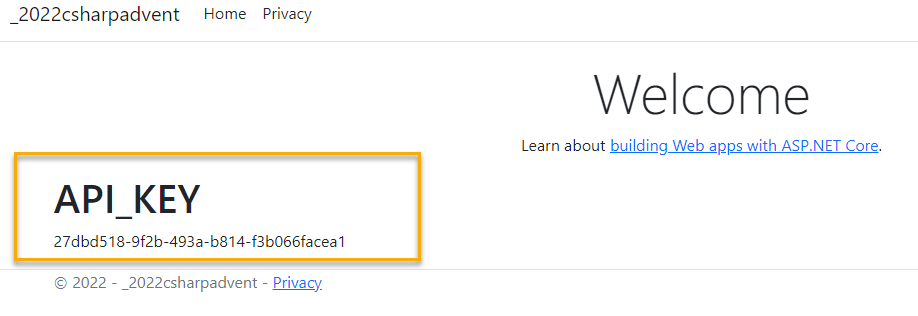
Index.cshtmlfile.On the Index.cshtml file for the Home controller, add the following html and Razor code:
<div> <h1>API_KEY</h1> <span>@ViewData["API_KEY"]</span> </div> -
Run the application
This is a great time to run the program to make sure that the secrets and configuration settings are working as expected.
Switch to local user secrets
In order to protect your information locally, you should utilize the built-in local user secrets for .Net applications. Moving the secret to the user secrets will keep you from accidentally committing a secret value into your GitHub repository.
-
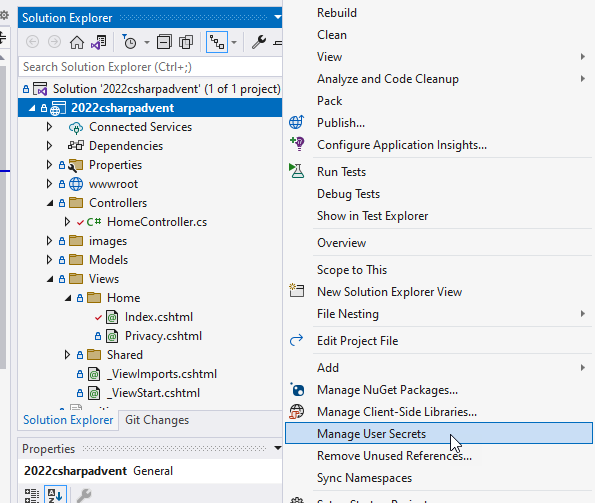
Add user secrets to the project.
To add user secrets to the project you can run some .NET commands, or you can just right-click and add them to your project.
-
Add the secret to the
usersecrets.jsonproject.To make this clear that the value is coming from secrets, add the following code into the
usersecrets.jsonfile:{ "ImportantSecrets:API_KEY": "local-secrets-199f893a-336d-427b-a427-64b039ea293c" }Note: The nested nature of the key is preserved using the
:character in the key. -
Run the project. What happens?
The value from the
usersecrets.jsonfile has super-ceded the value in the localappsettings.jsonfile.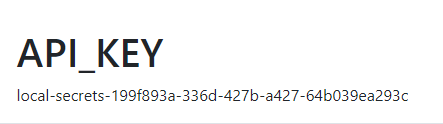
If, for some reason, your secret is not shown, then consider removing or commenting the value from the
appsettings.jsonfile.
Deploy the solution to Azure
To get the solution deployed into Azure, consider using the included YAML file to deploy. In that file, you'll need to change the application name to map to your application and you'll need to make sure to add the publish settings into your github actions secrets file.
-
Create a new free app service at Azure
The
F1tier of the Azure App Service is free, and you can leverage it for this deployment.Log into your Azure portal and deploy a new
F1 - Freeapp service plan on an azure app service.Create a resource group:
rgName=csadvent2022-workingwithsecrets
loc=centralus
az group create -n $rgName -l $loc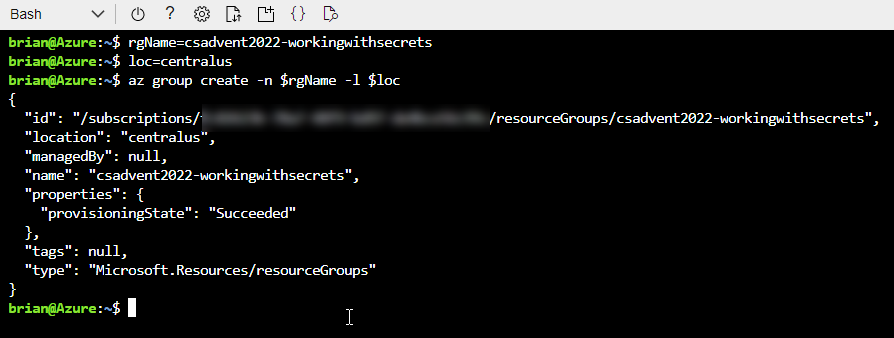
Create the app service plan:
planName=csadvent2022simpleweb
sku=F1
az appservice plan create -n $planName -g $rgName --sku $sku
After the plan is created, create the app service
appServiceName=csadvent2022secrets-web
az webapp create -n $appServiceName -g $rgName --plan $planName --runtime "dotnet:7"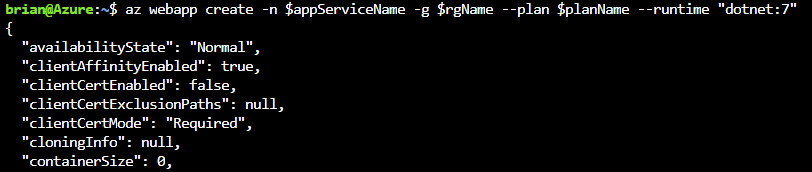
-
Set up CI/CD on the app
If you are just using code from your machine, you could right-click and publish.
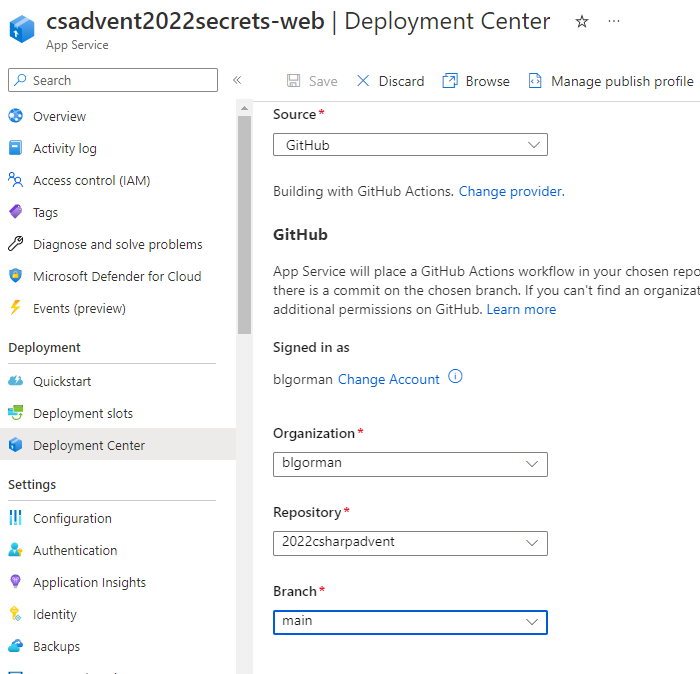
If you want to deploy from a public GIT repo, just use the deployment center and point to the public GitHub URL.
If you use the deployment center, you can also just connect to your own GitHub account and let Azure build the CI/CD.
In the deployment center, select your GitHub repository and allow Azure to connect and deploy with the default CI/CD action for the project.
-
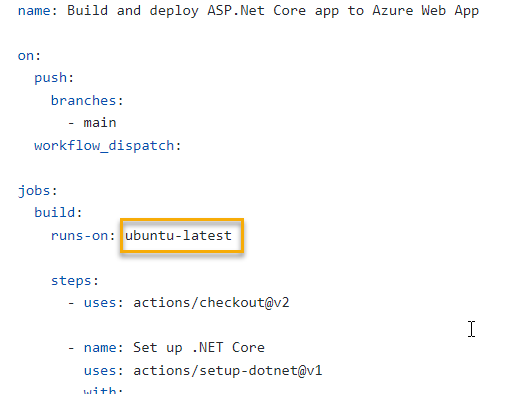
Update CI/CD for Ubuntu
Ubuntu builds at GitHub will run much more quickly than a windows build agent. Update the GitHub action YAML to use the ubuntu-agent:
-
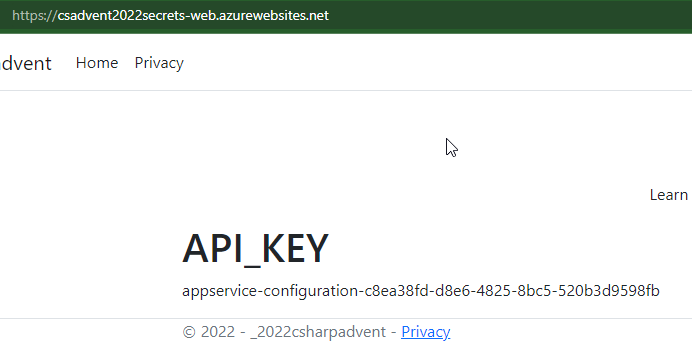
Review the deployment
Open the site after it deploys. The original secret from the
appsettings.jsonfile is displayed.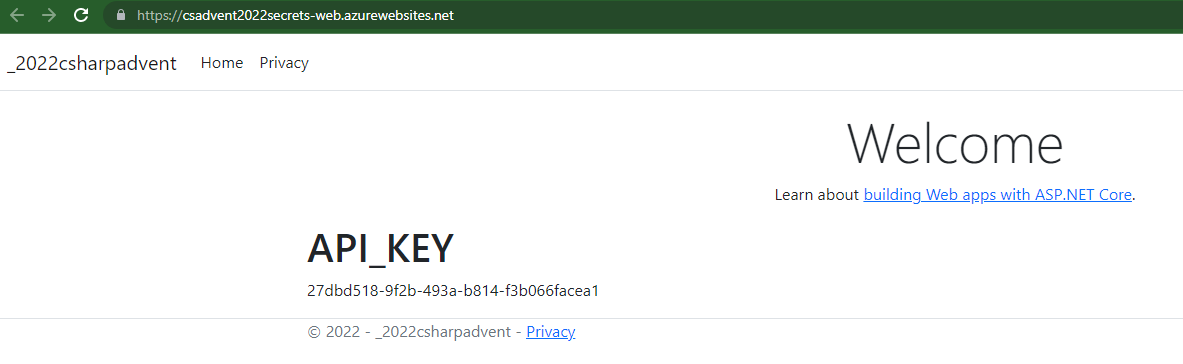
-
Update the configuration
Override the configuration on the deployed application to show the secret from the configuration for the app service:
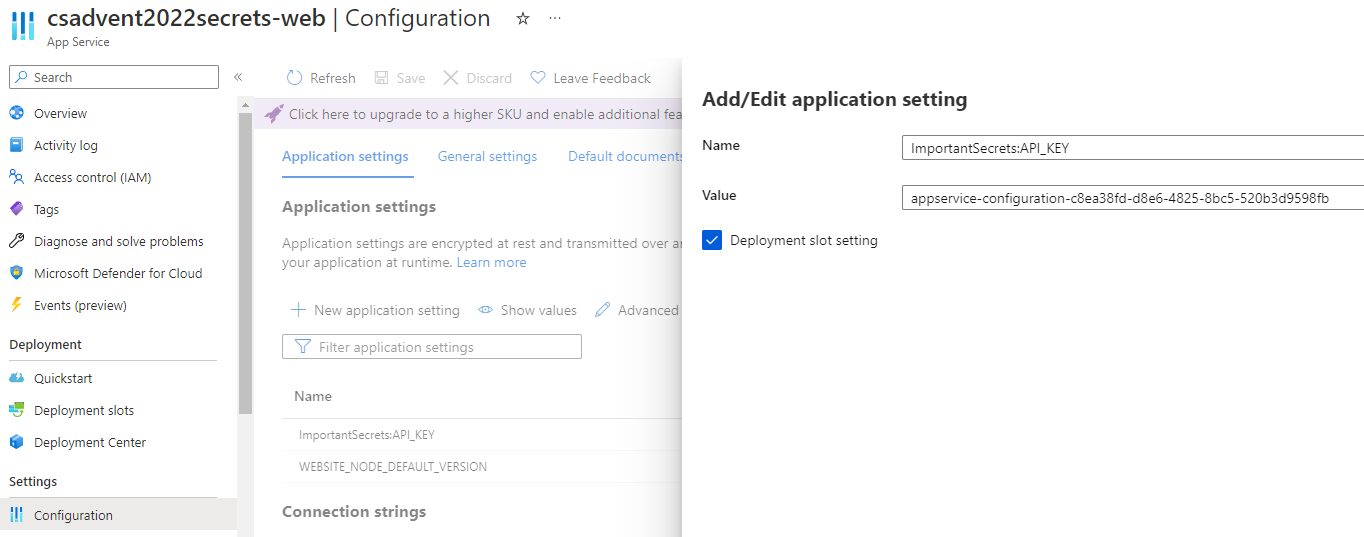
With the configuration updated, the new value shows as expected:
Place the secret in an Azure Key Vault
To keep the secret safe, the secret should be placed into an Azure Key Vault. Once the key is in the Vault, the application can read the value as expected.
-
Create the key vault
To store the secrets at Azure Key Vault, you'll need to create a vault. To create the vault, run the following commands:
kvName=csadvent2022vault
az keyvault create --location $loc --name MyKeyVault --resource-group $rgName
-
Create the Key Vault Secret
You can create the KeyVault secret via the portal or via the CLI. For this demonstration, we're already in the CLI so let's add it that way then just review it in the portal.
az keyvault secret set --vault-name $kvName --name "API-KEY" --value "vault-secret-59adf879-2722-410a-b8f9-97c42e03fc73"Then view the secret
az keyvault secret show --name "API-key" --vault-name $kvName --query "value"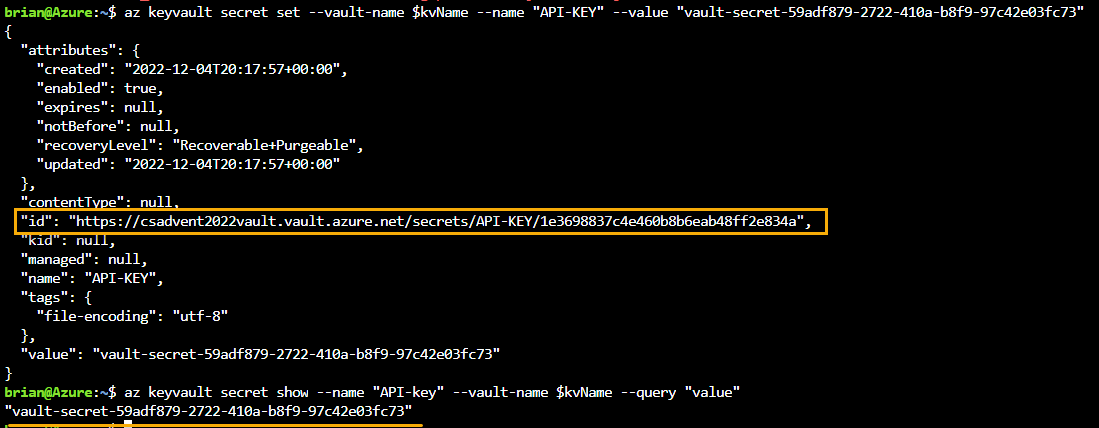
Note: The Secret URI is shown as the ID in the image/output. This URI also includes the secret version as part of the URI.
You can see secrets and values in the Azure portal:
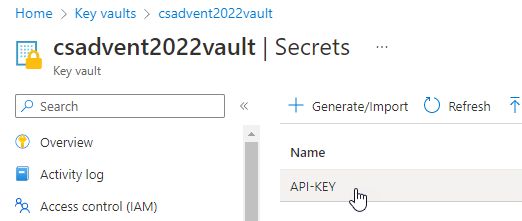
Drill in to see more info:
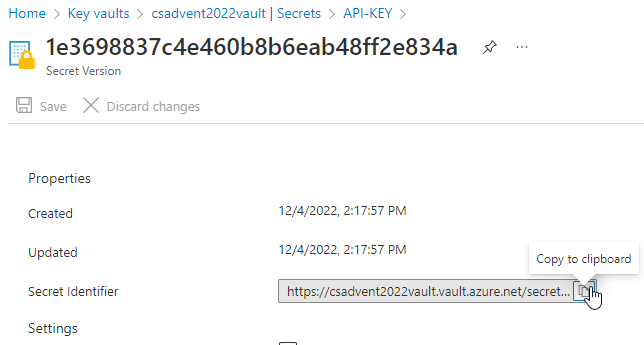
Get the Secret URI For use from the App Service.
-
Use the secret from the App Service
In order to use the secret from the App Service, you need to wrap the value with:
@Microsoft.KeyVault(SecretUri=.....)Replace the
.....with the URI copied above, such as:@Microsoft.KeyVault(SecretUri=https://csadvent2022vault.vault.azure.net/secrets/API-KEY/1e3698837c4e460b8b6eab48ff2e834a)Place the value in the Configuration value for the API key in the App Service. Note that you didn't have to name the secret the same as the value for the key.
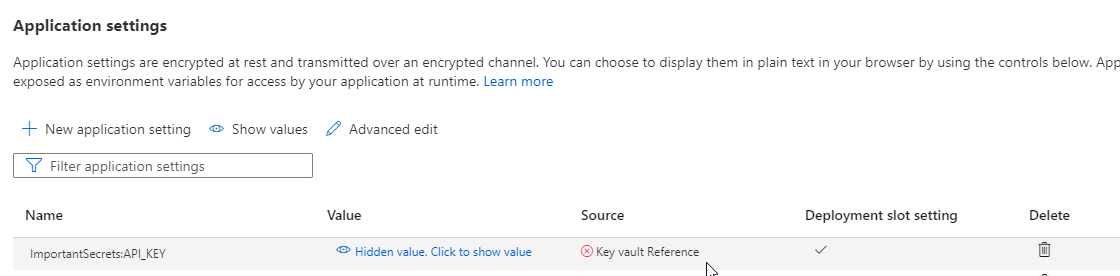
Note: The key vault reference currently will not work. The reference has a red X and if you view it in the app you would see the text entry:

-
Set the identity for the App Service
For the app service to work, you'll need to give it a system-managed identity, and then you'll need to give it permission in the vault.
To enable the system-managed identity, on the App Service in the Portal, under the
Identityleft-navigation menu, selectOnand then hitYesto save the identity.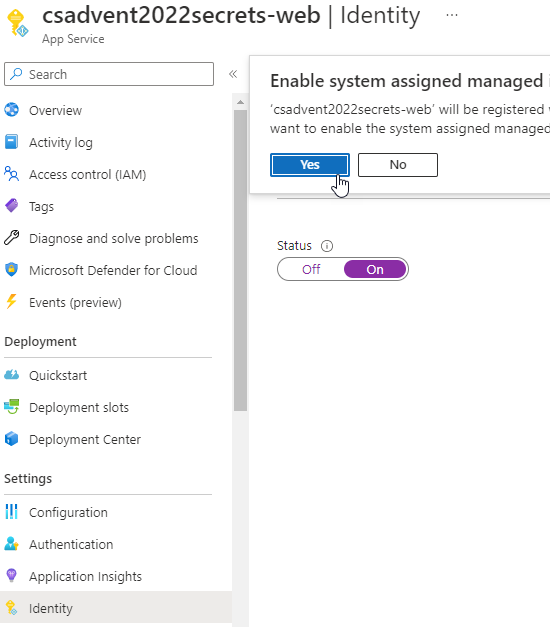
The identity will allow the App Service to be used in RBAC on the KeyVault policies.
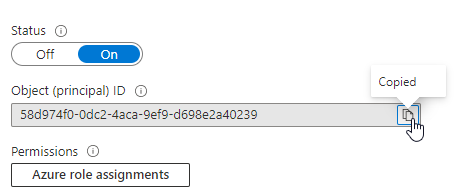
Once the identity is saved, copy the object id from the identity blade
-
Give the app service permission on the Key Vault
Once the App Service has a system-managed identity, the identity can be used in RBAC to give
GETpermission on the secrets from the vault.Navigate to the Key Vault and then choose the
Access Configurationleft-navigation menu. On the menu, selectGo to Access Policiesto open the policies blade.Select
+ Createto begin creating a policy.On the
Basicstab select only theSecrets -> Getoption. Everything else should be unchecked.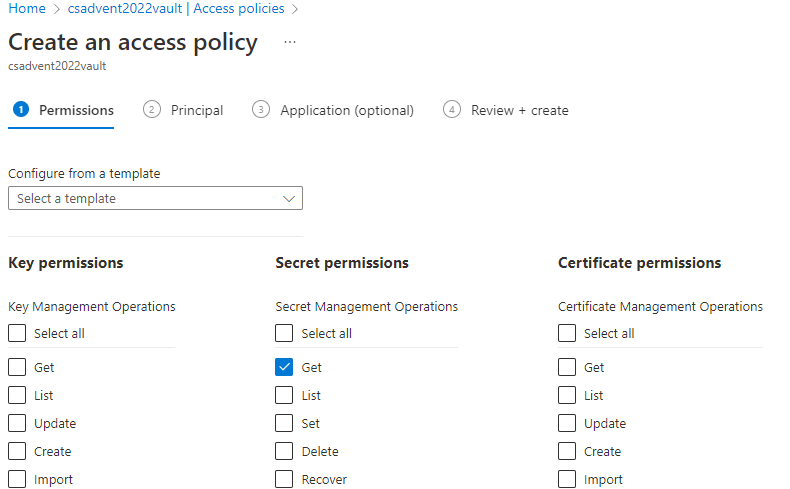
On the next blade, enter the object id retrieved above, and then select the identity.
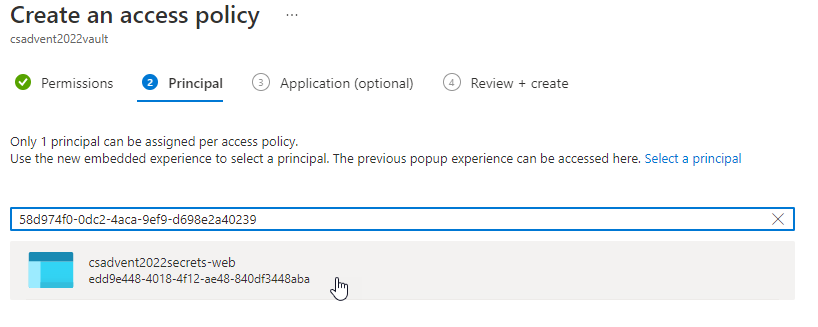
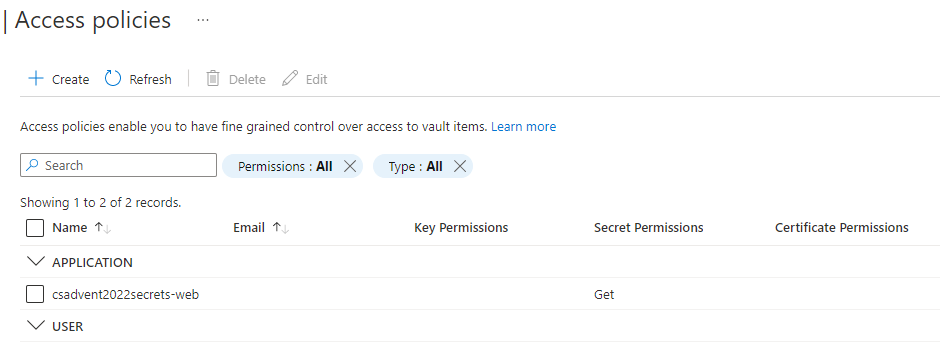
Complete the assignment. When done, it should be listed on the main policies blade.
-
Review the application configuration
After setting the configuration above and also giving permissions with the ID as above, wait a couple of minutes for the permissions to propagate, and go back to the App Service.
Review the configuration to see if a green checkmark has been added to the configuration setting.

-
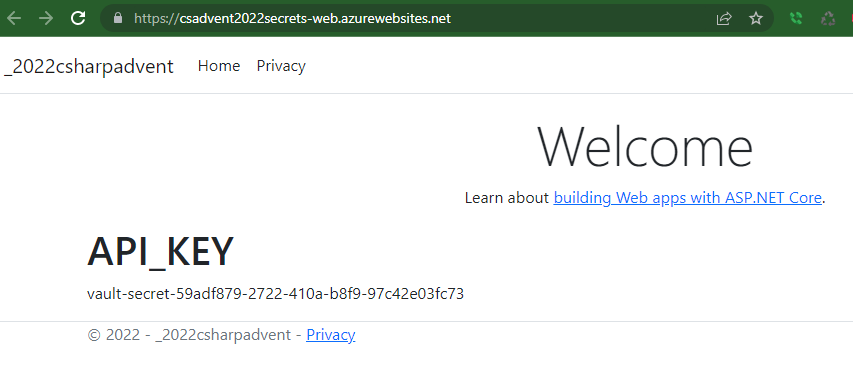
Review the Application
Navigate to the application, and you will be able to see the Key Vault Secret displayed from the Web application.
Conclusion
Now that the application is deployed and KeyVault is integrated, you can work with secrets from within your application as expected. I hope that you found this information useful and have a great rest of the holiday season and an awesome 2023.
Check out the repository for this blog post here
Drop me a tweet or a comment if you found this post helpful or if you have any questions or thoughts, would love to chat with you/meet you! Also, look out for my upcoming AZ-204 Exam Reference book which is currently in the editing process with APress
All the best and be blessed!
Recommend
About Joyk
Aggregate valuable and interesting links.
Joyk means Joy of geeK