
07#Web 实战:实现 GitHub 个人主页项目拖拽排序 - Enziandom
source link: https://www.cnblogs.com/Enziandom/p/16931129.html
Go to the source link to view the article. You can view the picture content, updated content and better typesetting reading experience. If the link is broken, please click the button below to view the snapshot at that time.
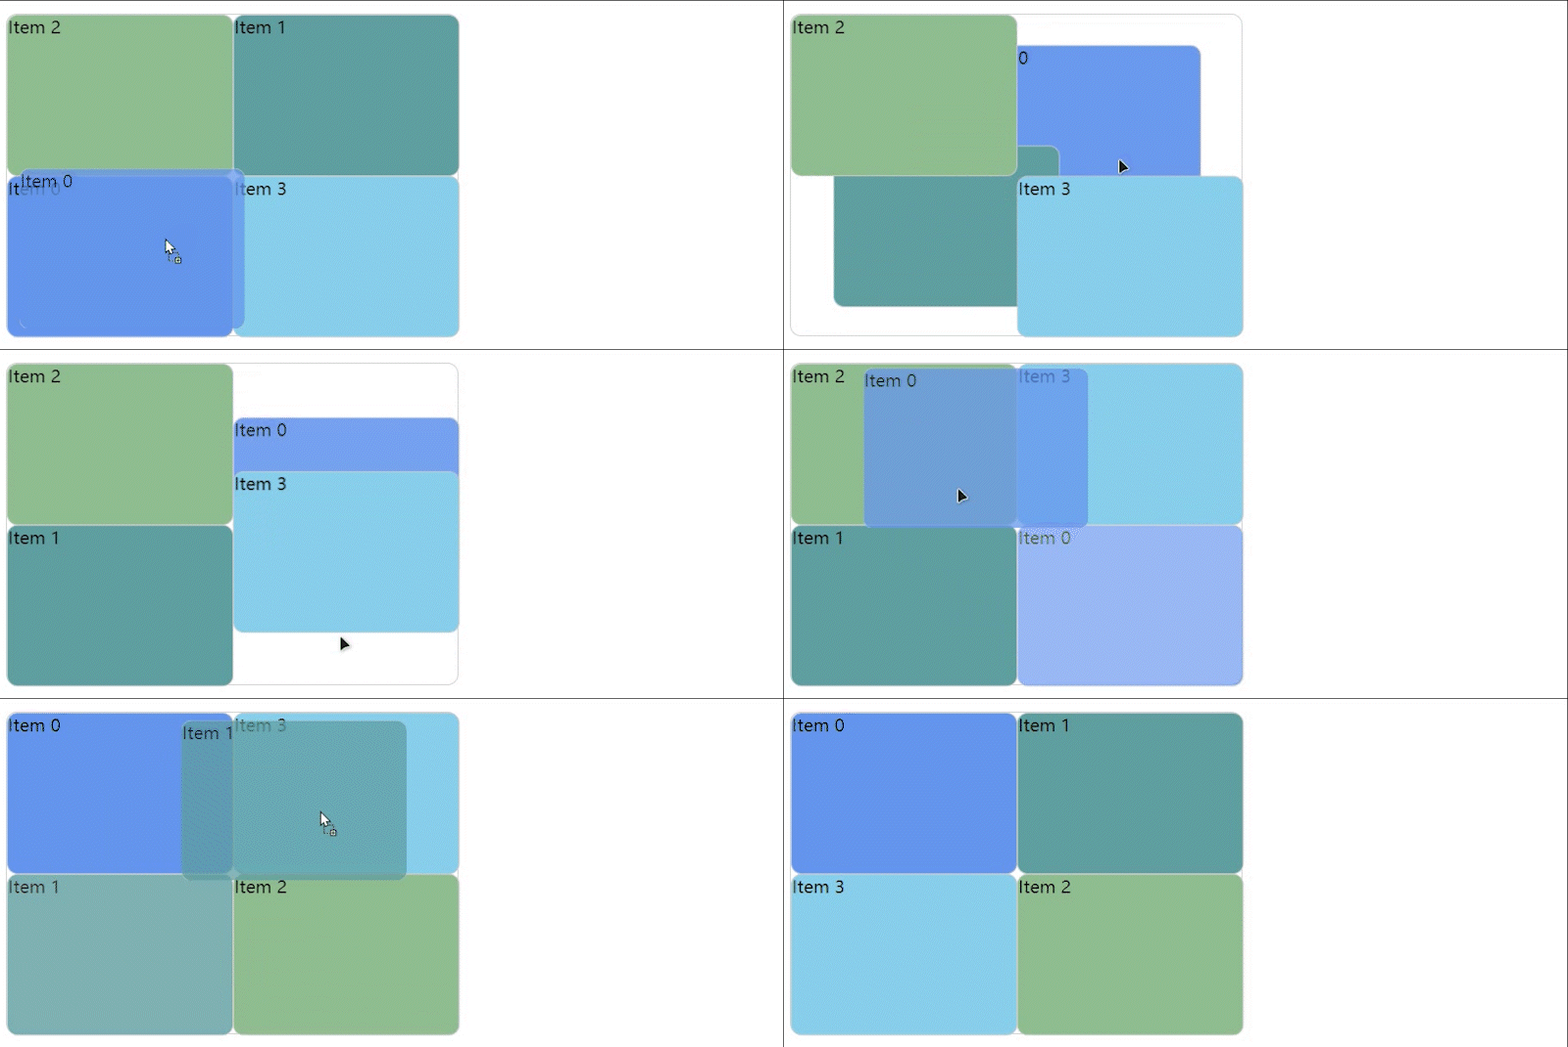
实现效果图

GitHub 和 Gitee 个人主页中可以对自己的项目进行拖拽排序,于是我就想自己实现一个。本随笔只是记录一下大概的实现思路,如果感兴趣的小伙伴可以通过代码和本随笔的说明去理解实现过程。👉我的 Gitee 和 GitHub 地址。
在线浏览地址:11.拖拽排序,里面还有更多的例子。
要实现元素拖拽可替换位置,就必须要锁定每一个元素的具体位置,且要直到两个元素的 transform: translate()。从代码上看,这是一个二维数组。从界面上看,就是一个网格布局。06#Web 实战:实现可滑动的标签页是通过一维数组实现的。
元素的布局不可能通过display: grid来进行,得用transform: translate(),实现元素得平移,且需要使用绝对和相对定位。
静态界面代码
这里给出初始的静态界面代码,draggable 表示开启这个元素的可拖拽功能:
<div class="drop-box">
  <div class="drag-item item-0">
    <div class="ontology" draggable="true">Item 0</div>
  </div>
  <div class="drag-item item-1">
    <div class="ontology" draggable="true">Item 1</div>
  </div>
  <div class="drag-item item-2">
    <div class="ontology" draggable="true">Item 2</div>
  </div>
  <div class="drag-item item-3">
    <div class="ontology" draggable="true">Item 3</div>
  </div>
</div>
老样子,我喜欢把不必要的代码给省略掉,如果样式不全,去我的仓库复制:
.drop-box {
  transition: all 0.5s ease-in-out;
  box-sizing: border-box;
  /* 在这里设置 drop-box 的高宽 */
  width: 420px;
  height: 300px;
  /* 在这里设置 drop-box 的高宽 */
  border-radius: 10px;
  border: 1px solid #cccccc;
  position: relative;
}

.drag-item {
  transition: all 0.5s ease-in-out;
  box-sizing: border-box;
  border-radius: 10px;
  border: 1px solid #cccccc;
  width: 200px;
  height: 50%;
  position: absolute;
  top: 0;
  left: 0;
}

.drag-item > div.ontology {
  width: 100%;
  height: 100%;
}
构建二维数组
拖拽每一个元素不代表真实地改变了 DOM 所在的位置。给这些元素设置监听器,并获取 index,拖拽之后都不会影响它的索引值。
上面给的 HTML 结构,在界面上生成之后,从 1 ~ 4 这样的序列是不会改变的,即便是我们修改了它的 translate(平移元素)之后,也不会影响它原本在 DOM 树上的顺序。
为了方便在代码中修改元素的transform: translate(),我们需要在页面载入时就虚拟化这些元素到二维数组中。元素虚拟化进二维数组的目的是让编程更加易于使用。
let virtualGridElem = [];

function initVirtualGrid(elem, init) {
  let elemIndex = 0;
  for (let rowIndex = 0; rowIndex < init.rowNum; rowIndex++) {
    virtualGridElem[rowIndex] = [];
    for (let colIndex = 0; colIndex < init.colNum; colIndex++) {
      $(elem[elemIndex]).attr("data-row-index", rowIndex);
      $(elem[elemIndex]).attr("data-col-index", colIndex);
      $(elem[elemIndex]).css({ width: init.width, height: init.height, transform: gridVals[rowIndex][colIndex] });
      initEvents(elem[elemIndex], elemIndex, rowIndex, colIndex);
      virtualGridElem[rowIndex][colIndex] = elem[elemIndex++];
    }
  }
}
在虚拟化之前,需要获得这个界面中的网格信息,即网格有多少行,每一行有多少列。
let gridVals = [];

function initGridVals(elNum, colNum, rowMaxWidth, colMaxWidth) {
  let rowNum = Math.ceil(elNum / colNum);
  let widthPerRow = rowMaxWidth / colNum;
  let heightPerCol = colMaxWidth / rowNum;

  let translateX = 0;
  for (let rowIndex = 0; rowIndex < rowNum; rowIndex++) {
    let translateY = 0;
    gridVals[rowIndex] = [];
    for (let colIndex = 0; colIndex < colNum; colIndex++) {
      gridVals[rowIndex][colIndex] = `translate(${translateY}px, ${translateX}px)`;
      translateY += widthPerRow;
    }
    translateX += heightPerCol;
  }

  return {
    width: widthPerRow,
    height: heightPerCol,
    rowNum: rowNum,
    colNum: colNum
  };
}
到目前为止,得到了两个重要的二维数组:virtualGridElem 和 gridVals。virtualGridElem 不会被改变,一直保持原有的位置,与实际的可拖拽元素的 DOM 树保持一致。gridVals 会与 virtualGridElem 发生出入,会根据操作而修改。
let dragItem = $(".drop-box").children(".drag-item");

initVirtualGrid(dragItem, initGridVals($(dragItem).length, 2, 420, 300));
拖拽排序功能
拖拽在 HTML5 就已经存在,drop、dragover、dragstart、dragend 都是实现本案例中最重要的几个监听事件。其中 drop 表示可拖拽元素到目标元素之后的元素,即 item1 拖拽到 item2 之后,获取 item2 的元素。
function initEvents(elem, index, rowIndex, colIndex) {
  // drop 是获取拖拽目标元素
  $(elem).on("drop", e => {
    e.preventDefault();
    $(virtualGridElem[rowIndex][colIndex]).css({ transform: gridVals[currRowIndex][currColIndex] });
    $(virtualGridElem[currRowIndex][currColIndex]).css({ transform: gridVals[rowIndex][colIndex] });
    // let tempTargetGridVals = gridVals[currRowIndex][currColIndex];
    // gridVals[currRowIndex][currColIndex] = gridVals[rowIndex][colIndex];
    // gridVals[rowIndex][colIndex] = tempTargetGridVals;
    [gridVals[currRowIndex][currColIndex], gridVals[rowIndex][colIndex]] = [gridVals[rowIndex][colIndex], gridVals[currRowIndex][currColIndex]];
  });

  // 必须写这一段代码,否则 drop 监听器不生效
  $(elem).on("dragover", e => {
    e.preventDefault();
  });

  // drag 相关的监听是对拖拽元素目标有效的
  let ontology = $(elem).children(".ontology");

  $(ontology).on("dragstart", e => {
    currRowIndex = rowIndex;
    currColIndex = colIndex;
    $(elem).css({ opacity: "0.5" });
  });

  $(ontology).on("dragend", e => {
    $(elem).css({ opacity: "1" });
  });
}
代码最多的是 drop 事件,在开始拖拽时,也就是获取拖拽的元素信息,在这里我们要把这个拖拽的元素透明度调低一点,表示被拖拽中的元素。之后,记录改拖拽元素的二维索引值,rowIndex、colIndex,记录为 currXxxIndex。
在拖拽完成之后,就要触发 drop 事件。drop 事件中,对 gridVals 进行值的交替。ES6 中解构赋值不需要中间变量临时存储,就可以实现值交换:
let x = 1, y = 2;

[x, y] = [y, x]
替换之后,x = 2,y = 1。
具体实现过程请去看我仓库中的代码👉 Gitee 和 GitHub 地址。喜欢的话,请点个赞👍再走哦!后续带来更多的 Web 实践。
Recommend
About Joyk
Aggregate valuable and interesting links.
Joyk means Joy of geeK