
2

Sentinel整合Feign对远程调用限流并降级
source link: https://blog.51cto.com/lianghecai/5755864
Go to the source link to view the article. You can view the picture content, updated content and better typesetting reading experience. If the link is broken, please click the button below to view the snapshot at that time.
Sentinel整合Feign对远程调用限流并降级
推荐 原创微服务提供者demo-pay
第一步:创建模块demo-pay添加依赖:
<dependency>
    <groupId>org.springframework.boot</groupId>
    <artifactId>spring-boot-starter-web</artifactId>
</dependency>
<dependency>
    <groupId>org.springframework.boot</groupId>
    <artifactId>spring-boot-starter-actuator</artifactId>
</dependency>
<!--热部署相关-->
<dependency>
    <groupId>org.springframework.boot</groupId>
    <artifactId>spring-boot-devtools</artifactId>
</dependency>

<dependency>
    <groupId>org.springframework.boot</groupId>
    <artifactId>spring-boot-starter-test</artifactId>
    <scope>test</scope>
</dependency>
<dependency>
    <groupId>com.alibaba.cloud</groupId>
    <artifactId>spring-cloud-starter-alibaba-nacos-discovery</artifactId>
</dependency>
第二步:修改application.yml:
server:
  port: 8801
  servlet:
    context-path: /pay
spring:
  application:
    name: nacos-pay
  cloud:
    nacos:
      discovery:
        server-addr: http://localhost:8848  # 配置Nacos地址
management:
  endpoints:
    web:
      exposure:
        include: '*' # 对外暴露出所有的端点
第三步:项目主启动类添加注解
@EnableDiscoveryClient
第四步:提供控制器PayController:
@RestController
public class PayController {

    @GetMapping("/fun/{id}")
    public String fun(@PathVariable("id") Long id) {
        System.out.println("1111111111111111");
        return "支付 id: " + id;
    }
}
微服务消费者demo-sentinel-openfeign
第一步:创建模块demo-sentinel-openfeign并添加依赖:
<dependency>
    <groupId>org.springframework.boot</groupId>
    <artifactId>spring-boot-starter-web</artifactId>
</dependency>
<dependency>
    <groupId>org.springframework.boot</groupId>
    <artifactId>spring-boot-starter-actuator</artifactId>
</dependency>
<!--热部署相关-->
<dependency>
    <groupId>org.springframework.boot</groupId>
    <artifactId>spring-boot-devtools</artifactId>
</dependency>

<dependency>
    <groupId>org.springframework.boot</groupId>
    <artifactId>spring-boot-starter-test</artifactId>
    <scope>test</scope>
</dependency>

<dependency>
    <groupId>com.alibaba.cloud</groupId>
    <artifactId>spring-cloud-starter-alibaba-sentinel</artifactId>
</dependency>

<dependency>
    <groupId>com.alibaba.cloud</groupId>
    <artifactId>spring-cloud-starter-alibaba-nacos-discovery</artifactId>
</dependency>

<dependency>
    <groupId>com.alibaba.csp</groupId>
    <artifactId>sentinel-datasource-nacos</artifactId>
</dependency>


<!--避免出现警告信息:Spring Cloud LoadBalancer is currently working with the default cache. You can switch to using Caffeine cache, by adding it and org.springframework.cache.caffeine.CaffeineCacheManager to the classpath.-->
<dependency>
    <groupId>com.github.ben-manes.caffeine</groupId>
    <artifactId>caffeine</artifactId>
    <version>3.1.1</version>
</dependency>
<!--  nacos自从2020版本之后不再整合的是Netflix,也就没有ribbon了 -->
<dependency>
    <groupId>org.springframework.cloud</groupId>
    <artifactId>spring-cloud-starter-loadbalancer</artifactId>
    <version>3.0.1</version>
</dependency>

<dependency>
    <groupId>org.springframework.cloud</groupId>
    <artifactId>spring-cloud-starter-openfeign</artifactId>
    <version>3.0.1</version>
</dependency>
第二步:修改application.yml
server:
  port: 6601
  servlet:
    context-path: /sentinelfeign

spring:
  application:
    name: sentinel-feign
  cloud:
    nacos:
      discovery:
        server-addr: localhost:8848 # 配置nacos地址
    sentinel:
      transport:
        # 配置sentinel dashboard地址
        dashboard: localhost:8080
        # 默认端口8719,假如被占用会自动从8719开始依次+1扫描,直至找到未被占用的端口
        port: 8719

management:
  endpoints:
    web:
      exposure:
        include: '*' #暴露出所有的端点
# 激活Sentinel对Feign的支持
feign:
  sentinel:
    enabled: true
第三步:在项目主启动类上添加注解:
@EnableFeignClients
@EnableDiscoveryClient
第四步:创建Feign接口:
@Service
//name:指定调用Rest接口所对应的服务名
//path:指定要调用的Rest接口所在的Controller指定的RequestMapping,如果Rest接口所在的Controller没有指定RequestMapping,则不用指定
@FeignClient(name = "nacos-pay", path = "/pay", fallback = PayFeignServiceFallback.class)
public interface PayFeignService {
    @GetMapping("/fun/{id}")
    public String fun(@PathVariable("id") Long id);
}
第五步:创建兜底类:
@Component
public class PayFeignServiceFallback implements PayFeignService {
    @Override
    public String fun(Long id) {
        return "兜底 服务降级: " + id;
    }
}
第六步:创建测试Controller
@RestController
public class DemoCtroller {
    @Resource
    private PayFeignService payFeignService;

    @GetMapping("/fun1")
    public String fun1(Long a) {
        String res = payFeignService.fun(a);
        return "fun1 "+res;
    }
}
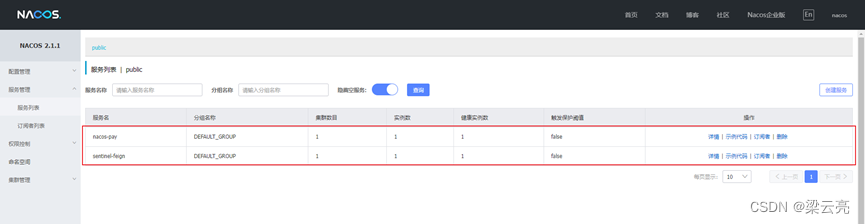
第一步:依次启动软件Nacos和Sentinel,然后再分别启动项目demo-pay和demo-sentinel-openfeign。
第二步:结果:
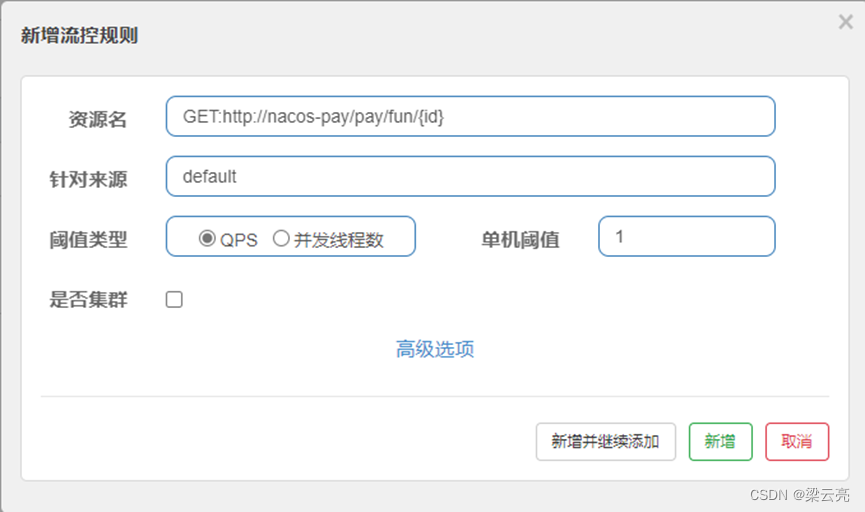
添加流控规则:

请求消费者中的示例控制器中的api接口:
低频访问:

高频访问:

- 打赏
- 赞
- 收藏
- 评论
- 分享
- 举报
Recommend
About Joyk
Aggregate valuable and interesting links.
Joyk means Joy of geeK