

Presidential Dad Jokes with Azure Custom Voice service
source link: https://www.tuicool.com/articles/QZR7BnU
Go to the source link to view the article. You can view the picture content, updated content and better typesetting reading experience. If the link is broken, please click the button below to view the snapshot at that time.
I went recently to Hack The North in Waterloo, Ontario. Way up there in Canada. Land of the maple syrup and overtly polite folks. It was a very intense moment of pure creativity shared with over 1,500 students. I saw many projects, but one caught my eye. It was a funny joke, but it sparked some ideas.
The project recognized your emotion through Azure Cognitive Services Face API , then, from a list of prewritten jokes (or insults), tell you a joke (or insult). What’s the twist? They were using Trump’s very distinctive voice. Politics aside, my first question was, how did they make it ? I’ve then on set on a path to reproduce what they did. At the very least, reproduce the custom voice.
Why would I want to do that? Custom voices for which you can use as a Text-To-Speech service makes for automation potential. Whether it is for phone assistant, personal assistant, bots, or jokes, having a custom voice that can tell you how bad you are at keeping up with memes and social media is very tempting.
I didn’t need any more reason to start building one. Let me show you how.
Setting a goal
The Hackathon team created a voice copying President Trump. I have no idea where they took their data, but I needed a way to get similar data. Two things are necessary when building a custom voice model.
- Audio file (mp3/wav)
- Matching transcript
The good news is that a President’s speeches are recorded and transcripted pretty thoroughly by multiple people. A small search for president speech recording
led me to the American Rhetoric
website and their online speech bank. From there, I saw that they had some President Obama speeches. Not only some
speeches but speeches since before he ran for president.
Those speeches also include full transcripts.
Our goal? Train a model that will be able to reproduce President Obama’s voice.
Downloading the training data
Go and download a few Obama Speeches as MP3s. Ensure that the speeches that you pick only have a single speaker (President Obama). Otherwise, the model won’t work correctly.
Create a separate .txt
file in UTF-8 with BOM
with the same name as the MP3 file.

Then, we’re going to create two zip files. One with all the audio files named PresidentialFun-Audio.zip
and another with all the transcripts called PresidentialFun-Transcript.zip
.
We’re going to need those later.
Creating the necessary resources
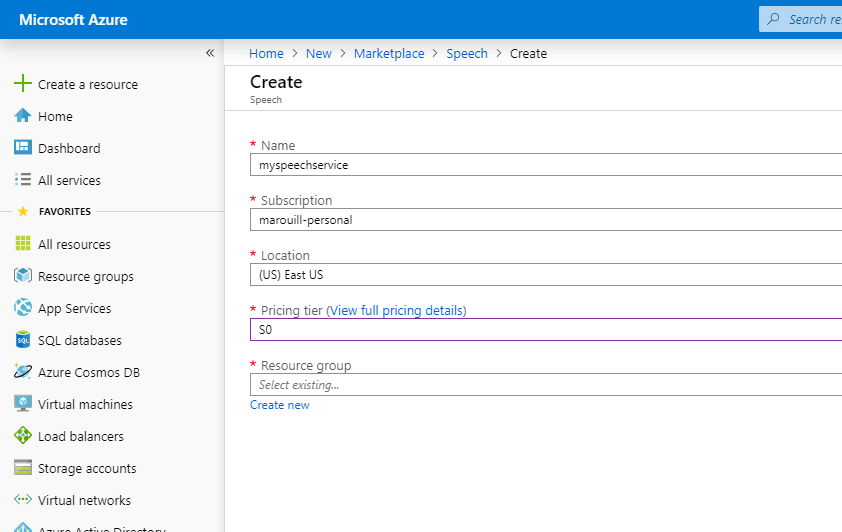
You will need a free Azure account before you go further. Then, we’ll need to create a Speech service within the Azure portal.
For this specific scenario, we’re going to choose a name, a location, and a pricing tier of S0
. We could go free, but the feature that we need is only available for the non-free offering.
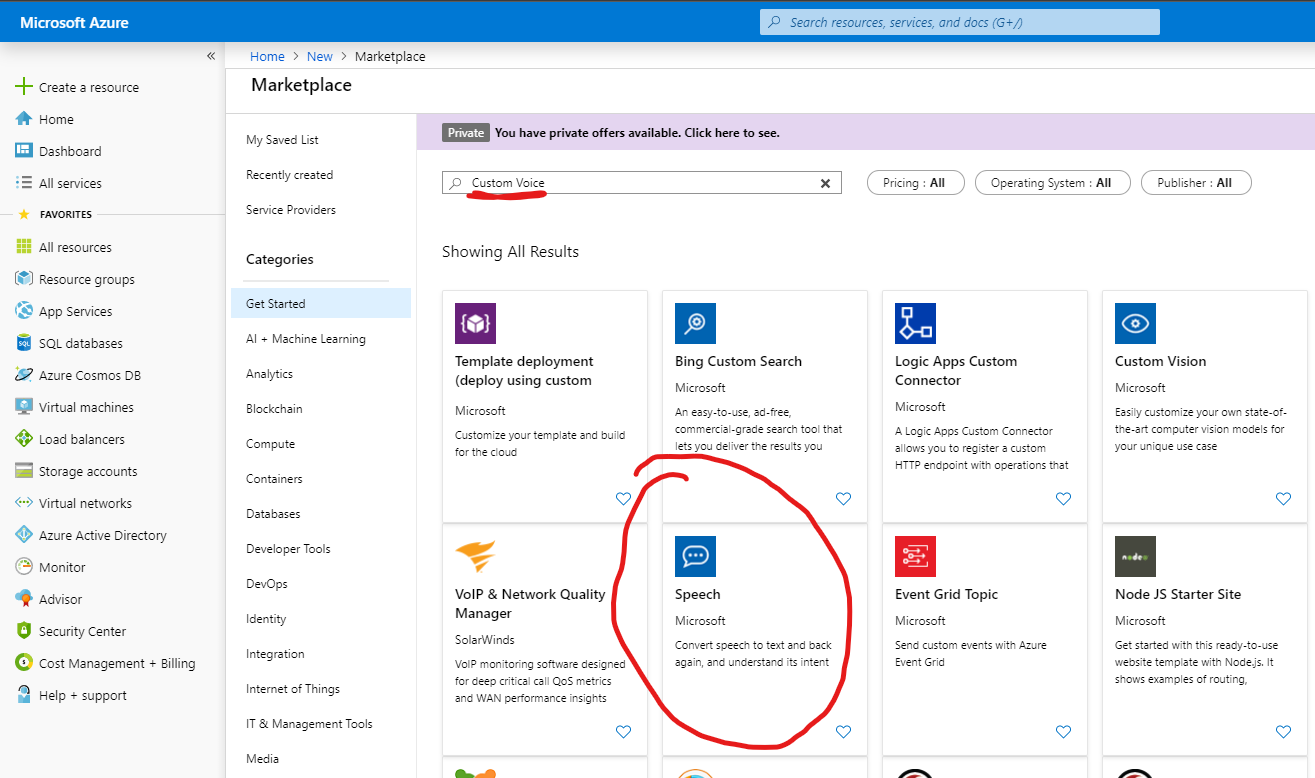
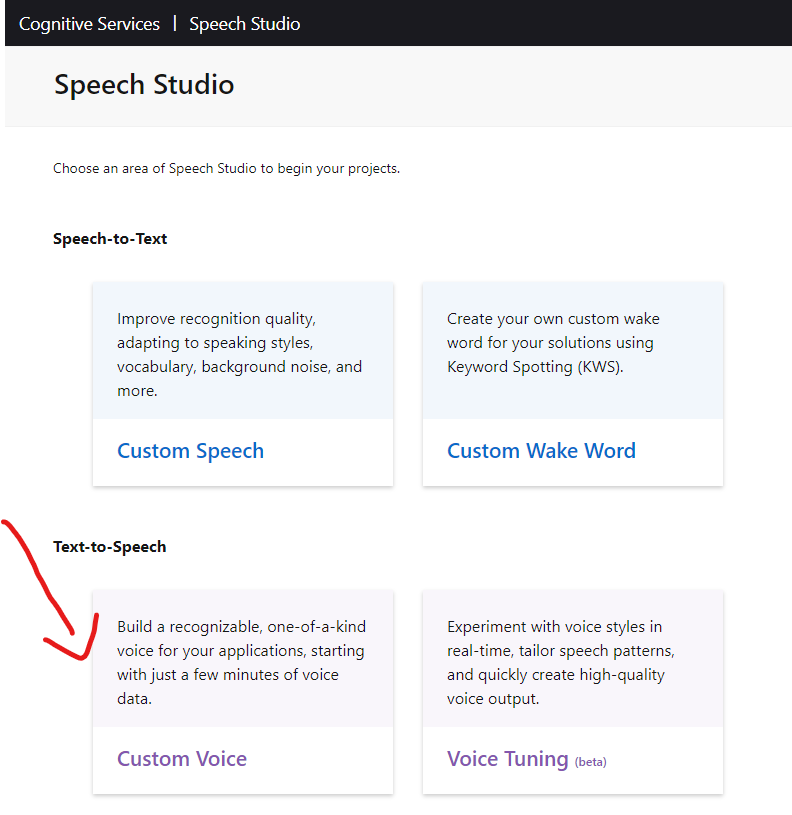
Once we have the resource created, we need to go to the Custom Voice website and start building our project.
Click on Custom Voice.
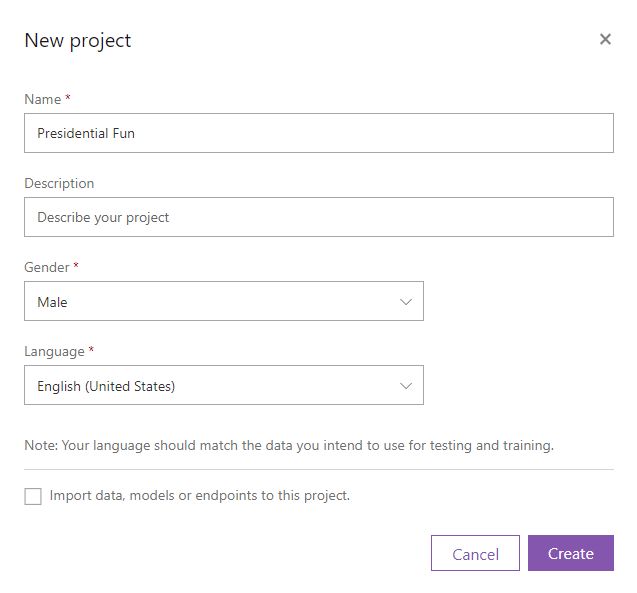
Then, we’re going to create a new project.
It is essential at that point that we select Male
and English (United States)
. We’re going to leave that checkbox unchecked for now.
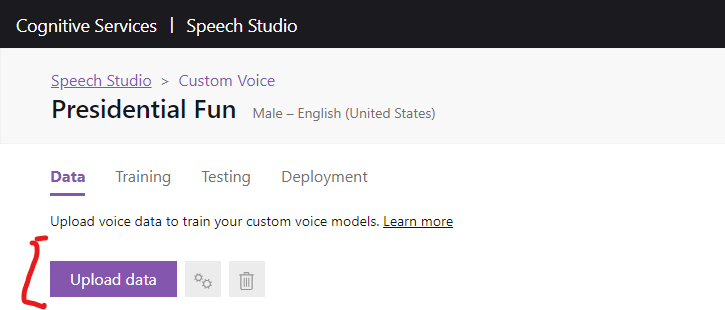
Uploading the data
Start by clicking on the project you created. You will be taken to the Data
tab. Click on Upload data
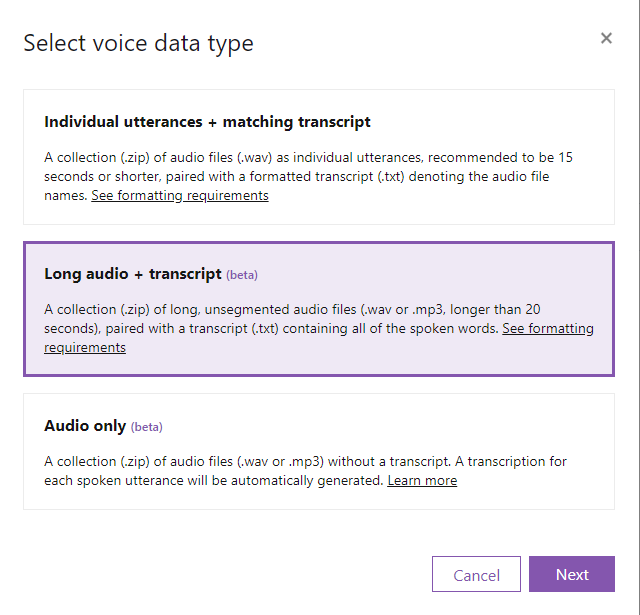
In the next window, we’re going to choose Long audio + transcript
. Click Next
.
Pick a name for your dataset and click Next
.
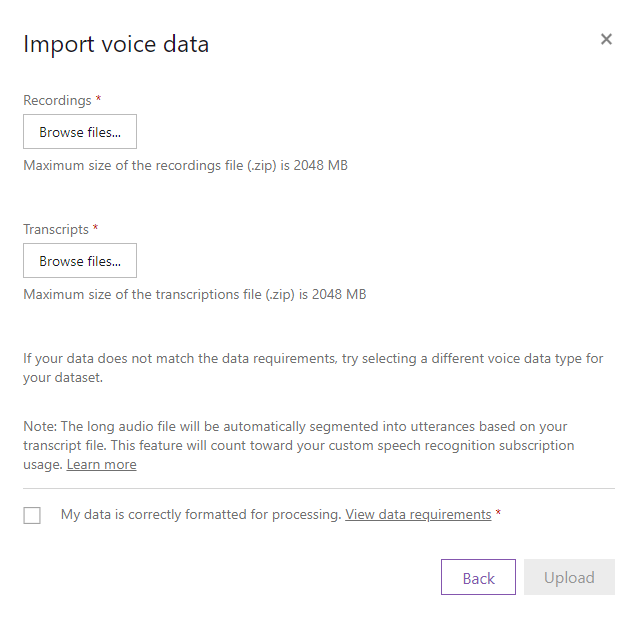
That is where our previously created zip files come in handy. Browse for PresidentialFun-Audio.zip
for the Recordings
, and PresidentialFun-Transcript.zip
for the Transcripts
section. Make sure to tick the checkbox and click Upload.
After that, all the speeches will be cut into utterances automatically. Once we parsed the data successfully, we are ready to train the model.
Warning: This may take an hour or two, depending on your dataset.
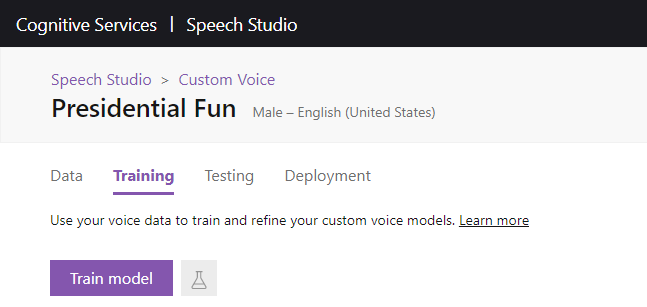
Training the model
Once the data step is in a Succeeded
state, we’re ready to start training the model. Go to the Training
tab, click Train model
.
Follow the steps that will allow you to pick a name for your model, as well as the data you want to use to train it. Review your options before clicking Train
.
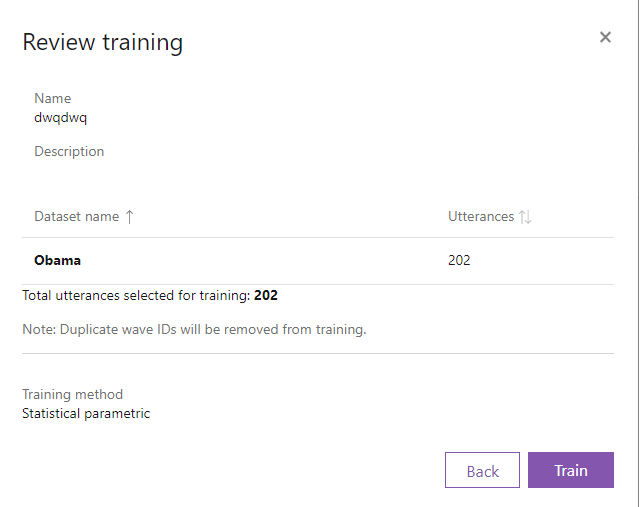
From that point on, it will take a while. For me, this meant 18 hours of processing. It will incur fees at around $1 per hour. The more clean utterances that you have, the more time the model will take to train.
Testing the model
With your completed model, it’s time to start testing. It is time to have fun.
Let’s say that I that point, I went all-in on Dad Jokes.
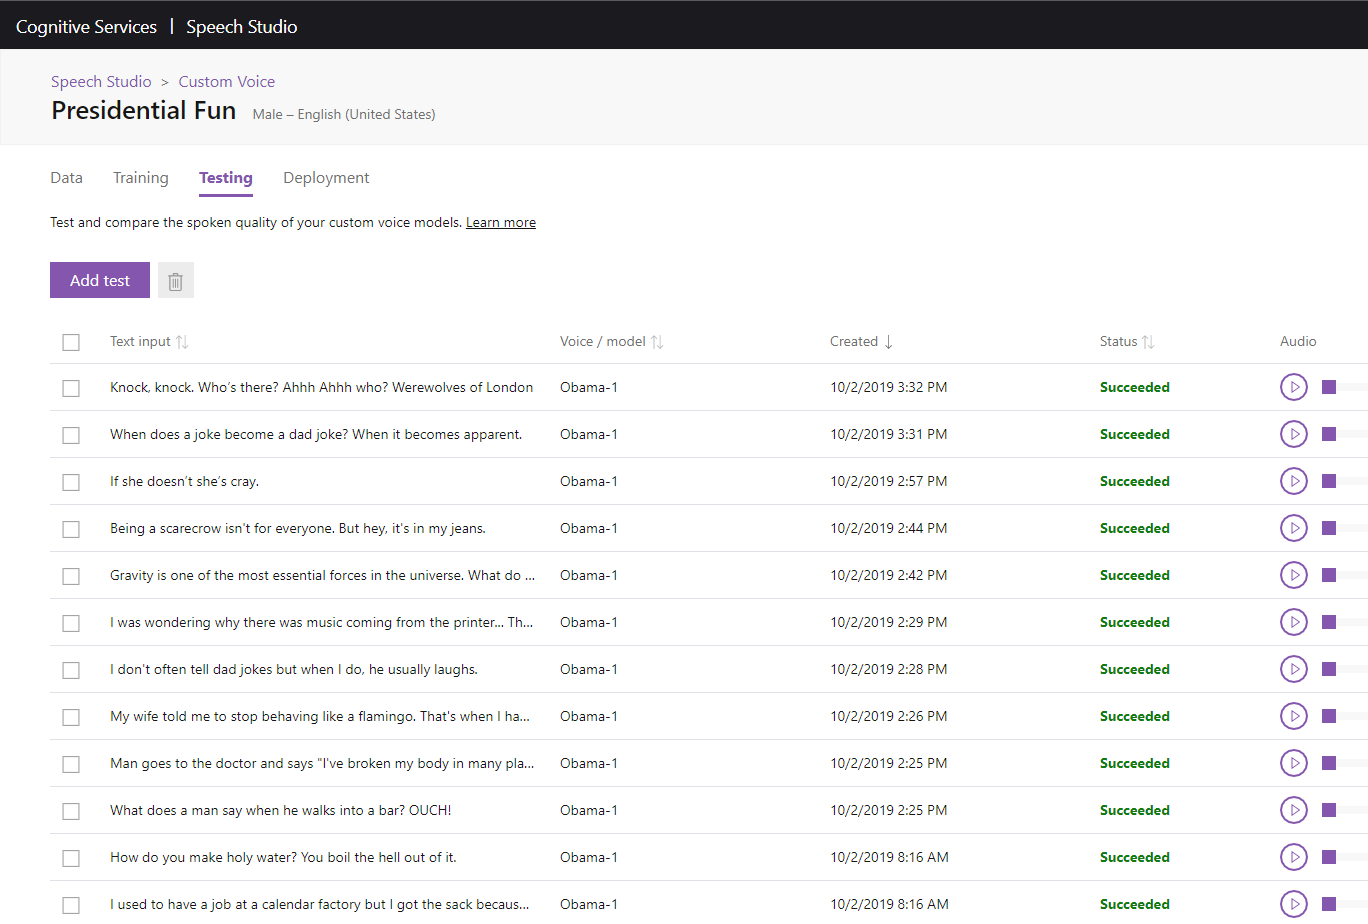
Here’s a sample.
What’s next
At that point, we can either keep on refining the model with more data or, if we’re happy with what we got, deploy it and have it available through an API.
If you happen to try this, please send me your best dad jokes with your favorite celebrity!
Recommend
About Joyk
Aggregate valuable and interesting links.
Joyk means Joy of geeK