

WorkManager Tutorial for Android: Getting Started [FREE]
source link: https://www.tuicool.com/articles/hit/M3Ujyur
Go to the source link to view the article. You can view the picture content, updated content and better typesetting reading experience. If the link is broken, please click the button below to view the snapshot at that time.
At Google I/O 2018 , Google announced the WorkManager library as part of the Android Jetpack component set. Moving forward, WorkManager replaces JobScheduler as Google’s recommended way to enqueue background tasks that are guaranteed to execute.
In this WorkManager tutorial, you’ll learn about the different types of background work and their respective uses. You’ll also implement a series of workers, each performing a different task. Finally, you will connect the tasks together using WorkManager task chaining.
Understanding Background Work
Background work is any app-related task that is not executed on the Android main (UI) thread .
Usually, you need to execute on a background thread because the task is an expensive operation — like applying filters to a bitmap — or the task depends on a network request to query or post data.
Because you don’t want to block the main thread, or you want the task to continue running even if you close the app, you dispatch the task to a background thread.
Types of Background Work
The types of background work can be categorized in two dimensions:

The vertical axis is the timing of the work: “Does the work need to be executed at an exact time or can it be deferred?”
The horizontal axis represents how relevant the work is: “Do you need a guarantee that the work will be executed?”
Depending on your use case, there are various approaches available:
- On the left, for tasks that don’t need a guarantee of execution, you can use ThreadPools , RxJava or coroutines .
- On the upper right, for exact timing and guaranteed execution, you should use a ForegroundService .
- On the lower right, for deferrable and guaranteed execution, you have several options: JobScheduler , Firebase JobDispatcher , and Alarm Manager + Broadcast receivers .
WorkManager falls into the category of guaranteed execution and deferrable.
Why WorkManager?
Since Android Marshmallow, the Android team has started to put more focus on battery optimizations. The team introduced Doze mode and, later in Android Oreo, it introduced background service limits — just to mention a few. With Android Pie, the team continues to give attention to optimization and introduce new changes.
Until now, to perform background work, developers not only had to know about these battery optimizations, but also had to choose between the many ways to implement the work.
Internally, WorkManager uses the existing mentioned options to perform background work: JobScheduler, Firebase JobDispatcher, and Alarm Manager + Broadcast receivers.
Depending on the configuration of a given device that your app is installed on (OS version, Google Play services availability, etc.), WorkManager will choose an appropriate option and execute the work when it considers the optimum time to do so.
In doing so, WorkManager provides a simple and clean interface and “hides” the complexity of deferrrable but guaranteed background work from developers.
Knowing When to Use WorkManager
As was previously mentioned, WorkManager falls into the deferrable guaranteed execution category of background work.
A few example use cases:
- Uploading files to a server.
- Syncing data to/from a server and saving it to a Room database.
- Sending logs to a server.
- Executing expensive operations on data.
In this tutorial, you’ll learn how to execute these types of background tasks using WorkManager .
Note : If you’re new to Android development or Kotlin, it’s highly recommended that you start with Beginning Android Development with Kotlin to learn your way around the basic tools and concepts.
Getting Started
The project you’ll be working with, PhotoUploader , is an app to pick photos from your photo library and execute the following operations in the background:
- Apply a sepia filter to each image.
- Zip the filtered images.
- Upload the .zip file to a server.

Use the Download materials button at the top or bottom of this tutorial to download the starter project.
Once downloaded, open the starter project in Android Studio 3.2 Beta 1 or newer. When you build and run it, you’ll see the first screen shown here:
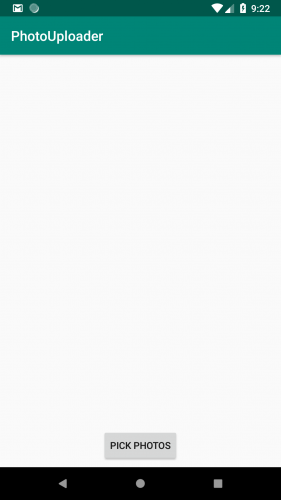

Currently, tapping on the “Pick Photos” button will let you pick one or more photos from your library. After that, it does nothing. You’ll write code to add the featured mentioned above to the app.
Reviewing the project, you’ll see that it consists of two files:
- MainActivity.kt : This is the main screen with a Pick Photos button.
- ImageUtils.kt : Contains the aforementioned operations that you’ll execute in the background.
Setting Up the WorkManager Library
Open the build.gradle file for the app module and add the following dependency:
implementation "android.arch.work:work-runtime:1.0.0-alpha02"
Note : At the time of the writing of this tutorial, there’s an alpha04 version. However, parallel and chaining WorkRequests (to be explained later) won’t work. This is likely because the library is still alpha.
That’s all the setup you need to start using the library!
Understanding WorkManager Classes
Before adding code to the project, you’ll need to familiarize yourself with the following main classes that the WorkManager library contains:
- WorkManager : This is the main class that you’ll use to enqueue WorkRequests .
- Worker : You’ll need to subclass this to perform the task that will run in the background.
- WorkRequest : This represents the request of the task that will run. You’ll set the task through the Worker subclass. You can also specify constraints — for example, only run the task if the device has Internet connectivity. There are two main types of work requests: OneTimeWorkRequest , which executes the task just one time, and PeriodicWorkRequest , which executes your task periodically. The period of a PeriodicWorkRequest can be customized.
- WorkStatus : Whenever you need to know the status — running, enqueued, finished, etc., for example — of a particular WorkRequest , you can ask the WorkManager for it. It will provide a LiveData object containing one or more WorkStatus objects.
Creating Your First Background Task
For your first background task, you’ll create the FilterWorker . This worker will receive the URIs of the selected images and apply a sepia filter to them.
Note : In the following snippets, file imports won’t be shown, as you’ll be focusing on the actual code required to implement tasks. The worker-related imports start with the package androidx so, when importing, make sure you choose the correct one.
Writing the FilterWorker Code
To start, create a new package called workers ; this will hold the code required to finish your project. Next, add a FilterWorker.kt file to it with the following content:
private const val LOG_TAG = "FilterWorker"
const val KEY_IMAGE_URI = "IMAGE_URI"
const val KEY_IMAGE_INDEX = "IMAGE_INDEX"

private const val IMAGE_PATH_PREFIX = "IMAGE_PATH_"

class FilterWorker : Worker() {

  override fun doWork(): WorkerResult = try {
    // Sleep for debugging purposes
    Thread.sleep(3000)
    Log.d(LOG_TAG, "Applying filter to image!")

    val imageUriString = inputData.getString(KEY_IMAGE_URI, null)
    val imageIndex = inputData.getInt(KEY_IMAGE_INDEX, 0)

    val bitmap = MediaStore.Images.Media.getBitmap(applicationContext.contentResolver, Uri.parse(imageUriString))

    val filteredBitmap = ImageUtils.applySepiaFilter(bitmap)
    val filteredImageUri = ImageUtils.writeBitmapToFile(applicationContext, filteredBitmap)

    outputData =
        Data.Builder()
            .putString(IMAGE_PATH_PREFIX + imageIndex, filteredImageUri.toString())
            .build()

    Log.d(LOG_TAG, "Success!")
    WorkerResult.SUCCESS
  } catch (e: Throwable) {
    Log.e(LOG_TAG, "Error executing work: " + e.message, e)
    WorkerResult.FAILURE
  }
}
Each worker has to extend the Worker
class and override the doWork
method, which returns a WorkResult
. The result can succeed or fail, giving you feedback on the final outcome. Since the work being done can end with an exception, you’re wrapping the calls in a try-catch
expression, and using the Kotlin single-line function syntax to return a value as the last line in each block of the try-catch.
This worker is made up of several steps. Going over each:
First, you get the image-related data from the inputData
field bound within the worker, ultimately turning it into a bitmap:
val imageUriString = inputData.getString(KEY_IMAGE_URI, null)
val imageIndex = inputData.getInt(KEY_IMAGE_INDEX, 0)

val bitmap = MediaStore.Images.Media.getBitmap(applicationContext.contentResolver, Uri.parse(imageUriString))
Second, you apply a sepia filter, using the ImageUtils
object. Right after that, you save the file to the disk:
val filteredBitmap = ImageUtils.applySepiaFilter(bitmap)
val filteredImageUri = ImageUtils.writeBitmapToFile(applicationContext, filteredBitmap)
Finally, before returning a successful result, you take the filtered image path and set it in the outputData
, which will get passed to the next worker:
outputData =
    Data.Builder()
              .putString("IMAGE_PATH_$imageIndex", filteredImageUri.toString())
              .build()
You’ll see how this URI will be used in the next worker. Also, by returning a successful case, you notify that this worker has done its job without any issues. If there’s an exception, you return a failure to stop the work.
Note : inputData and outputData are just key-value maps. However, there is a 10KB limit for the payload.
Instantiating and Configuring the Worker
Now, open the MainActivity.kt
file and replace the onActivityResult
method with the following:
override fun onActivityResult(requestCode: Int, resultCode: Int, data: Intent) {
    if (data != null
        && resultCode == Activity.RESULT_OK
        && requestCode == GALLERY_REQUEST_CODE) {

      val applySepiaFilter = buildSepiaFilterRequests(data)

      val workManager = WorkManager.getInstance()
      workManager.beginWith(applySepiaFilter).enqueue()
    }
  }
After the images are selected and returned, you wrap each into your FilterWorker
using the buildSepiaFilterRequests()
method that you’ll add next. Then you retrieve the WorkManager
instance, and you begin your chain of tasks by applying sepia filters.
The code required to build the requests is as follows:
private fun buildSepiaFilterRequests(intent: Intent): List<OneTimeWorkRequest> {
    val filterRequests = mutableListOf<OneTimeWorkRequest>()

    intent.clipData?.run {
      for (i in 0 until itemCount) {
        val imageUri = getItemAt(i).uri

        val filterRequest = OneTimeWorkRequest.Builder(FilterWorker::class.java)
            .setInputData(buildInputDataForFilter(imageUri, i))
            .build()
        filterRequests.add(filterRequest)
      }
    }

    intent.data?.run {
      val filterWorkRequest = OneTimeWorkRequest.Builder(FilterWorker::class.java)
          .setInputData(buildInputDataForFilter(this, 0))
          .build()

      filterRequests.add(filterWorkRequest)
    }

    return filterRequests
  }
Since there are two ways to select images — by selecting a single one, and by choosing multiple — there’s also two ways to build requests. On the one hand, if there are multiple images selected, you have to run a for
loop and map each image to a filter request:
intent.clipData?.run {
      for (i in 0 until itemCount) {
        val imageUri = getItemAt(i).uri

        val filterRequest = OneTimeWorkRequest.Builder(FilterWorker::class.java)
            .setInputData(buildInputDataForFilter(imageUri, i))
            .build()
        filterRequests.add(filterRequest)
      }
    }
On the other hand, if there is only one image, you just wrap it up in a filter request:
intent.data?.run {
      val filterWorkRequest = OneTimeWorkRequest.Builder(FilterWorker::class.java)
          .setInputData(buildInputDataForFilter(this, 0))
          .build()

      filterRequests.add(filterWorkRequest)
    }
In the end, you return all the requests you’ve prepared and run them all at once. Notice how they are each a OneTimeWorkRequest , meaning that this work will run once and clean up.
Add one more private method to MainActivity
that creates the inputData
that each worker consumes:
private fun buildInputDataForFilter(imageUri: Uri?, index: Int): Data {
  val builder = Data.Builder()
  if (imageUri != null) {
    builder.putString(KEY_IMAGE_URI, imageUri.toString())
    builder.putInt(KEY_IMAGE_INDEX, index)
  }
  return builder.build()
}
Having finished all of that, you’re ready to try out the filters and see what you get!
Checking the Results
Run the app, pick one or more photos and then, after a few seconds, open the Device File Explorer
via the following Android Studio menu: View ▸ Tool Windows ▸ Device File Explorer
. Navigate to the /data/user/0/com.raywenderlich.android.photouploader/files/outputs
folder.
Note
: On different emulators, there are different output folders. So if you cannot find the /user/0
folder, try looking up /data/data
.
You should see the bitmap files with the sepia filter applied:

If you don’t see them, try synchronizing:

Congratulations! Your first worker worked just fine! :]

If you want, you can delete all the files with the Device File Explorer but, later on, you’ll create a worker that cleans these files.

Chaining Tasks
After applying the sepia filter to each selected image, you’ll compress them into a single .zip file.
Writing the CompressWorker Code
Under the workers package, create a new file called CompressWorker.kt with this content:
private const val LOG_TAG = "CompressWorker"
private const val KEY_IMAGE_PATH = "IMAGE_PATH"
private const val KEY_ZIP_PATH = "ZIP_PATH"

class CompressWorker : Worker() {

  override fun doWork(): WorkerResult = try {
    // Sleep for debugging purposes
    Thread.sleep(3000)
    Log.d(LOG_TAG, "Compressing files!")

    val imagePaths = inputData.keyValueMap
        .filter { it.key.startsWith(KEY_IMAGE_PATH) }
        .map { it.value as String }

    val zipFile = ImageUtils.createZipFile(applicationContext, imagePaths.toTypedArray())

    outputData = Data.Builder()
        .putString(KEY_ZIP_PATH, zipFile.path)
        .build()

    Log.d(LOG_TAG, "Success!")
    WorkerResult.SUCCESS
  } catch (e: Throwable) {
    Log.e(LOG_TAG, "Error executing work: " + e.message, e)
    WorkerResult.FAILURE
  }
}
This worker is simpler than the last one and only consists of two steps — finding the images and zipping them.
The following snippet filters out the data, which starts with your image path format, and maps them into actual image paths:
val imagePaths = inputData.keyValueMap
        .filter { it.key.startsWith(KEY_IMAGE_PATH) }
        .map { it.value as String }
After mapping them, you once again call ImageUtils ; this time, however, you zip the selected files. Finally, you pass the .zip file path to the next worker:
val zipFile = ImageUtils.createZipFile(applicationContext, imagePaths.toTypedArray())

outputData = Data.Builder()
    .putString(KEY_ZIP_PATH, zipFile.path)
    .build()
The .zip file path will then be passed along to another worker. But, for now, you’ll connect the two existing workers to create a chain that applies a filter and then zips the images.
Chaining FilterWorker with CompressWorker
Open MainActivity
again and modify onActivityResult()
as follows:
override fun onActivityResult(requestCode: Int, resultCode: Int, data: Intent) {
  if (data != null
      && resultCode == Activity.RESULT_OK
      && requestCode == GALLERY_REQUEST_CODE) {

    val applySepiaFilter = buildSepiaFilterRequests(data)
    val zipFiles = OneTimeWorkRequest.Builder(CompressWorker::class.java).build()

    val workManager = WorkManager.getInstance()
    workManager.beginWith(applySepiaFilter)
        .then(zipFiles)
        .enqueue()
    }
}
You’ve combined the zip compression with the sepia filter code. After you created a CompressWorker
zipFiles
, you chained it with the sepia filter worker by calling .then(zipFiles)
on the workManager
instance. You can chain arbitrary amounts of workers this way, and it’s really simple to do so!
Also notice how you don’t need to pass any arguments to the CompressWorker , because of the inputData and outputData constructs. When the first worker finishes, whatever output it passed on gets propagated to the next worker in chain.
Checking the Results
Run the app again. Select one or more images and, after a few seconds, check in the app files with Device File Explorer . Now, you should also see the .zip file.

Cleaning the Worker and Uploading the ZIP
Next up, you’ll clean the directory. Additionally, after generating the .zip file, you’ll upload it to a server.
First, create a CleanFilesWorker.kt file in the workers package:
private const val LOG_TAG = "CleanFilesWorker"

class CleanFilesWorker : Worker() {

  override fun doWork(): WorkerResult = try {
    // Sleep for debugging purposes
    Thread.sleep(3000)
    Log.d(LOG_TAG, "Cleaning files!")

    ImageUtils.cleanFiles(applicationContext)

    Log.d(LOG_TAG, "Success!")
    WorkerResult.SUCCESS
  } catch (e: Throwable) {
    Log.e(LOG_TAG, "Error executing work: ${e.message}", e)
    WorkerResult.FAILURE
  }
}
This worker is pretty straightforward; it simply calls ImageUtils to clean up the files.
To finish, create the UploadWorker.kt file inside workers with the following content:
private const val LOG_TAG = "UploadWorker"
private const val KEY_ZIP_PATH = "ZIP_PATH"

class UploadWorker : Worker() {

  override fun doWork(): WorkerResult = try {
    // Sleep for debugging purposes
    Thread.sleep(3000)
    Log.d(LOG_TAG, "Uploading file!")

    val zipPath = inputData.getString(KEY_ZIP_PATH, null)

    ImageUtils.uploadFile(Uri.parse(zipPath))

    Log.d(LOG_TAG, "Success!")
    WorkerResult.SUCCESS
  } catch (e: Throwable) {
    Log.e(LOG_TAG, "Error executing work: " + e.message, e)
    WorkerResult.FAILURE
  }
}
UploadWorker is simple, too; it parses the .zip file path and tells ImageUtils to upload the final product.
Now, create the new workers and add them to the chain them accordingly in MainActivity :
override fun onActivityResult(requestCode: Int, resultCode: Int, data: Intent) {
  if (data != null
      && resultCode == Activity.RESULT_OK
      && requestCode == GALLERY_REQUEST_CODE) {

    val applySepiaFilter = buildSepiaFilterRequests(data)
    val zipFiles = OneTimeWorkRequest.Builder(CompressWorker::class.java).build()
    val uploadZip = OneTimeWorkRequest.Builder(UploadWorker::class.java).build()
    val cleanFiles = OneTimeWorkRequest.Builder(CleanFilesWorker::class.java).build()

    val workManager = WorkManager.getInstance()
    workManager.beginWith(cleanFiles)
        .then(applySepiaFilter)
        .then(zipFiles)
        .then(uploadZip)
        .enqueue()
    }
}
Note : Since the UploadWorker needs to upload the file somewhere, you need a file server to be running. You can do this in two different ways: run one locally or upload to a shared service.
Both options are ready for you. There’s a shared service running to which you can upload at any time. If, however, you prefer to upload locally, you can use the prepared local version of a file server.
To run the local version, you need to install NodeJS
, and then navigate in the terminal to the server folder, found in the materials you downloaded. Execute the command node app.js
, and everything should be up and running.
Depending on the chosen server option, open ImageUtils.kt
and comment out one of the two SERVER_UPLOAD_PATH
constants and uncomment the other one. The one containing 10.0.2.2:3000
is used for local server, while the other one is the shared service. Feel free to change the local server IP address to something else, if you’re using a real device.
Checking the Results
Run the app, again. Next, select one or more images and, after a few seconds, open Logcat (View ▸ Tool Windows ▸ Logcat) . You should see something like this, confirming that the file was correctly received by the server:
onResponse - Status: 200 Body: {"url":"/files/Your-UUID-string.zip"}
If you are running the server locally, you can open a browser and go to http://localhost:3000/files/Your-UUID-string.zip to download the file.
Starting Unique Work
Worker tasks can be started in two different ways. First, you can call the beginWith()
method, as you’ve done so far. The second way is by calling beginUniqueWork()
instead. As the name suggests, the beginUniqueWork()
method starts work that can only have one unique instance. But you also have to provide something called an ExistingWorkPolicy
. If you try to start another work instance, the previous work will proceed according to the chosen policy — replace, keep or append:
- Replace the existing sequence with the new one.
- Just ignore the new one and keep the existing sequence.
- Append the new sequence to the existing one.
Replacing Existing Work of Picked Photos
For this tutorial, you’ll replace the existing work. To do that, open MainActivity
, add a constant to the companion object and change onActivityResult()
as follows:
class MainActivity : AppCompatActivity() {

  companion object {
    ...
    private const val UNIQUE_WORK_NAME = "UNIQUE_WORK_NAME"
  }

  override fun onActivityResult(requestCode: Int, resultCode: Int, data: Intent) {
    if (resultCode == Activity.RESULT_OK
        && requestCode == GALLERY_REQUEST_CODE) {

      val applySepiaFilter = buildSepiaFilterRequests(data)
      val zipFiles = OneTimeWorkRequest.Builder(CompressWorker::class.java).build()
      val uploadZip = OneTimeWorkRequest.Builder(UploadWorker::class.java).build()
      val cleanFiles = OneTimeWorkRequest.Builder(CleanFilesWorker::class.java).build()

      val workManager = WorkManager.getInstance()

      workManager.beginUniqueWork(UNIQUE_WORK_NAME, ExistingWorkPolicy.REPLACE, cleanFiles)
          .then(applySepiaFilter)
          .then(zipFiles)
          .then(uploadZip)
          .enqueue()
    }
  }
  ...
}
By calling beginUniqueWork(UNIQUE_WORK_NAME, ExistingWorkPolicy.REPLACE, cleanFiles)
, you’ve started unique work and decided to use the REPLACE
policy. This means that, each time that you click the Pick Photos button and select one or more images, WorkManager
will replace the existing sequence of WorkRequests
and start a new one.
Observing Work
WorkManager also allows you to observe the progress of each work instance using the following:
-
getStatusById(): Use this to get a LiveData object containing the WorkStatus for the WorkRequest with a given ID. -
getStatusesByTag(): Returns a LiveData object containing the list of WorkStatus objects for the specified tag. This is possible because you can tag multiple WorkRequests with the same name. -
getStatusesForUniqueWork(): This will also return a LiveData object containing the list of WorkStatus objects that have the same unique work name.
Tagging a WorkRequest and Observing It
You’ll observe the work of the requests to toggle a progress bar and a cancel button. Open MainActivity
and add a tag to the uploadZip
work request using a new constant WORK_TAG
:
class MainActivity : AppCompatActivity() {

  companion object {
    ...
    private const val WORK_TAG = "WORK_TAG"
  }


  override fun onActivityResult(requestCode: Int, resultCode: Int, data: Intent) {
      ...
      val uploadZip = OneTimeWorkRequest.Builder(UploadWorker::class.java)
          .addTag(WORK_TAG)
          .build()
After you’ve added a tag to the worker, you can observe its status. Now, add the following method to MainActivity , which will do just that:
...
import android.arch.lifecycle.Observer
...

private fun observeWork() {
  val statuses = WorkManager.getInstance().getStatusesByTag(WORK_TAG)
  statuses.observe(this,
      Observer<List<WorkStatus>> { workStatusList ->
        val currentWorkStatus = workStatusList?.getOrNull(0)
        val isWorkActive = currentWorkStatus?.state?.isFinished == false

        val uploadVisibility = if (isWorkActive) View.VISIBLE else View.GONE

        uploadGroup.visibility = uploadVisibility
      })
}
getStatusesByTag()
returns a LiveData
object to which you attach an Observer
. When you get an update on the status from the WorkManager
, you check if it’s active or not. Since you’ve tagged only one worker, you can take the first item from the list (if it exists) and check its state. If it’s not finished, you show a progress bar and a cancel button. Otherwise, you hide them.
Now, at the bottom of the onCreate()
lifecycle method in MainActivity
, add a call observeWork()
.
override fun onCreate(savedInstanceState: Bundle?) {
  super.onCreate(savedInstanceState)
  setContentView(R.layout.activity_main)
  initUi()

  requestPermissionsIfNecessary()

  observeWork()
}
Checking the Results
Build and run the app. Once you start uploading images, you’ll see the progress bar and the cancel button. The cancel button doesn’t do anything yet, but you’ll fix that soon.

Canceling Work
WorkManager allows you to cancel work in several ways:
-
Unique work:
If you started unique work with a unique work name, then you can just call
cancelUniqueWork()and pass the name as parameter. -
By tag:
When you tag one or more WorkRequests, you call
cancelAllWorkByTag. -
By ID:
If you have the ID of the WorkRequest and want to cancel it, you call
cancelWorkById().
Since you're using unique work, you'll cancel it using the unique work name.
Canceling the Picking Photos Work Sequence
In MainActivity
and add the following snippet inside the initUi()
method:
cancelButton.setOnClickListener {
    WorkManager.getInstance().cancelUniqueWork(UNIQUE_WORK_NAME)
}
Build and run the app, select some photos and then cancel the work requests using the cancel button.
Understanding Constraints
Some work cannot be done without a certain set of conditions. For example, work may only run if your device is not low on storage, is charging, etc. You can add constraints like these to any of your tasks. It makes sense to add a network-related constraint to the UploadWorker , because you cannot upload unless there is a stable connection.
Adding a Network Connection Constraint
In MainActivity
onActivityResult()
, modify uploadZip
to the following:
val uploadZip = OneTimeWorkRequest.Builder(UploadWorker::class.java)
    .setConstraints(Constraints.Builder().setRequiredNetworkType(
        NetworkType.CONNECTED).build())
    .addTag(WORK_TAG)
    .build()
As you can see, you've configured the upload request to only run if the device is connected to the network, otherwise it will not run until the condition is met. This is really convenient because you don't have to implement the connection listeners and do the checks yourself.
Testing the Network Constraint
Run the app. Set the emulator/device into Airplane mode. Pick photos from your library and open the Logcat console. You should see that the UploadWorker will not run (filter the console for onResponse like you did before and check the timestamp on any results). Only after it receives a network connection will it upload the file. You can make sure this happens by taking a look at the console once again, after disabling Airplane mode.
Where to Go From Here?
Congratulations! You’ve just learned the basics of WorkManager .
You can download the final version of the project using the Download materials button at the top or bottom of this tutorial.
Here are some great references to learn more about the subject:
- Official Docs: You can find them here .
- Official Reference: Browse the reference here .
- The background guide will help you choose the best way for your app to perform operations in the background.
- Watch the Google I/O 2018 session .
- There's a Google codelab that you might want to check out.
- Listen to the Android Developers Backstage — WorkManager podcast episode .
- Because this library is in an alpha stage, you may find bugs. Report them in the issue tracker and have a look at the release notes for any news on WorkManager or the other Android architecture components .
- Android Background Course: Check this great coursehere that covers not only WorkManager but also other ways to execute background tasks.
Feel free to share your feedback, findings or ask any questions in the comments below or in the forums. I hope you enjoyed this tutorial on WorkManager!
Recommend
About Joyk
Aggregate valuable and interesting links.
Joyk means Joy of geeK