

Next Level Webpack Dashboard – freeCodeCamp
source link: https://medium.com/@wesharehoodies/webpack-dashboard-with-create-react-app-vue-cli-and-custom-configs-49166e1a69de
Go to the source link to view the article. You can view the picture content, updated content and better typesetting reading experience. If the link is broken, please click the button below to view the snapshot at that time.
A Next Level Webpack Dashboard
Level up your webpack using webpack-dashboard
Webpack-dashboard has over 13,000 stars on GitHub, yet I almost never encounter developer teams making use of the plugin.
Why not take advantage of this great plugin?
Note: Don’t forget you can pretend you work for NASA if someone shoulder peeks!
When using webpack, especially for a dev server, you are probably used to seeing something like this — according to webpack-dashboard GitHub page.
We’re all familiar with the webpack log above. Although sometimes I wonder — who exactly is this screen for? A vastly superior alien race?
This is why the webpack log desperately needs a new friendlier UI, and webpack-dashboard does that.
Webpack-Dashboard to the Rescue!
This plugin improves your visuals for the webpack logs. Now when you run your dev server, you basically work at NASA.

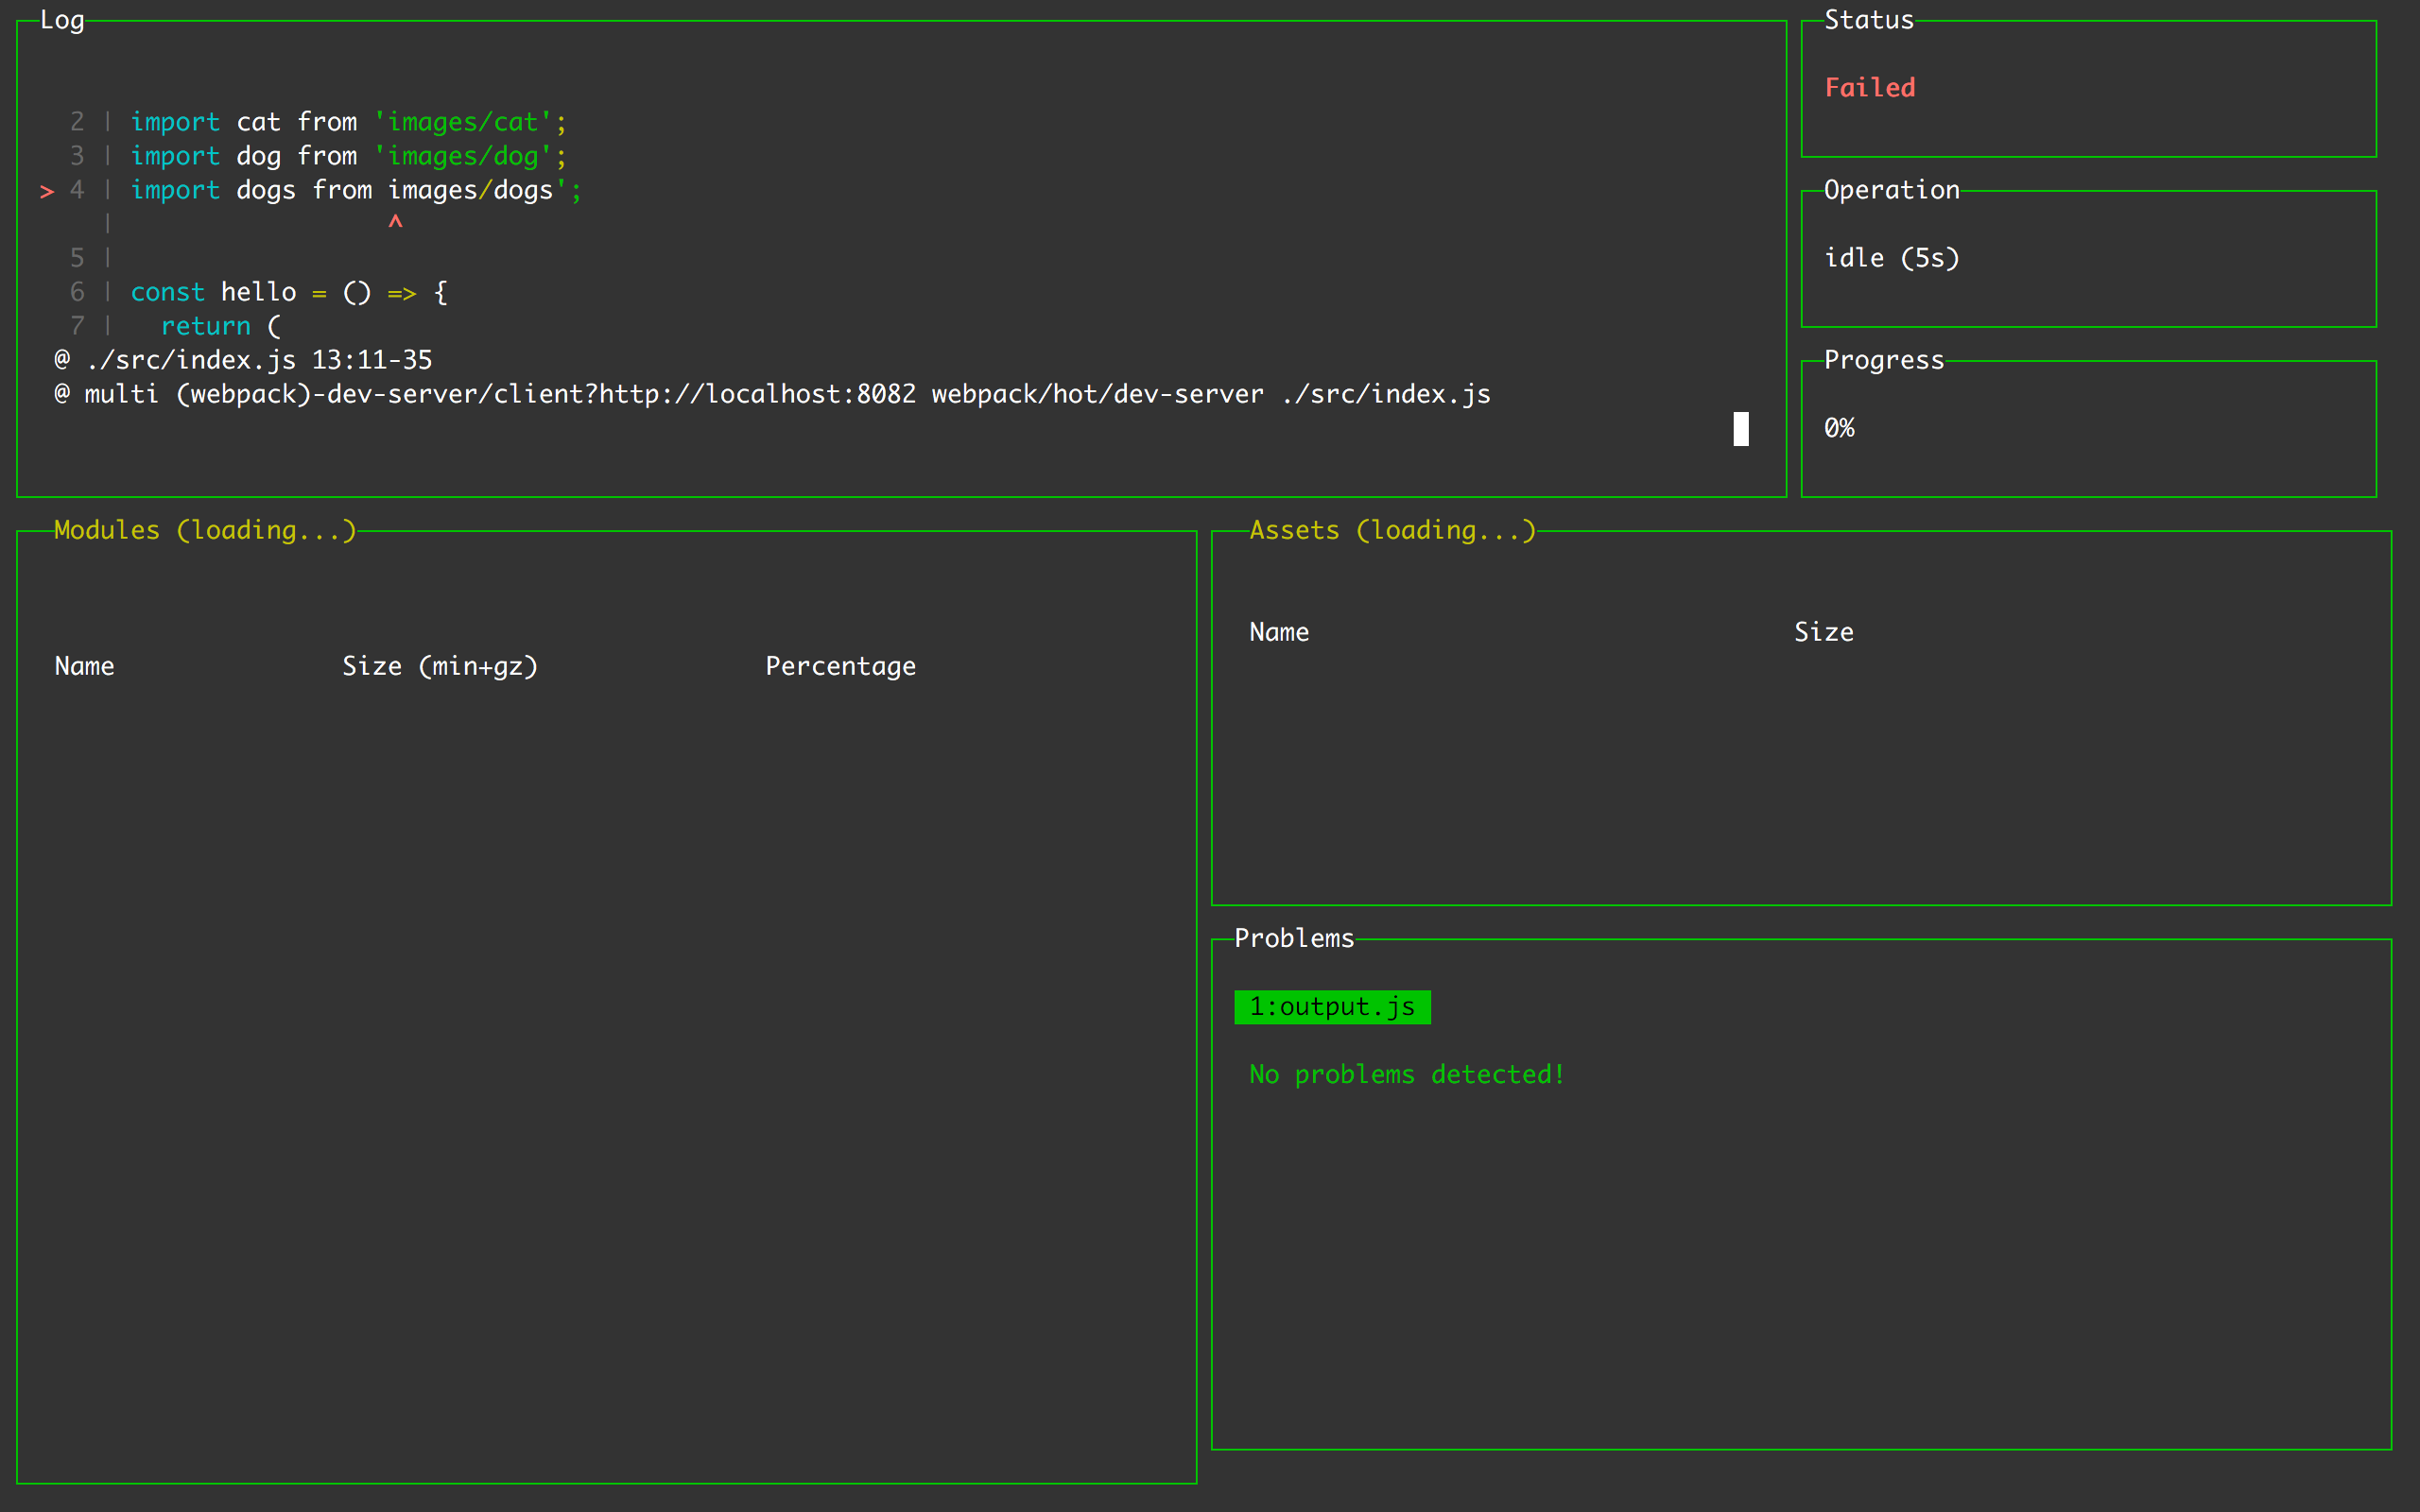
Aren’t the compilation errors and logs much more human-readable?
Let’s take a look at how two of the most popular scaffolding tools use webpack logging.

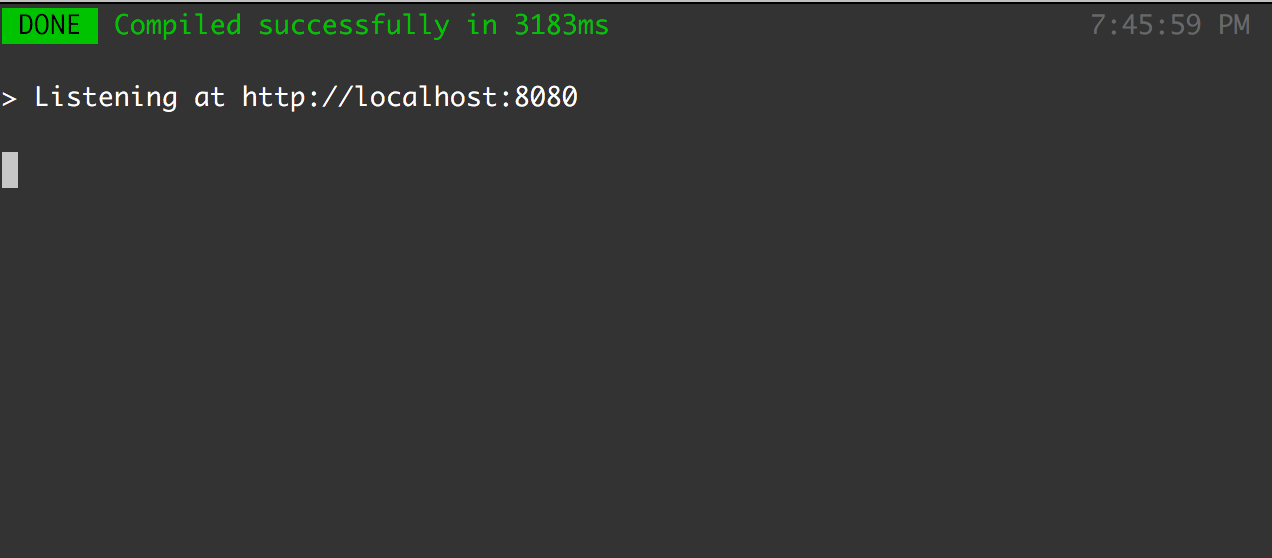
From the examples above — Webpack lets us know whether our application compiled successfully. It also lets us know which port the webpack server is currently using.
We surely can improve this by having more useful information on the screen.
Error Handling With Create-React-App and Vue-CLI
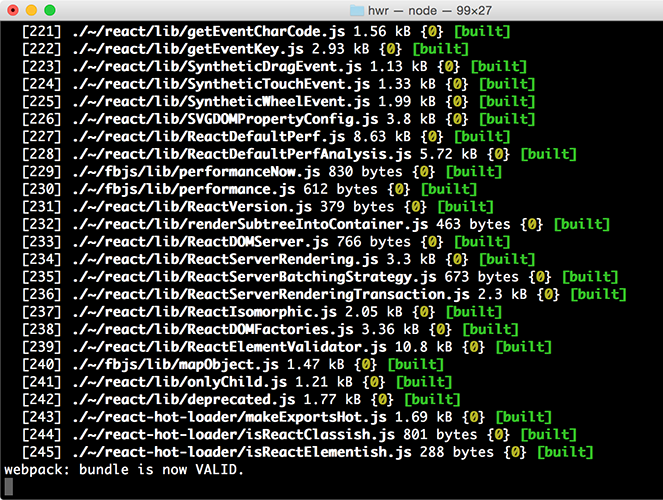
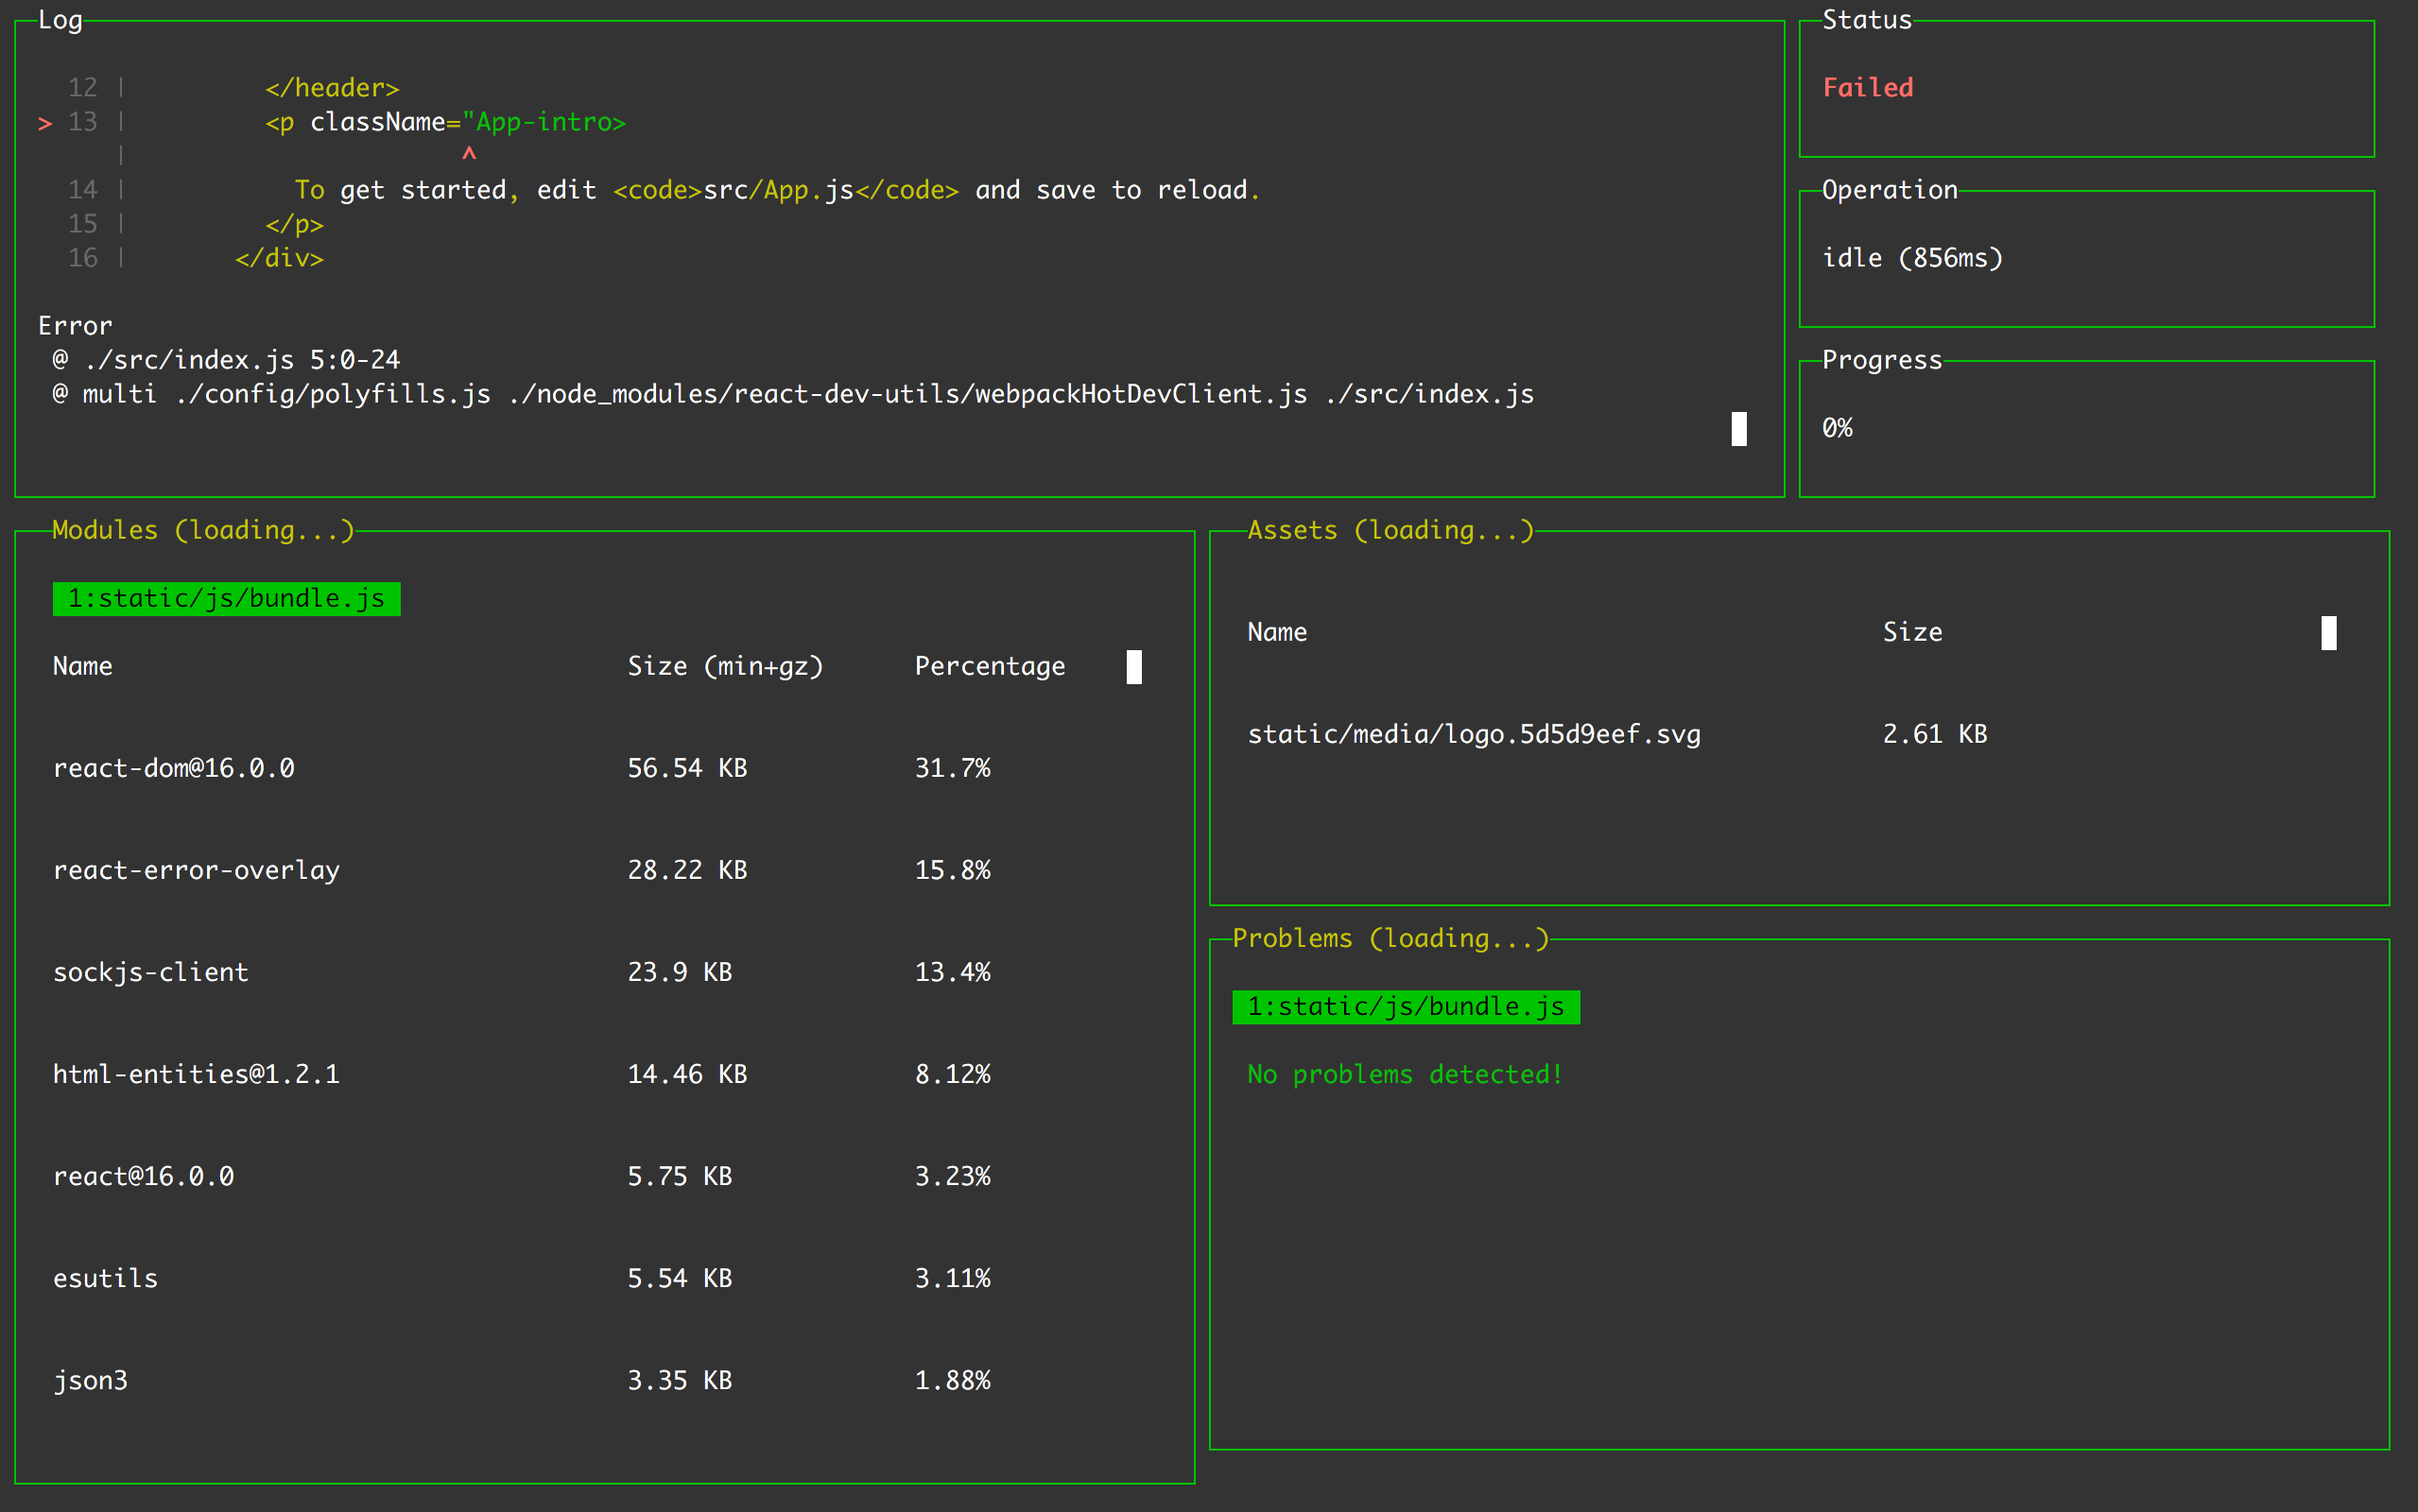
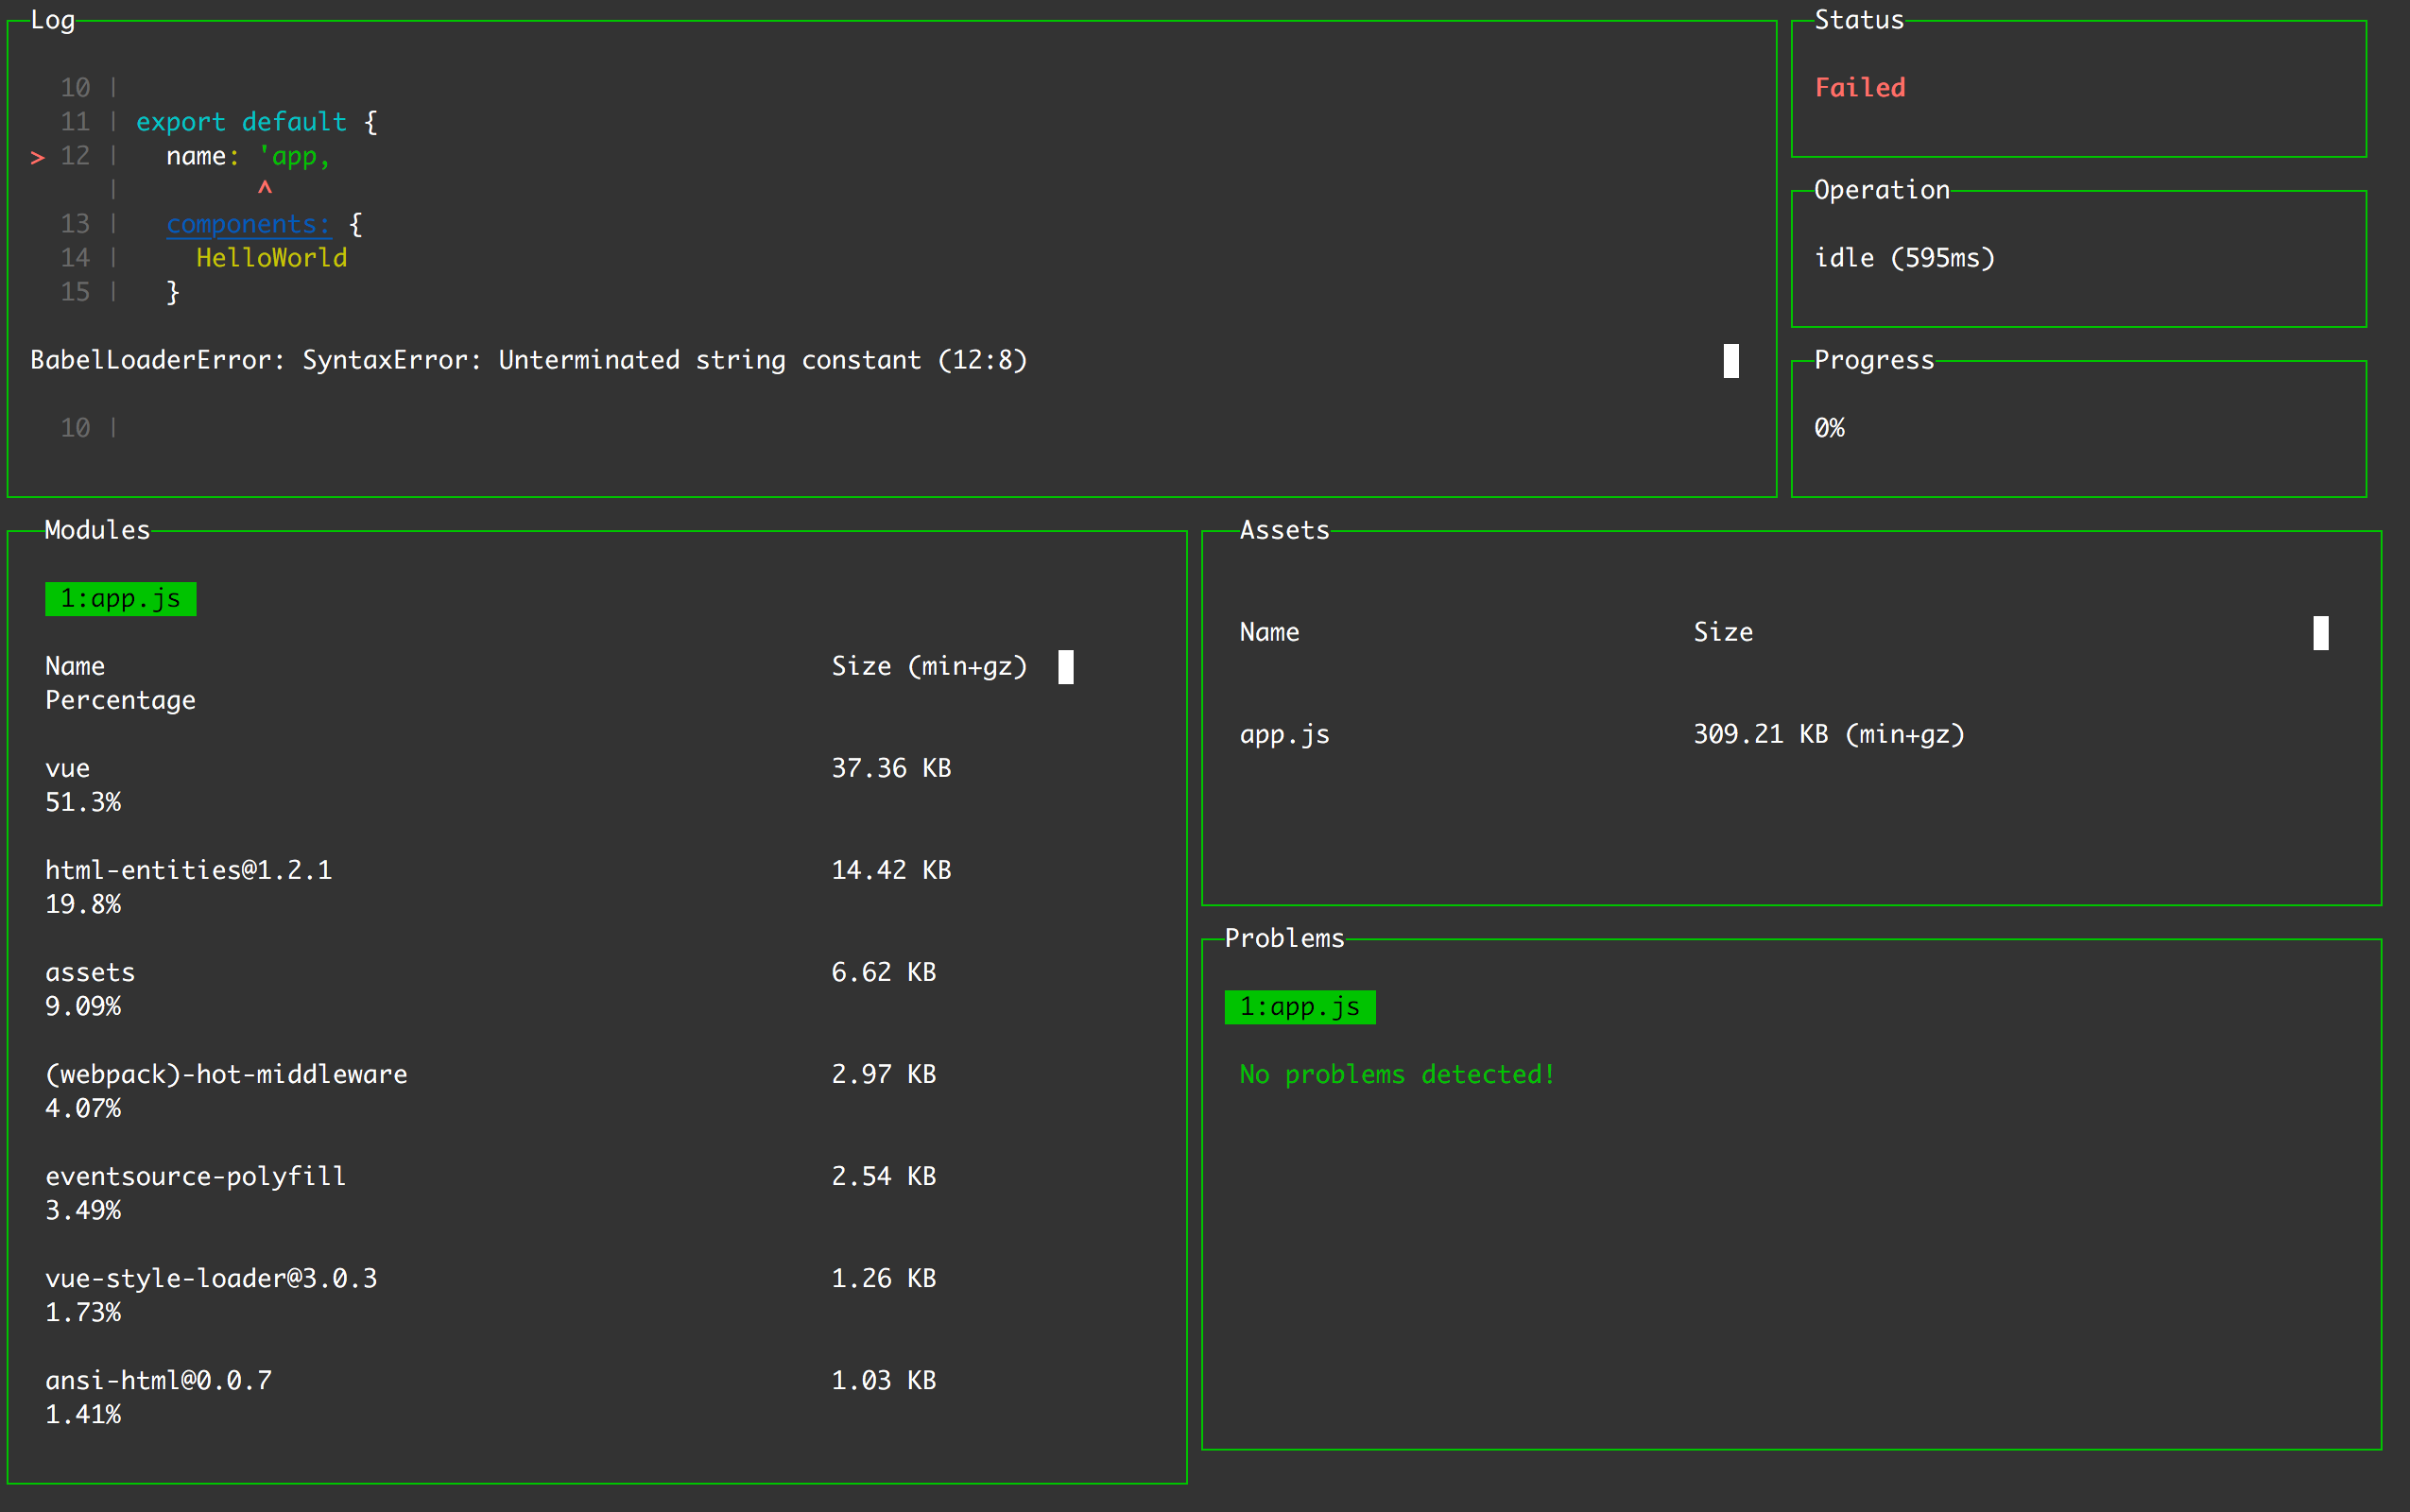
Here’s how compilation errors currently look when using webpack.
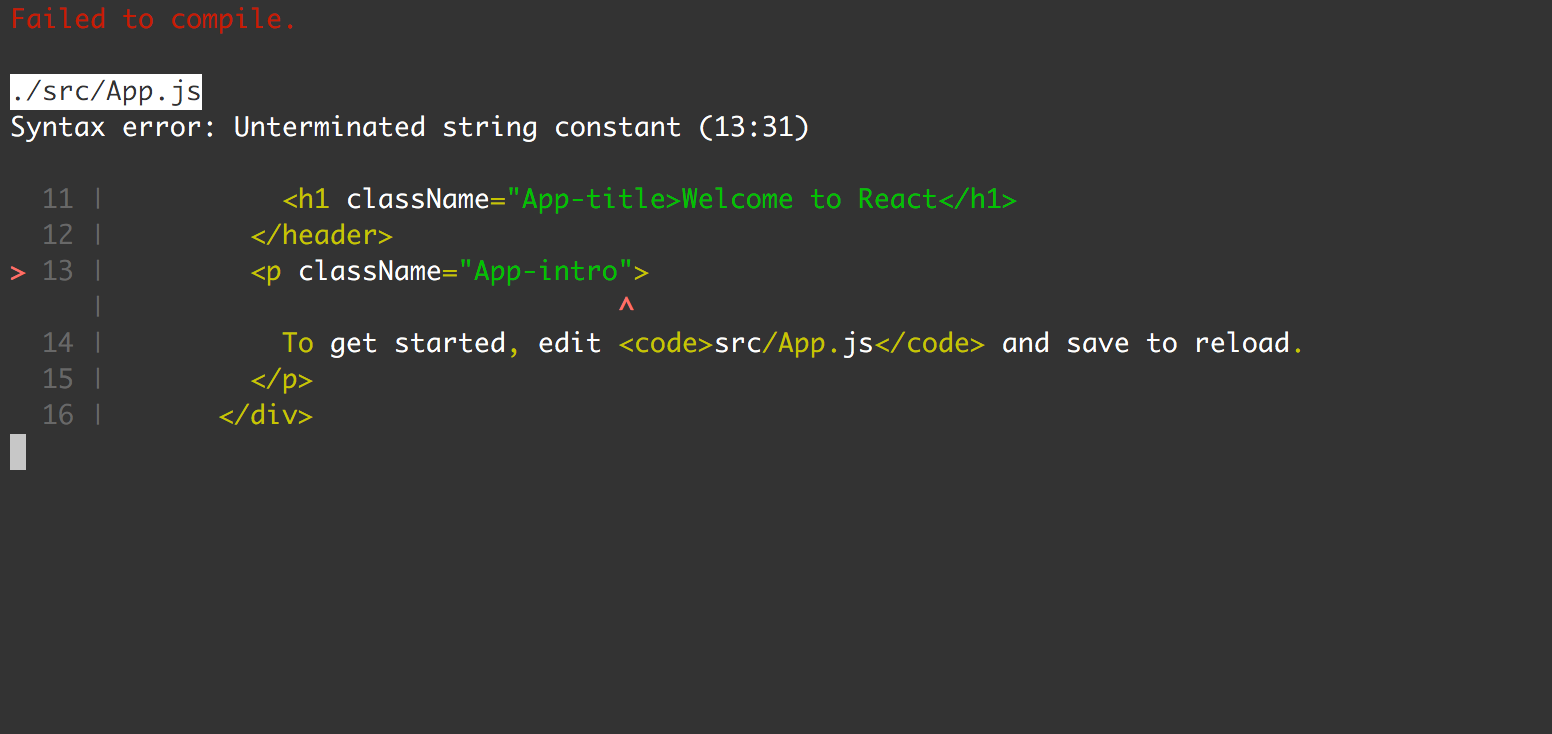
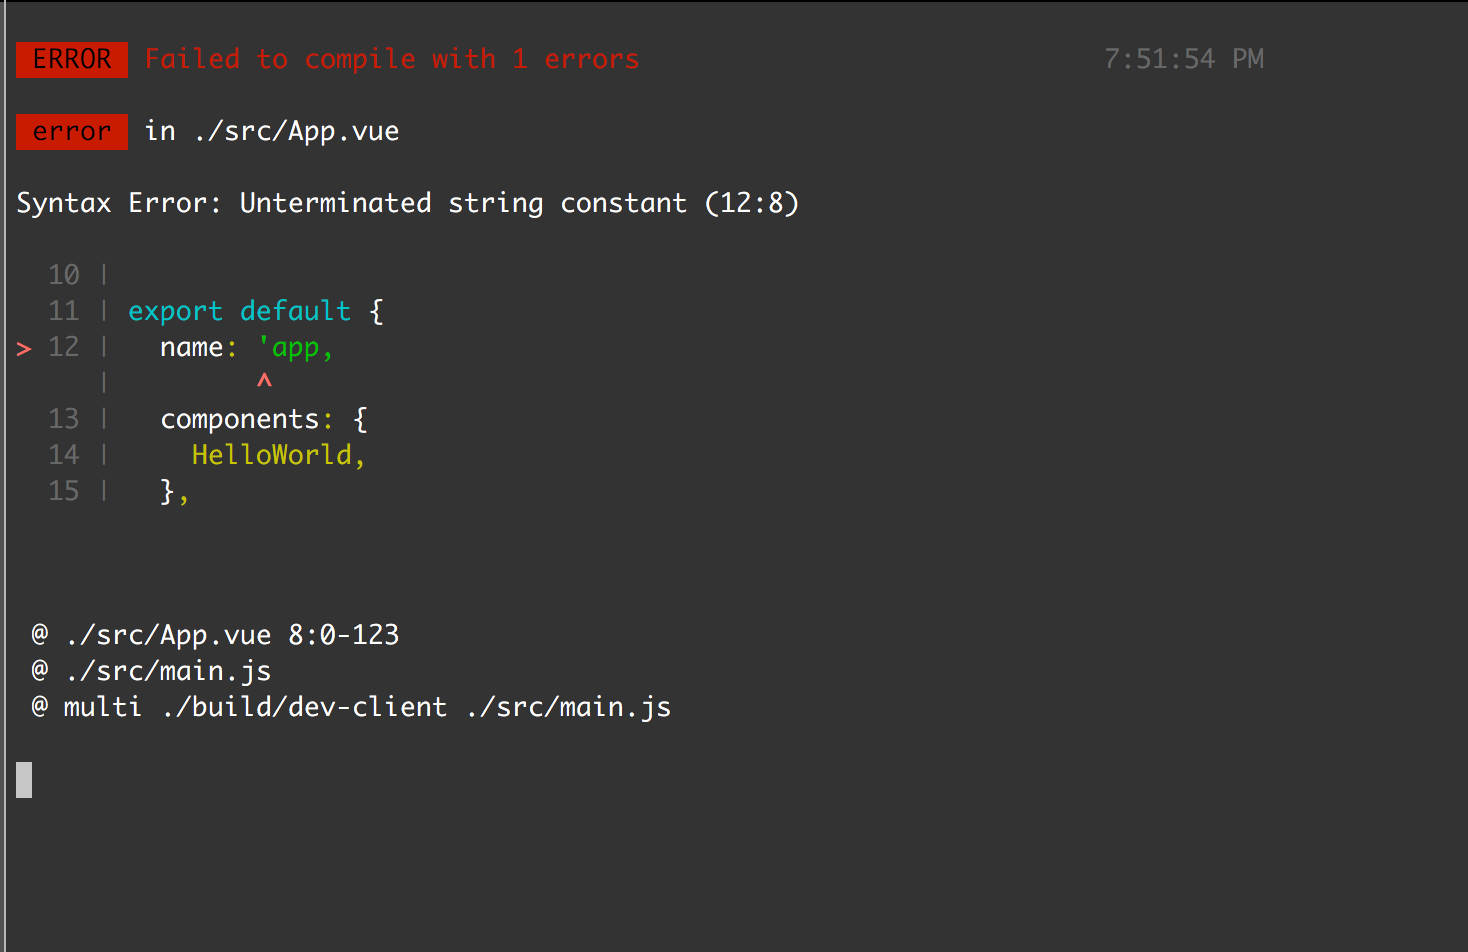
Pretty good — immediately after making a syntax error, we get notified.
What’s more important; we not only get notified — but we’re also given the error message, and where the error occured.
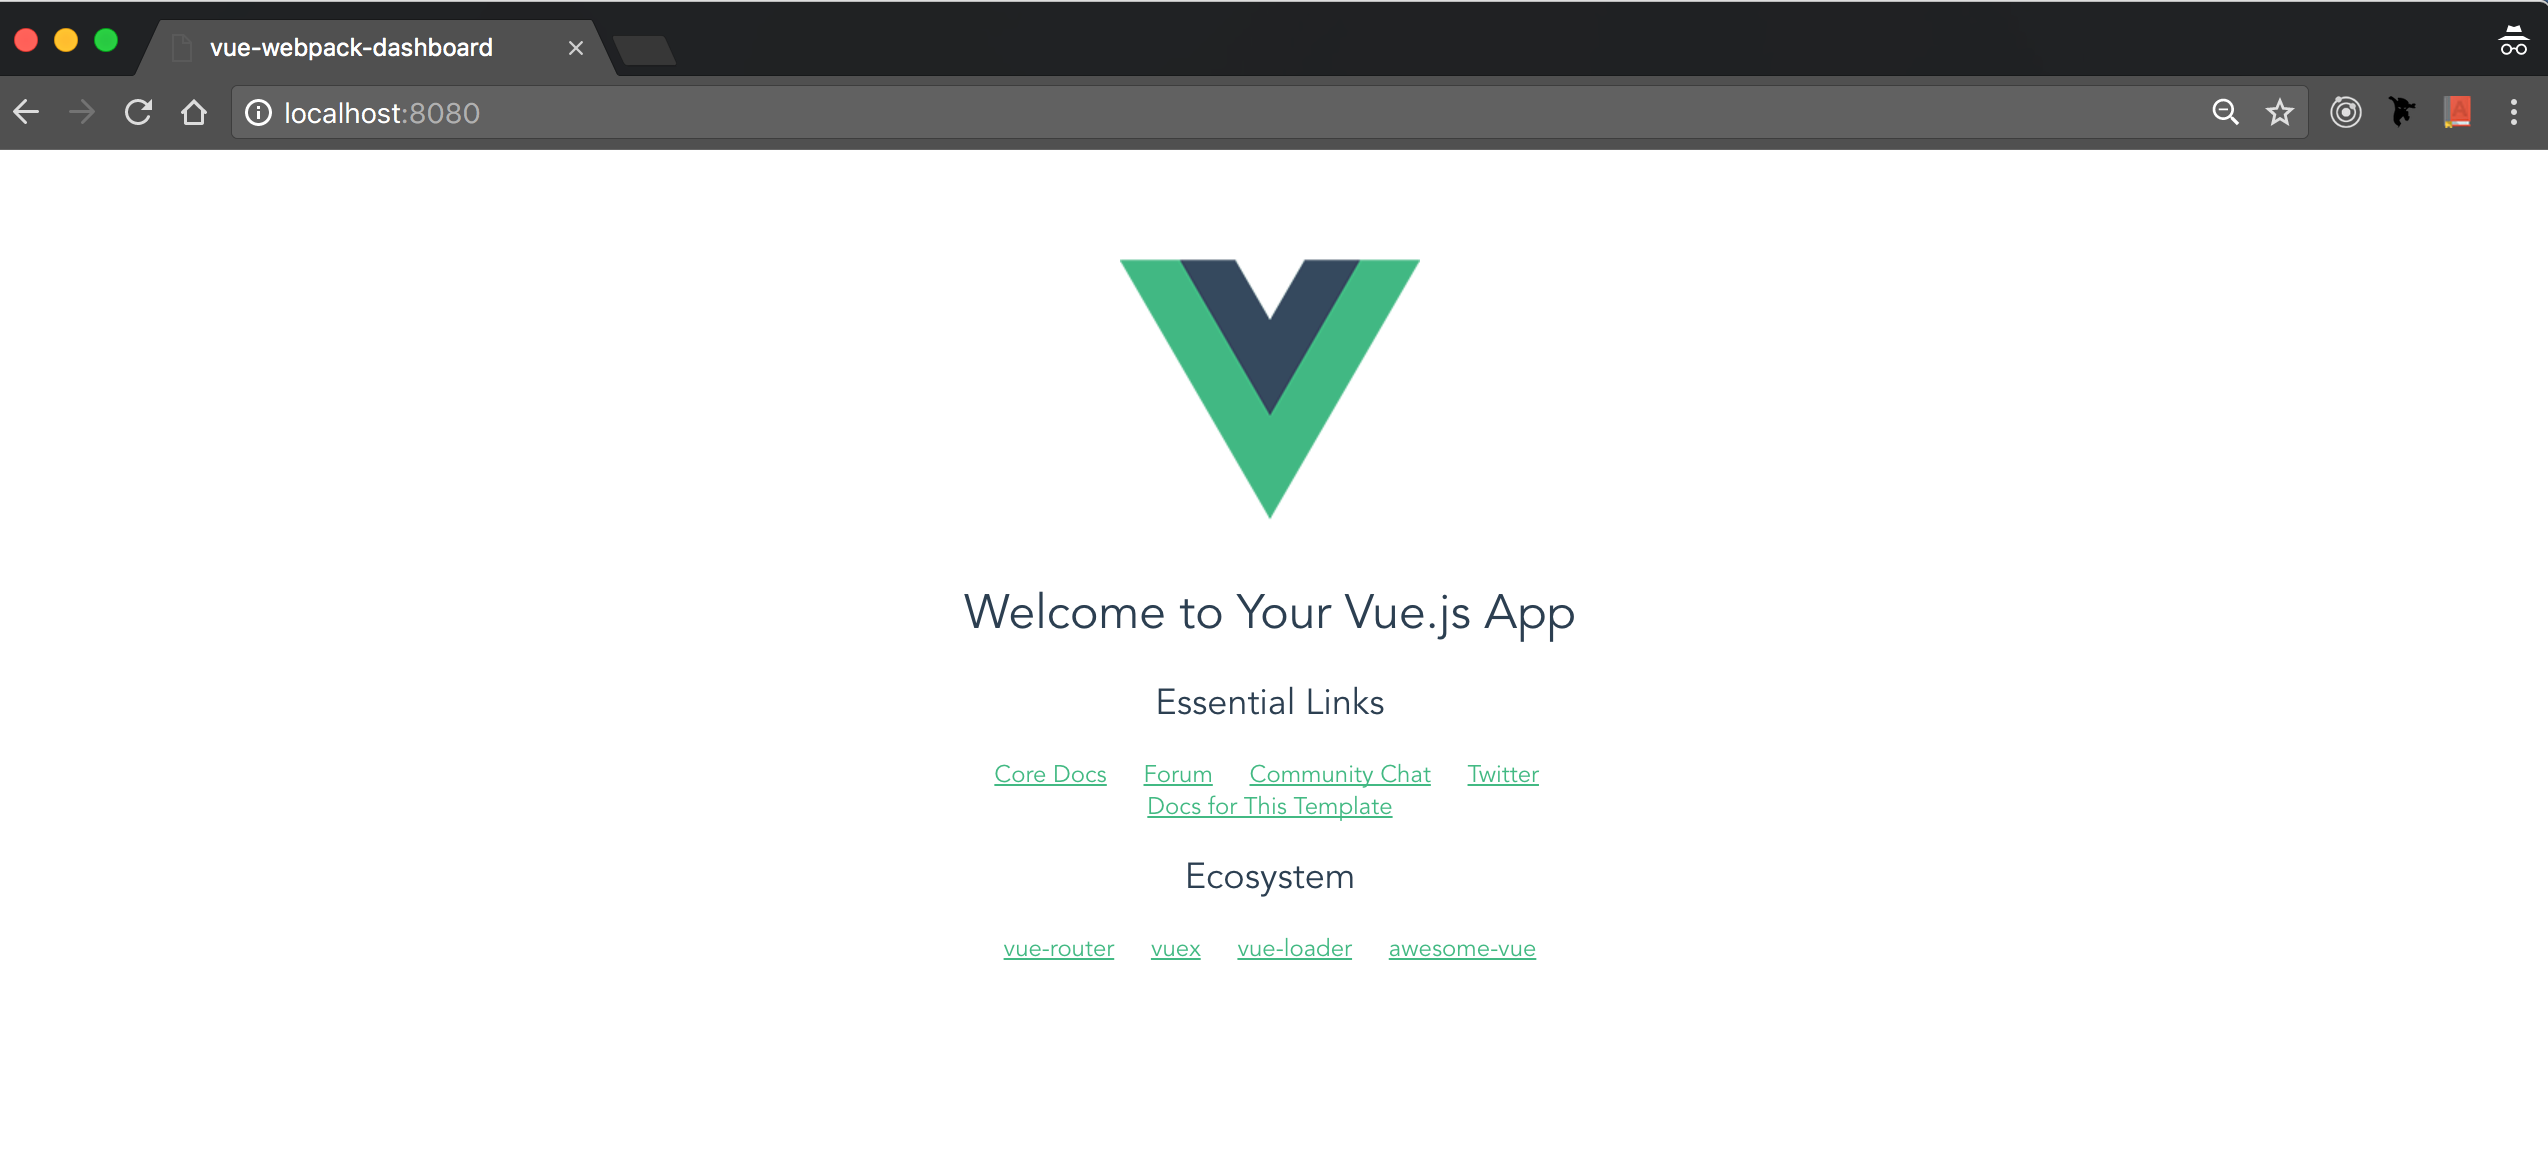
Create-React-App and Vue-CLI Production Output
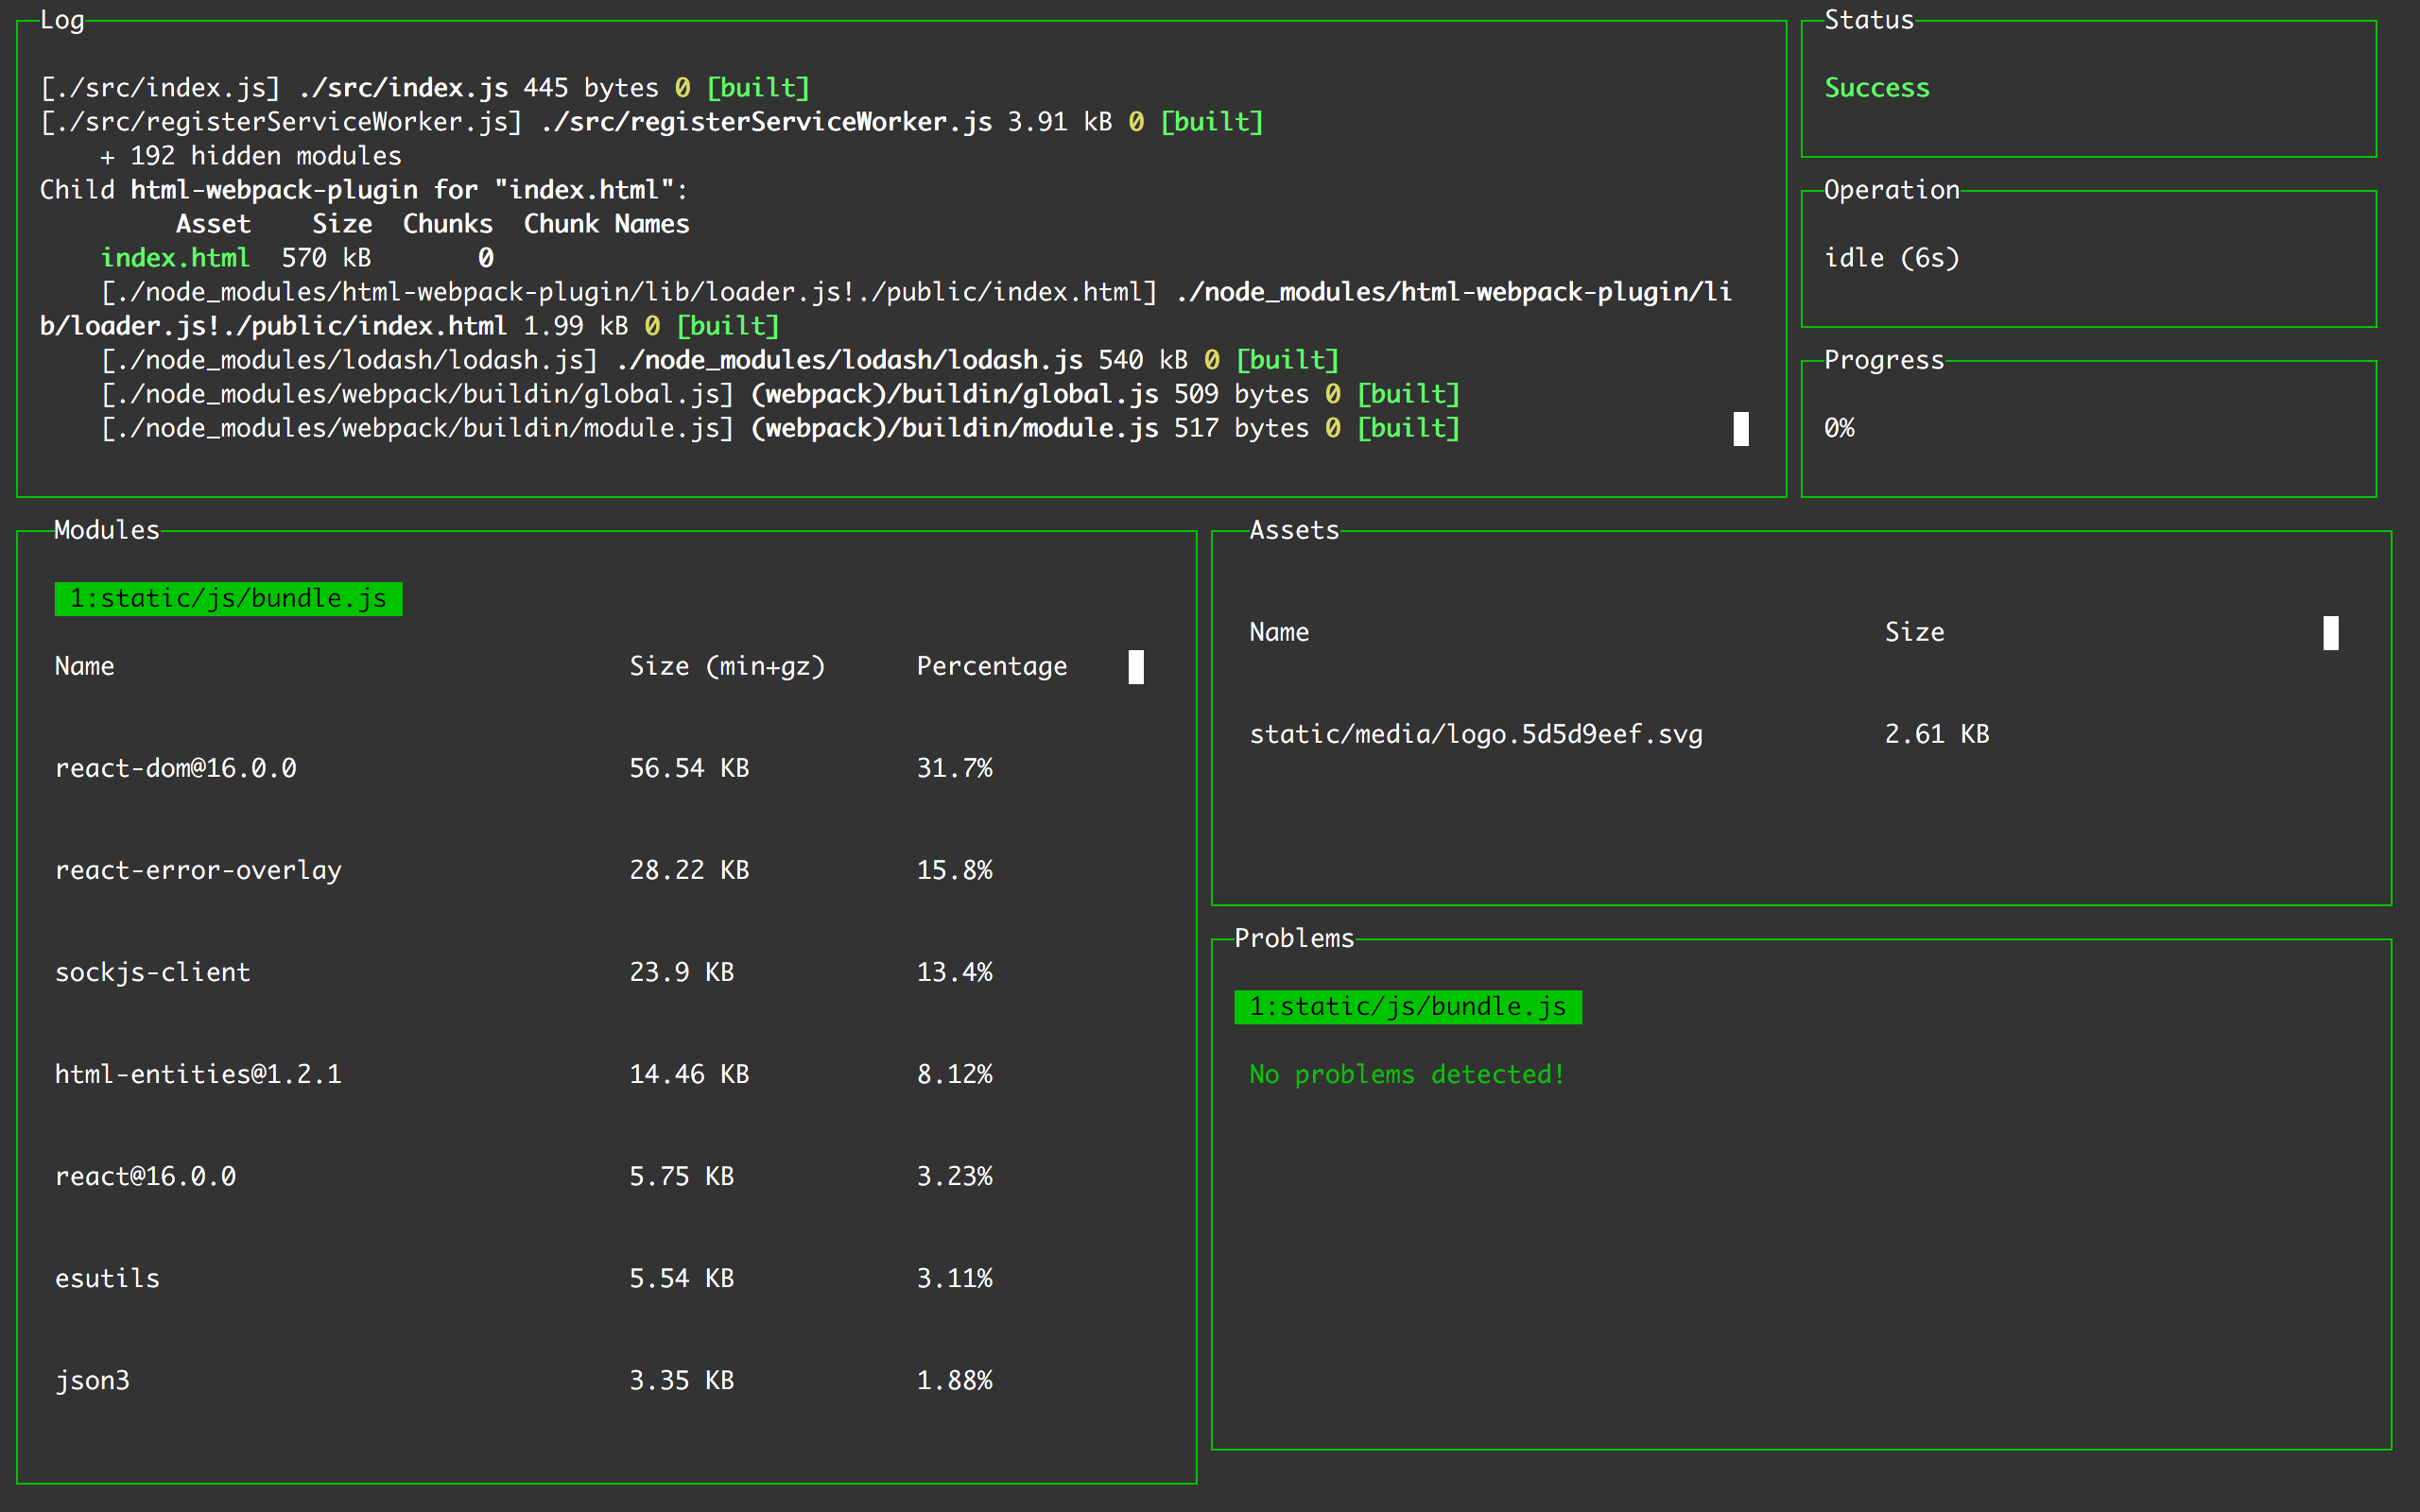
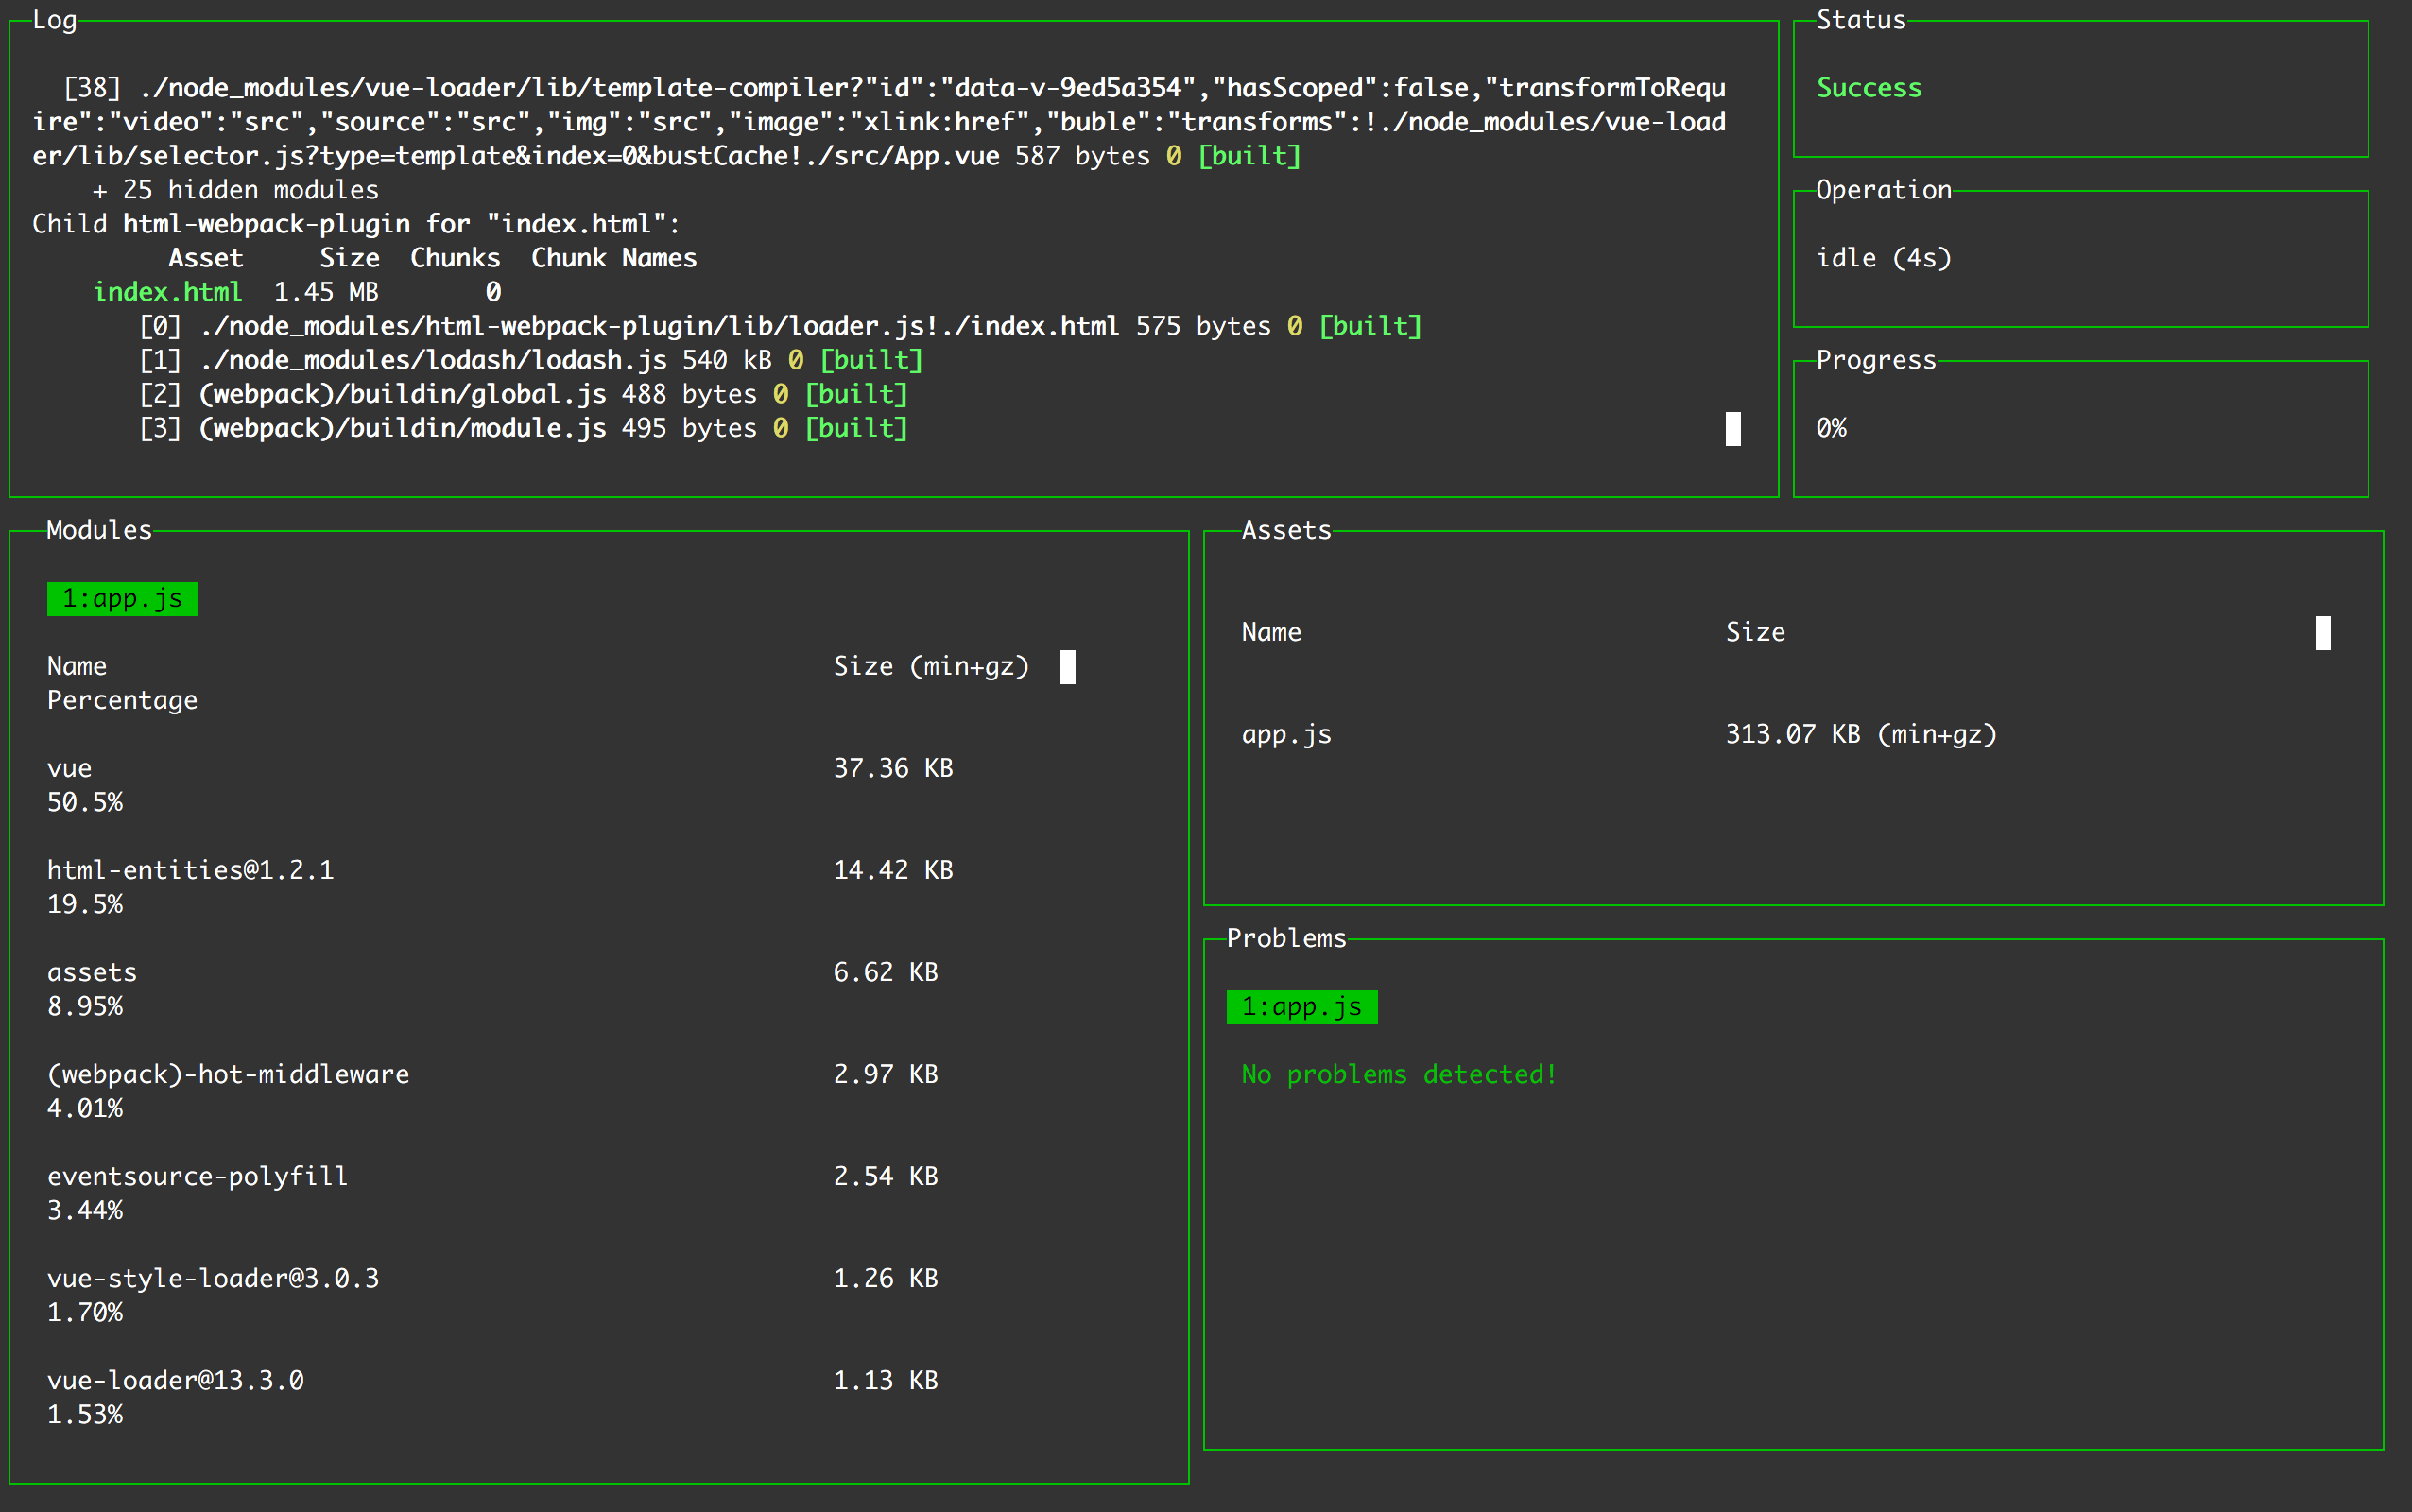
Here’s what we get when we decide to bundle our application for production.
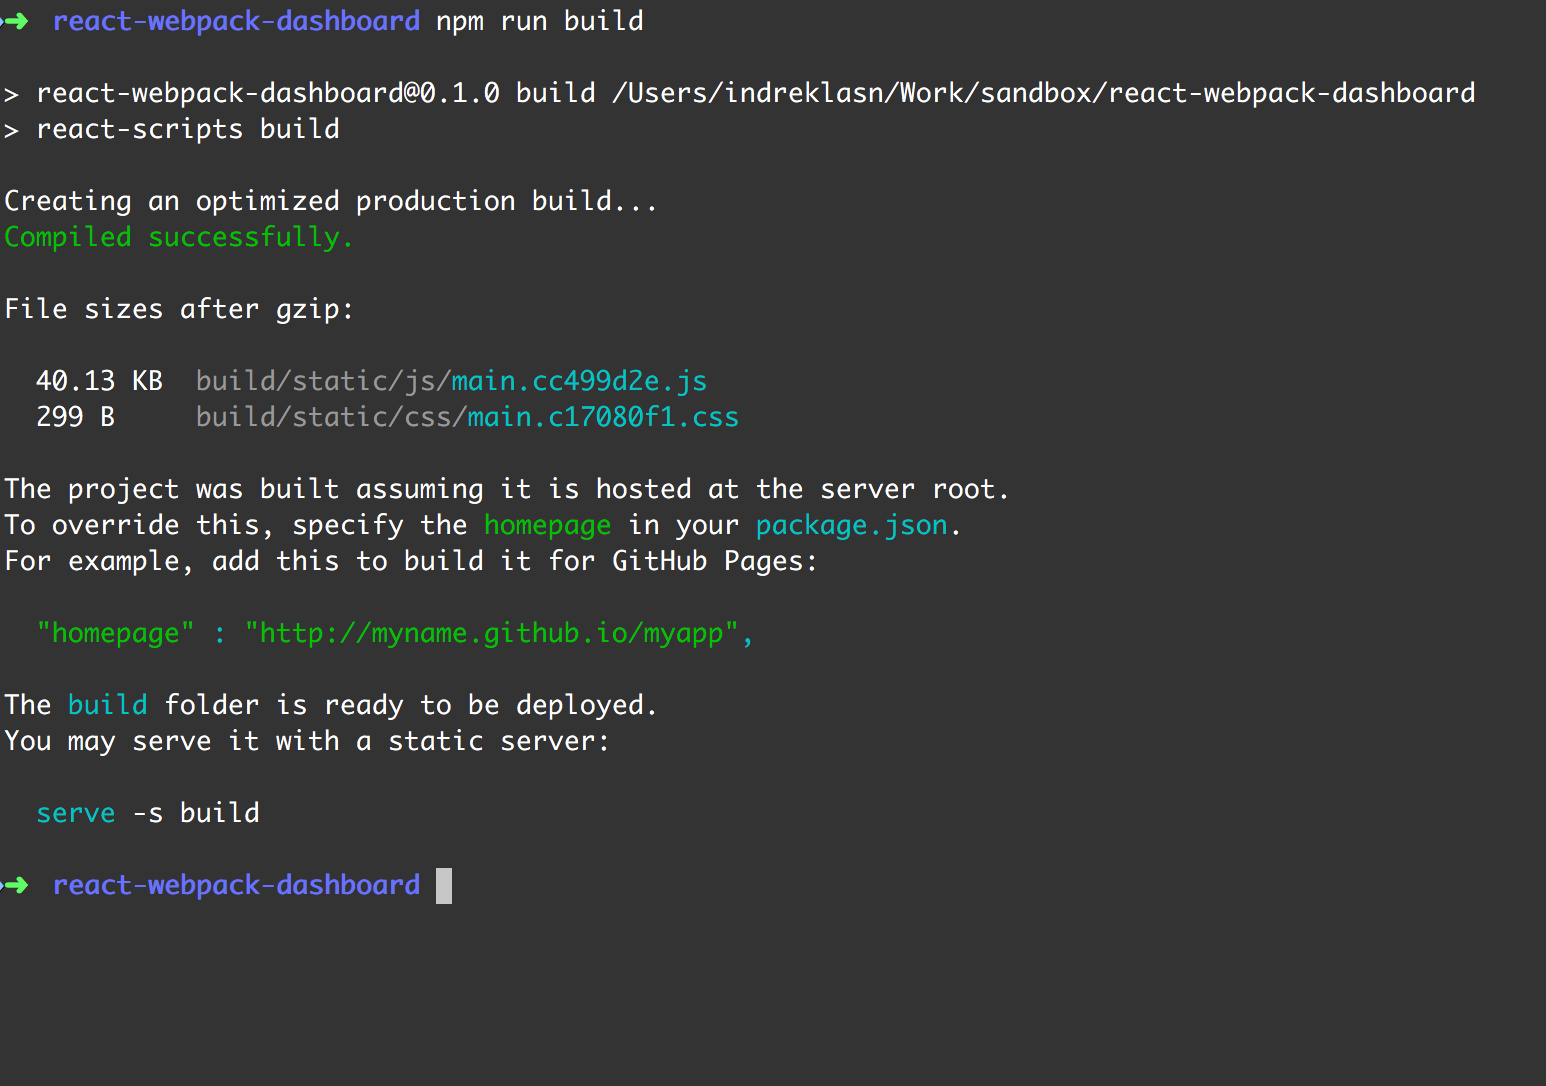
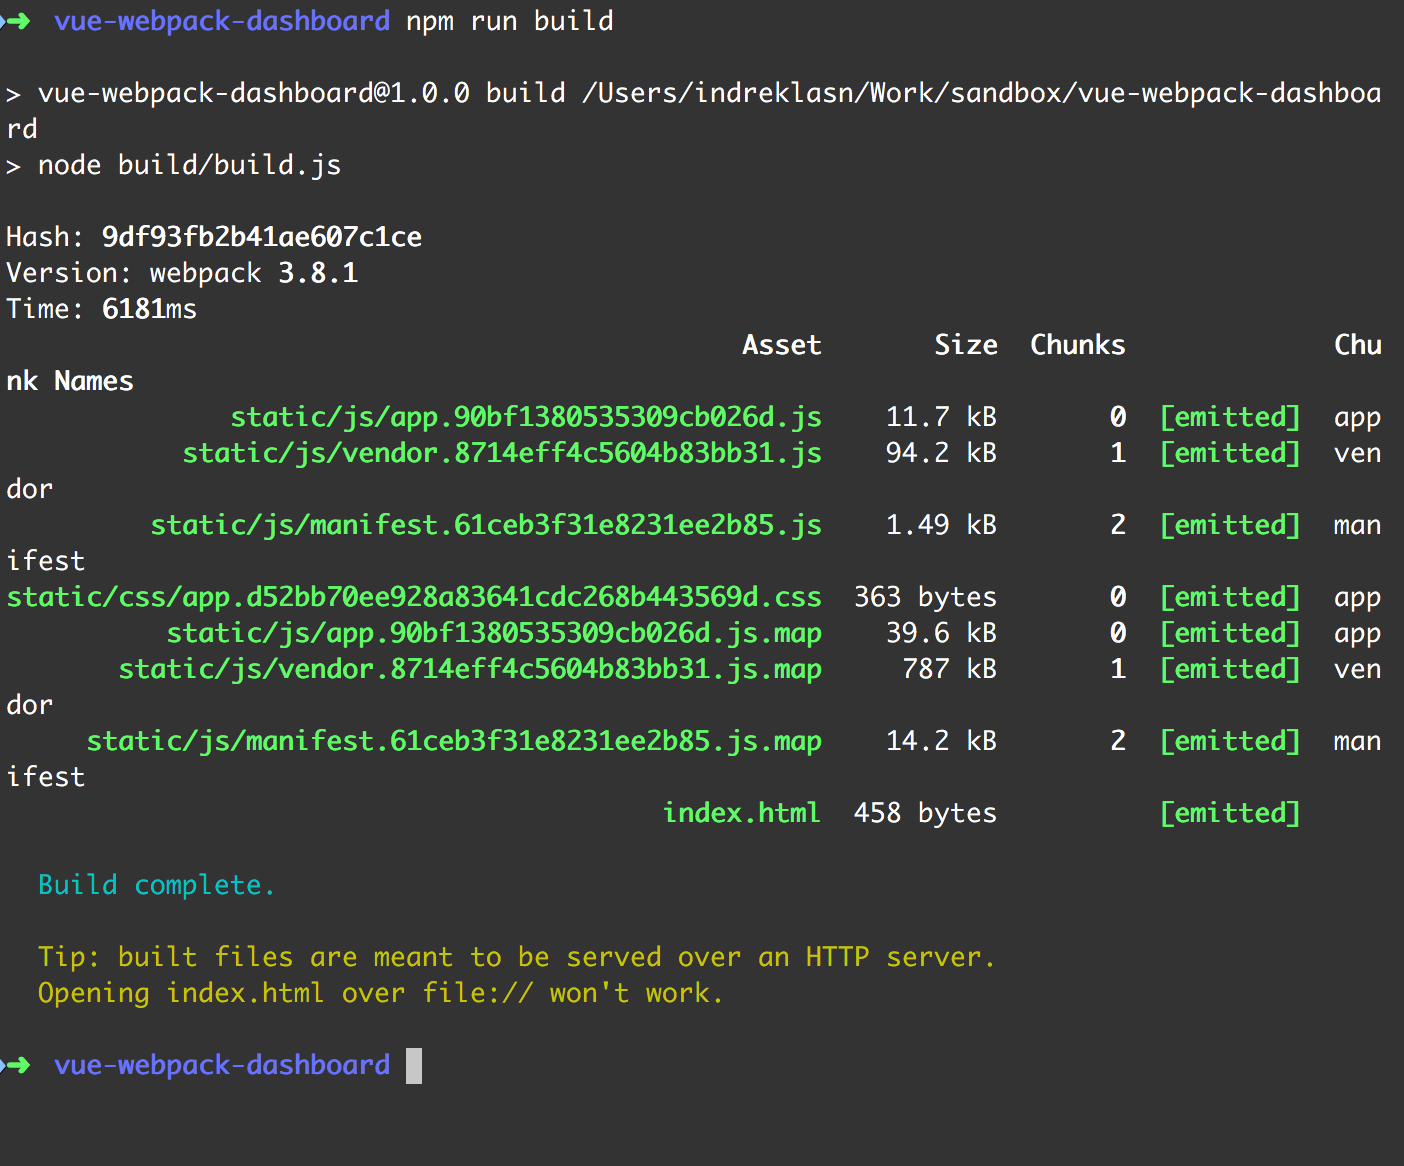
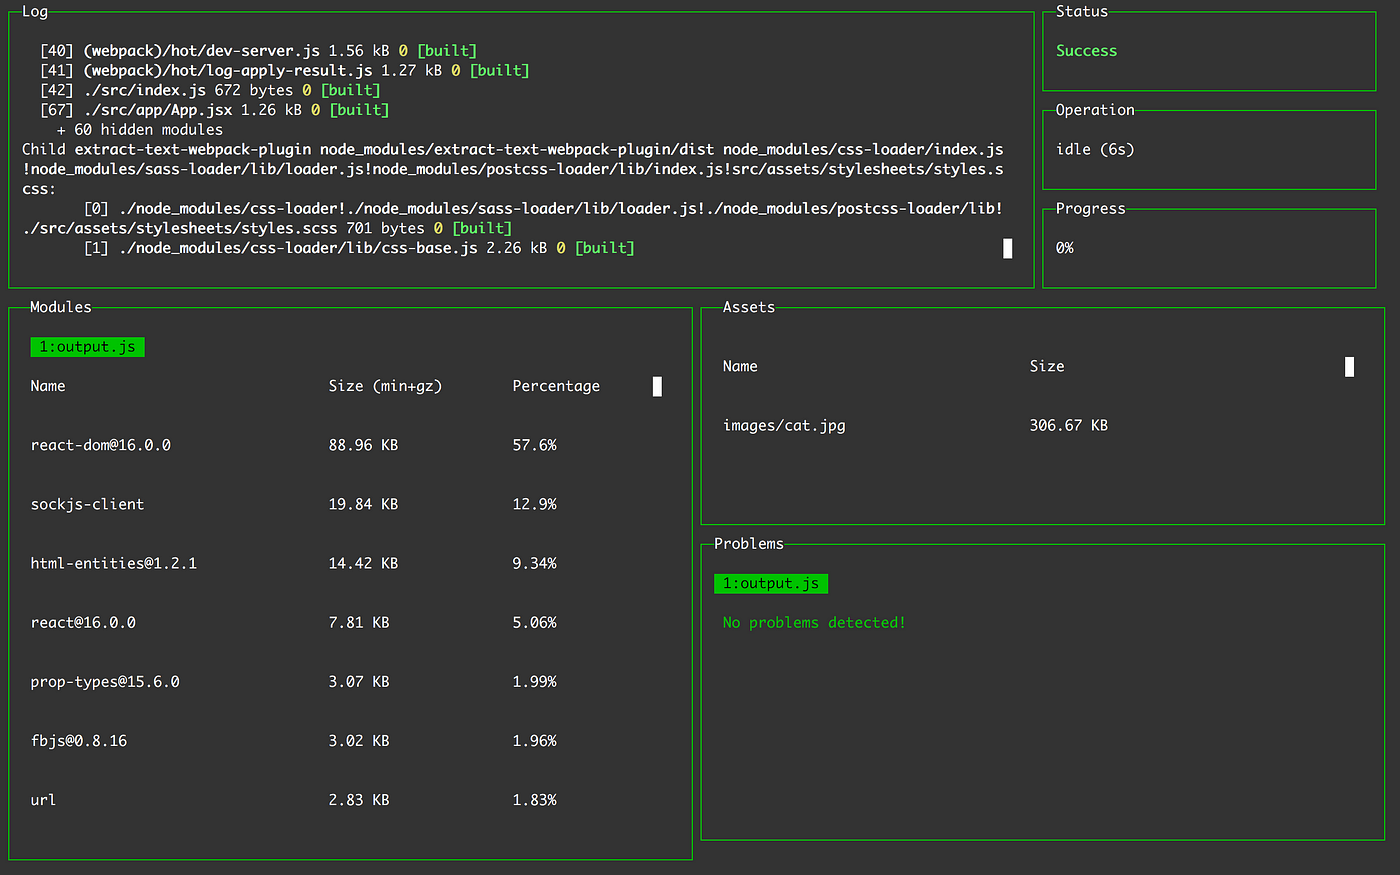
No complaints — but there are areas where we could improve. Let’s give the webpack dashboard spin and see how it might help us.
Using Webpack-Dashboard with Custom Config
I’ve set up a basic project using Webpack. Clone the project, install the dependencies, and start the project with the following command.
git clone [email protected]:indreklasn/webpack-2.0-from-scratch.git && cd webpack-2.0-from-scratch && npm i && npm run start
If you’re curious — Here’s a step by step, a five-chapter guide on how this webpack config was set up — strongly recommend reading it through!
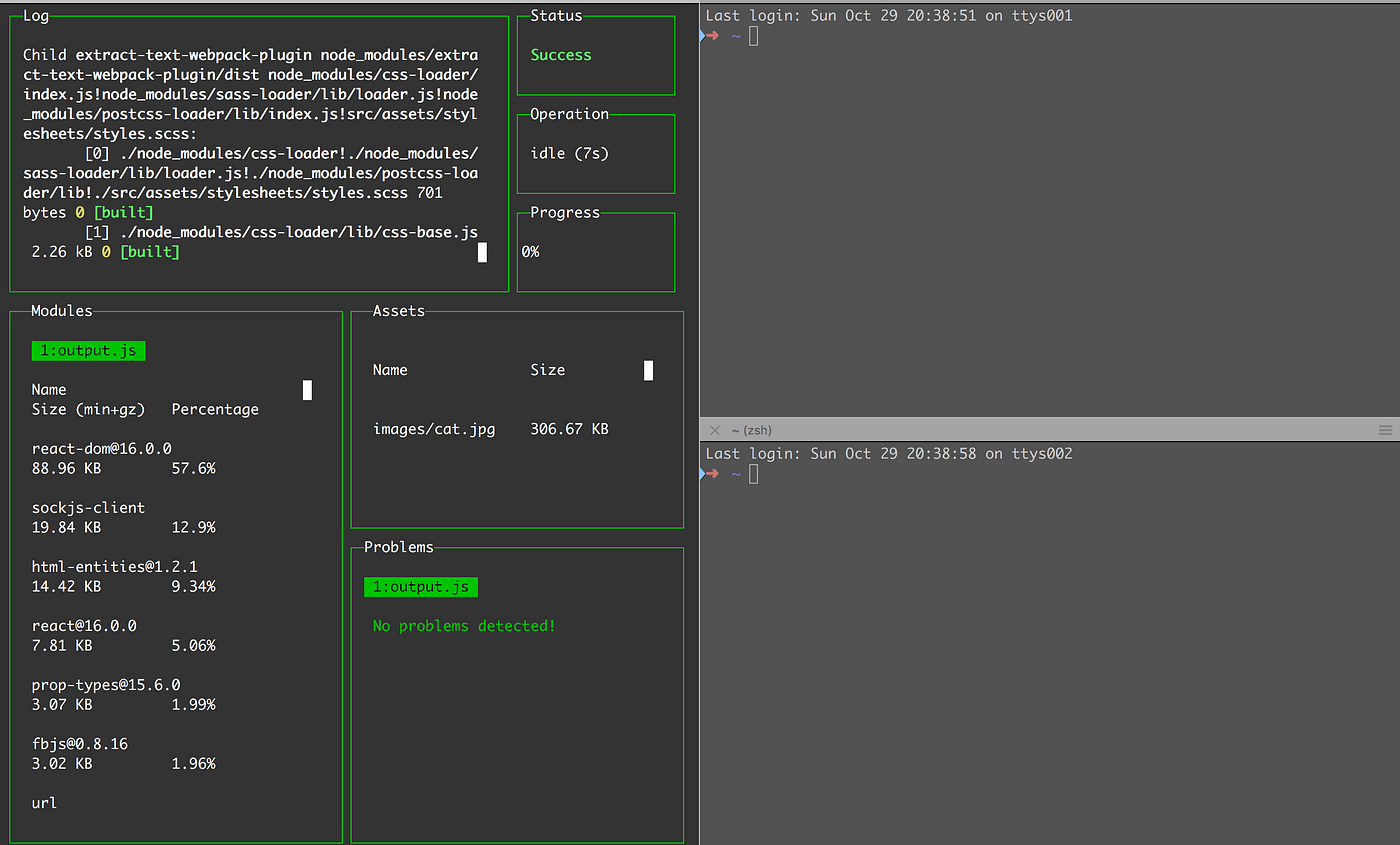
After pasting in the command and some patience, you should see the following screen.

Great! Working as intended. Let’s get started with the webpack-dashboard.
Installing webpack-dashboard
Installing via NPM
$ npm install --save-dev webpack-dashboard
Installing via Yarn
$ yarn add --dev webpack-dashboard
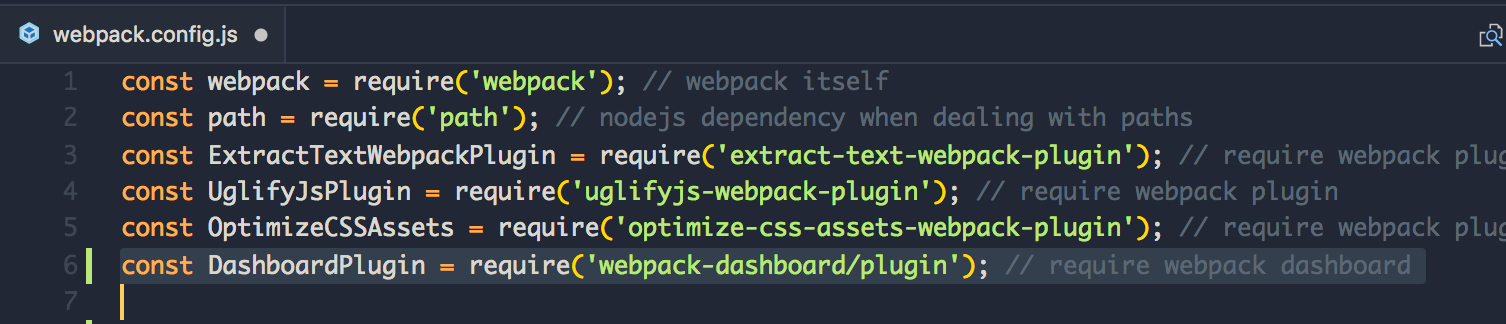
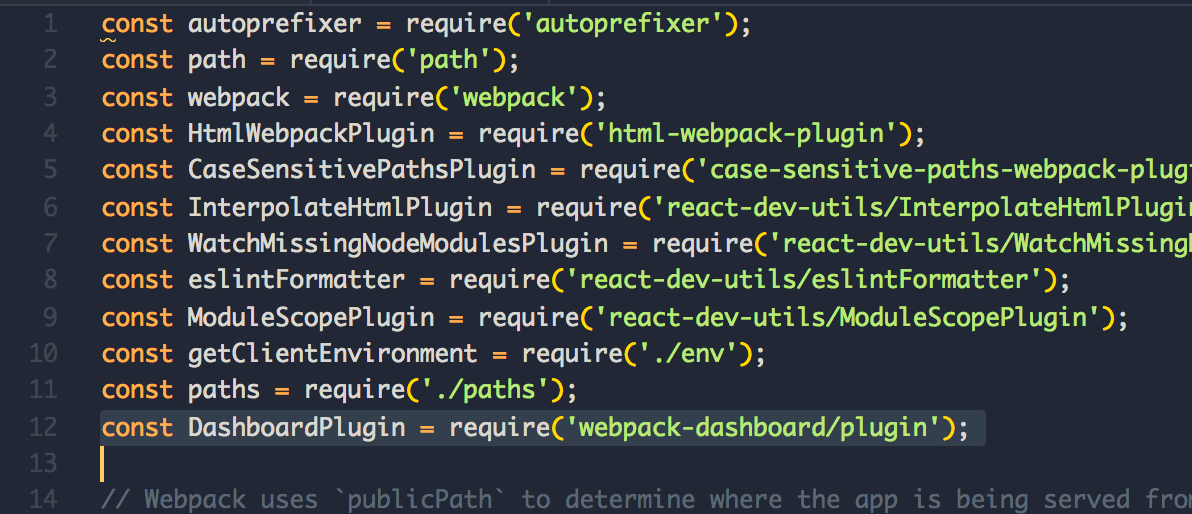
Next up— Require the webpack-dashboard plugin in webpack.config.js and call the plugin with the new keyword, like so:

Then, modify your dev server start script previously looked like:
"scripts": {
    "dev": "node index.js", # OR
    "dev": "webpack-dev-server", # OR
    "dev": "webpack",
}
Fire up our webpack with npm run start and we get the following
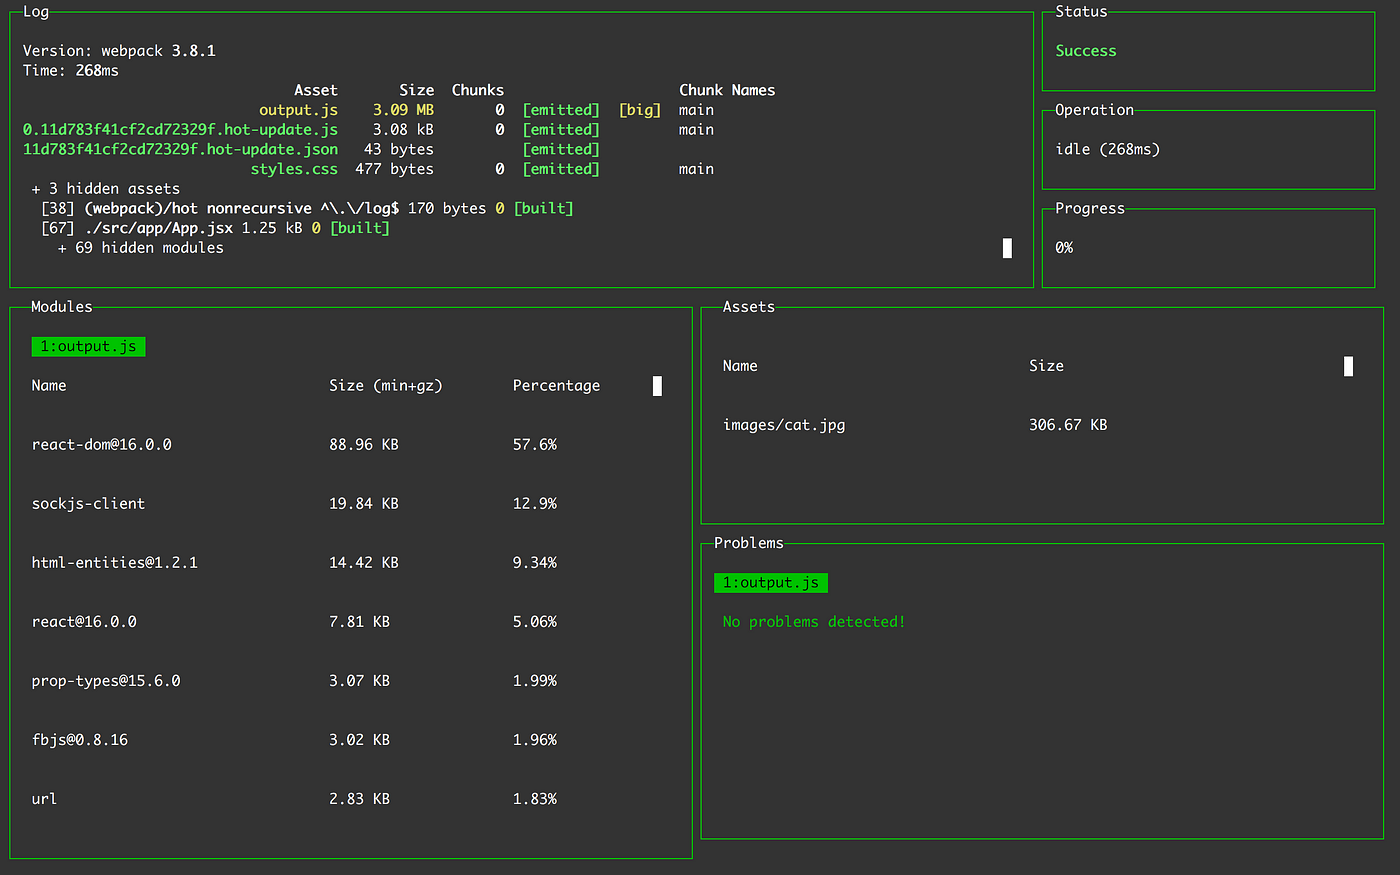
Booyah! Awesome!
By the way — we don’t have to have this giant dashboard. Here’s a practical example of resizing the windows.
Create-React-App With Webpack-Dashboard

npm i -g create-react-app && create-react-app react-webpack-dashboard && cd react-webpack-dashboard && npm i webpack-dashboard --save-dev && npm run eject

Now I’m not a big fan of ejecting but if you find a work-around, please let me know!
We set it up the same way as with the custom config.
Open config/webpack.config.dev.js and require the dashboard plugin. Also, don’t forget to include the plugin in the plugins: [] section. You can search for the plugin section with CTRL + F. Should be at line ~ 214.

Open package.json and update the start script to the following:
"start": "webpack-dashboard -- node scripts/start.js",
Testing time! Run the following commandnpm run start
Vue-CLI With Webpack-Dashboard

Vue doesn’t have the eject concept. This is a no brainer since we don’t have to make sacrifices.
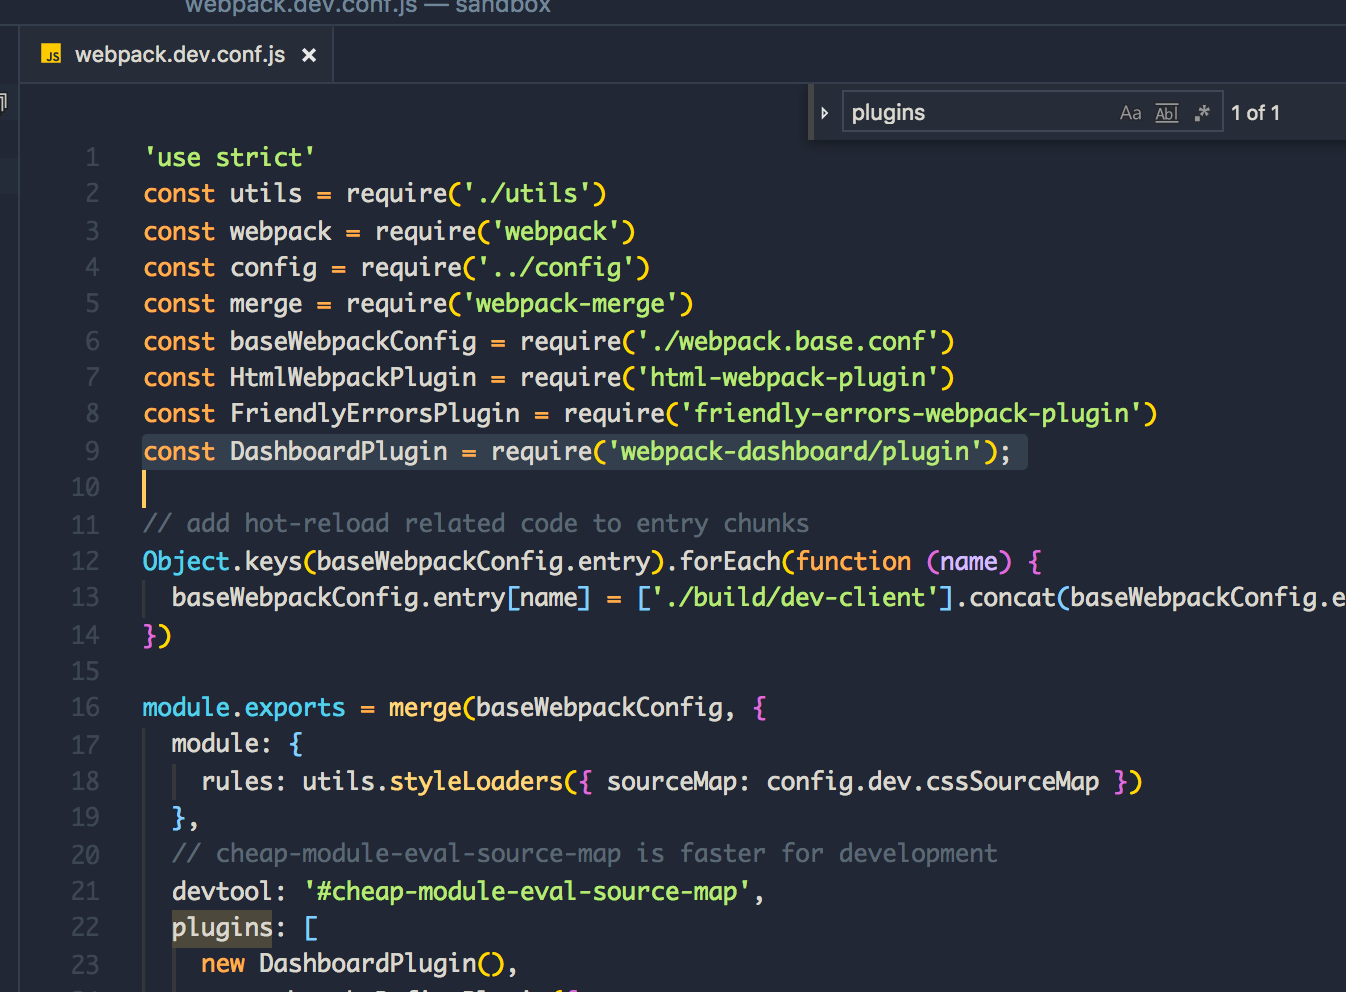
Open build/webpack.dev.conf.js — require the plugin (line 9) and insert the plugin (line 23)
Finally, go to package.json and change the dev script to the following:
“dev”: “webpack-dashboard — node build/dev-server.js”,
Test it:
npm run start
Conclusion
Special thanks to the creators of the webpack-dashboard. Please show appreciation for their hard work — go and star the repository on GitHub!
Thanks for reading, happy coding!
Recommend
About Joyk
Aggregate valuable and interesting links.
Joyk means Joy of geeK